
A Brief Tour On .NET Core View Components


  • View Components are small pieces or chunks of a reusable block of code.  
  • A View Component is made of the class(Component Class) and a view that looks like Controller. But View Component can't be triggered or initialized by a user request like MVC Controller, it will be invoked from code manually.
  • A View or Razor can be completely or partially build using View Components.

Create A .Net Core MVC Sample:

Let's understand View Components by doing simple examples on it. So let's create a sample .Net Core MVC application(another choice to use like Razor Pages sample application). Use either Visual Studio 2019(IDE supports .Net Core 3.0 plus version) or Visual Studio Code.

Implement The View Component Class:

View Component Class is the logic container where we can prepare data that need to be bind to view on the render. Create a folder like ViewComponents where will create all our application components.

A POCO class that inherits Microsoft.AspNetCore.Mvc.ViewComponent can be called a View Component class. As of good coding standards, it is recommended to suffix the POCO class name as 'ViewComponent' like eg:- 'YourComponentNameViewComponent'.
ViewComponents/StudentViewComponent.ts:
using Microsoft.AspNetCore.Mvc;
using System.Threading.Tasks;

namespace SampleViewComponent.App.ViewComponents
{
    public class StudentViewComponent : ViewComponent
    {

    }
}

Invoke Or InvokeAsync Methods Of View Component:

On Calling or invoking View Component the only method that executed automatically is Invoke or InvokeAsync. Any logic or data accessing calls are implemented in this method. Invoke or InvokeAsync method return type is Microsoft.AspNetCore.Mvc.IViewComponentResult. An IVewComponentResult can accept either Html(View or Razor Page) or Plain String.
ViewComponents/StudentViewComponent.ts:
using Microsoft.AspNetCore.Mvc;
using System.Threading.Tasks;

namespace SampleViewComponent.App.ViewComponents
{
    public class StudentViewComponent : ViewComponent
    {
        public async Task<IViewComponentResult> InvokeAsync()
        {
            return Content("Hi I'm Student Component");
        }
    }
}
#L10 at this line number retuning method ViewComponent.Content() which returns a plain string as View Component output. In real-time scenarios, most cases return a razor view using ViewComponent.View() which is an overloaded method.

Calling View Component From *.cshtml:

View Component is like building blocks of a page and most appropriate way to call or invoke them from an MVC View or from a Razor Page View. IViewComponentHelper of razor view helper helps to invoke any View Component within the application by passing component name as an input parameter.

Let's test our sample View Component by calling it on Index.cshtml(HomeController View) as follows.
Views/Home/Index.cshtml:
@{
    ViewData["Title"] = "Home Page";
}

<div class="text-center">
   @await Component.InvokeAsync("Student")
</div>
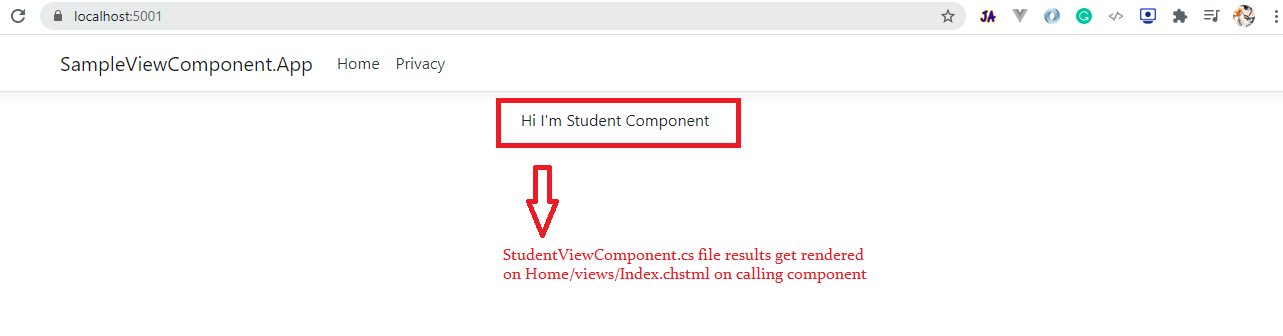
#L6 - asynchronous call for View Component, if we want we can do synchronous call but it is recommended to use async call. If we observe name of the component is passed as an input parameter so that particular View Component result gets rendered. The original name of our View Component class is 'StudentViewComponent', but while calling we removed suffix('ViewComponent') because .Net will able to identify the component without suffix only, so if you try to pass full name like 'StudentViewComponent' we will get runtime error notifying that no View Component identified with that name. So the verdict is to trim the suffix while calling component.

Run the application and test the results below.
Based on your requirement View Component can be called on n-number of different pages or n-number of location with on the same page. On every call, a separate instance or output gets rendered. To test let's update the Index.cshtml(HomeController view) to call component multiple times as follows.
@{
    ViewData["Title"] = "Home Page";
}

<div class="text-center">
   @await Component.InvokeAsync("Student")
   <br/>
   @await Component.InvokeAsync("Student")
   <br/>
   @await Component.InvokeAsync("Student")
</div>

View Component Returning Razor View(*.cshtml) As Result:

Using overloaded method like Microsoft.AspNetCore.Mvc.ViewComponent.View() renders the razor HTML as a View Component output.

By default framework searches for the component view path in the following areas
  • /Views/{Controller Name Folder}/Components/{View Component Name Folder}/{View Name}
  • /Views/Shared/Components/{View Component Name Folder}/{View Name}
Let's update View Component that searches for the Default.cshtml razor page in the specified path as we discussed above.
ViewComponents/StudentViewComponent.cs:
using Microsoft.AspNetCore.Mvc;
using System.Threading.Tasks;

namespace SampleViewComponent.App.ViewComponents
{
    public class StudentViewComponent : ViewComponent
    {
        public async Task<iviewcomponentresult> InvokeAsync()
        {
            return View();
        }
    }
}
#L10 on returning empty view from View Component, on runtime framework will automatically search for Default.cshtml as per the paths specified above.

So let's run the application and test the view component output.
On running application, we will get an error because we haven't added Default.cshtml view either in the controller or shared folder.

So let's add Default.cshtml file as below.
Views/Shared/Components/Student/Default.cshtml:
<h1>My Path: /Views/Shared/Components/Student/Default.cshtml</h1>
<h3>Hi i'm Student componen</h3>
Now run the application and view component results output as below.


Microsoft.AspNetCore.Mvc.ViewComponent.View("YourViewName") using this overloaded method we can specify view name explicitly for a view component.
ViewComponents/StudentViewComponent.cs:
using Microsoft.AspNetCore.Mvc;
using System.Threading.Tasks;

namespace SampleViewComponent.App.ViewComponents
{
    public class StudentViewComponent : ViewComponent
    {
        public async Task<IViewComponentResult> InvokeAsync()
        {
            return View("Student2");
        }
    }
}
#L10 at this line we passed view name explicitly.

Let's add a new view with the name specified above.
Views/Shared/Components/Student/Student2.cshml:
<h1>My Path: /Views/Shared/Components/Student/Student2.cshtml</h1>
<h3>Hi i'm Student component</h3>

Similar to the MVC controller in View Component also we can pass a model to the output view(razor view).

Let's first create a sample model that will be used by View Component.
Models/Profile.cs:
namespace SampleViewComponent.App.Models
{
    public class Profile
    {
        public string AvatarLink { get; set; }
        public string FirstName { get; set; }
        public string LastName { get; set; }
    }
}
Let's update the view component below.
ViewComponents/StudentViewComponent.cs:
using Microsoft.AspNetCore.Mvc;
using SampleViewComponent.App.Models;
using System.Threading.Tasks;

namespace SampleViewComponent.App.ViewComponents
{
    public class StudentViewComponent : ViewComponent
    {
        public async Task<IViewComponentResult> InvokeAsync()
        {
            var profile = new Profile
            {
                AvatarLink = "img/profile.webp",
                FirstName = "Naveen",
                LastName = "Bommidi"
            };
            return View("Student2",profile);
        }
    }
}
Let's update the razor view with the model binding below.
Views/Shared/Components/Student/Student2.cshml:
@model SampleViewComponent.App.Models.Profile


<div class="row">
    <div class="col-sm-4">
        <div class="card">
            <img src="@Model.AvatarLink" class="card-img-top">
            <div class="card-body">
                <h4 Card-title>@Model.FirstName @Model.LastName</h4>
            </div>
        </div>
    </div>
</div>
On running application component renders output below

Dependency Injection Support:

Similar to the MVC controller, View Component also supports Dependency Injection, where we inject all service or data access layers that can be injected into the component constructor.

An example that shows IHttpContextAccessor injects to View Components:
using Microsoft.AspNetCore.Mvc;
using System.Threading.Tasks;
using Microsoft.AspNetCore.Http;

namespace SampleViewComponent.App.ViewComponents
{
    public class StudentViewComponent : ViewComponent
    {
        private readonly IHttpContextAccessor _httpContextAccessor;
        public StudentViewComponent(IHttpContextAccessor httpContextAccessor)
        {
            _httpContextAccessor = httpContextAccessor;
        }
        public async Task<IViewComponentResult> InvokeAsync()
        {
            
            return Content("Example to show ViewComponent supports Dependency Injection")
        }
    }
}

Invoking ViewComponent From MVC Controller:

In the previous examples, we have invoked components from the *.cshtml view(Controller View), but there is an option to call or return ViewComponent as output from the MVC Controller.

Example MVC action method that returns View Component as output.
public IActionResult Index()
{
    return ViewComponent("Student2");
}

Passing Params To View Component:

On calling or invoking view component we can pass n-number of variables as below.

Example of passing values to ViewComponent
 @await Component.InvokeAsync("Student", new { id =1, firstName ="naveen", lastName ="Bommidi" })
The above variable names should be matched with input parameter names of the InvokeAsync method in View Component. If the name did not match component will ignore the input params.

Example of parameters in InvokeAsync method of View Component
using Microsoft.AspNetCore.Mvc;
using System.Threading.Tasks;

namespace SampleViewComponent.App.ViewComponents
{
    public class StudentViewComponent : ViewComponent
    {
        public StudentViewComponent()
        {
        }
        public async Task<IViewComponentResult> InvokeAsync(int id, string firstName, string lastName)
        {
            return Content("");
        }
    }
}

Wrapping Up:

Hopefully, I think this article delivered some useful information about View Components in .Net Core MVC or Razor Page Applications. I love to have your feedback, suggestions, and better techniques in the comment section below.

Follow Me:

Comments

Popular posts from this blog

Angular 14 Reactive Forms Example

In this article, we will explore the Angular(14) reactive forms with an example. Reactive Forms: Angular reactive forms support model-driven techniques to handle the form's input values. The reactive forms state is immutable, any form filed change creates a new state for the form. Reactive forms are built around observable streams, where form inputs and values are provided as streams of input values, which can be accessed synchronously. Some key notations that involve in reactive forms are like: FormControl - each input element in the form is 'FormControl'. The 'FormControl' tracks the value and validation status of form fields. FormGroup - Track the value and validate the state of the group of 'FormControl'. FormBuilder - Angular service which can be used to create the 'FormGroup' or FormControl instance quickly. Form Array - That can hold infinite form control, this helps to create dynamic forms. Create An Angular(14) Application: Let'

.NET 7 Web API CRUD Using Entity Framework Core

In this article, we are going to implement a sample .NET 7 Web API CRUD using the Entity Framework Core. Web API: Web API is a framework for building HTTP services that can be accessed from any client like browser, mobile devices, and desktop apps. In simple terminology API(Application Programming Interface) means an interface module that contains programming functions that can be requested via HTTP calls either to fetch or update data for their respective clients. Some of the Key Characteristics of API: Supports HTTP verbs like 'GET', 'POST', 'PUT', 'DELETE', etc. Supports default responses like 'XML' and 'JSON'. Also can define custom responses. Supports self-hosting or individual hosting, so that all different kinds of apps can consume it. Authentication and Authorization are easy to implement. The ideal platform to build the REST full services. Install The SQL Server And SQL Management Studio: Let's install the SQL server on our l

ReactJS(v18) JWT Authentication Using HTTP Only Cookie

In this article, we will implement the ReactJS application authentication using the HTTP-only cookie. HTTP Only Cookie: In a SPA(Single Page Application) Authentication JWT token either can be stored in browser 'LocalStorage' or in 'Cookie'. Storing the JWT token inside of the cookie then the cookie should be HTTP Only. The HTTP-ONly cookie nature is that it will be only accessible by the server application. Client apps like javascript-based apps can't access the HTTP-Only cookie. So if we use the authentication with HTTP-only JWT cookie then we no need to implement the custom logic like adding authorization header or storing token data, etc at our client application. Because once the user authenticated cookie will be automatically sent to the server by the browser on every API call. Authentication API: To authenticate our client application with JWT HTTP-only cookie, I developed a NetJS(which is a node) Mock API. Check the GitHub link and read the document on G

.NET6 Web API CRUD Operation With Entity Framework Core

In this article, we are going to do a small demo on AspNetCore 6 Web API CRUD operations. What Is Web API: Web API is a framework for building HTTP services that can be accessed from any client like browser, mobile devices, desktop apps. In simple terminology API(Application Programming Interface) means an interface module that contains a programming function that can be requested via HTTP calls to save or fetch the data for their respective clients. Some of the key characteristics of API: Supports HTTP verbs like 'GET', 'POST', 'PUT', 'DELETE', etc. Supports default responses like 'XML' and 'JSON'. Also can define custom responses. Supports self-hosting or individual hosting, so that all different kinds of apps can consume it. Authentication and Authorization are easy to implement. The ideal platform to build REST full services. Create A .NET6 Web API Application: Let's create a .Net6 Web API sample application to accomplish our

Angular 14 State Management CRUD Example With NgRx(14)

In this article, we are going to implement the Angular(14) state management CRUD example with NgRx(14) NgRx Store For State Management: In an angular application to share consistent data between multiple components, we use NgRx state management. Using NgRx state helps to avoid unwanted API calls, easy to maintain consistent data, etc. The main building blocks for the NgRx store are: Actions - NgRx actions represents event to trigger the reducers to save the data into the stores. Reducer - Reducer's pure function, which is used to create a new state on data change. Store - The store is the model or entity that holds the data. Selector - Selector to fetch the slices of data from the store to angular components. Effects - Effects deals with external network calls like API. The effect gets executed based the action performed Ngrx State Management flow: The angular component needs data for binding.  So angular component calls an action that is responsible for invoking the API call.  Aft

Angular 14 Crud Example

In this article, we will implement CRUD operation in the Angular 14 application. Angular: Angular is a framework that can be used to build a single-page application. Angular applications are built with components that make our code simple and clean. Angular components compose of 3 files like TypeScript File(*.ts), Html File(*.html), CSS File(*.cs) Components typescript file and HTML file support 2-way binding which means data flow is bi-directional Component typescript file listens for all HTML events from the HTML file. Create Angular(14) Application: Let's create an Angular(14) application to begin our sample. Make sure to install the Angular CLI tool into our local machine because it provides easy CLI commands to play with the angular application. Command To Install Angular CLI npm install -g @angular/cli Run the below command to create the angular application. Command To Create Angular Application ng new name_of_your_app Note: While creating the app, you will see a noti

Unit Testing Asp.NetCore Web API Using xUnit[.NET6]

In this article, we are going to write test cases to an Asp.NetCore Web API(.NET6) application using the xUnit. xUnit For .NET: The xUnit for .Net is a free, open-source, community-focused unit testing tool for .NET applications. By default .Net also provides a xUnit project template to implement test cases. Unit test cases build upon the 'AAA' formula that means 'Arrange', 'Act' and 'Assert' Arrange - Declaring variables, objects, instantiating mocks, etc. Act - Calling or invoking the method that needs to be tested. Assert - The assert ensures that code behaves as expected means yielding expected output. Create An API And Unit Test Projects: Let's create a .Net6 Web API and xUnit sample applications to accomplish our demo. We can use either Visual Studio 2022 or Visual Studio Code(using .NET CLI commands) to create any.Net6 application. For this demo, I'm using the 'Visual Studio Code'(using the .NET CLI command) editor. Create a fo

Part-1 Angular JWT Authentication Using HTTP Only Cookie[Angular V13]

In this article, we are going to implement a sample angular application authentication using HTTP only cookie that contains a JWT token. HTTP Only JWT Cookie: In a SPA(Single Page Application) Authentication JWT token either can be stored in browser 'LocalStorage' or in 'Cookie'. Storing JWT token inside of the cookie then the cookie should be HTTP Only. The HTTP-Only cookie nature is that it will be only accessible by the server application. Client apps like javascript-based apps can't access the HTTP-Only cookie. So if we use authentication with HTTP only JWT cookie then we no need to implement custom logic like adding authorization header or storing token data, etc at our client application. Because once the user authenticated cookie will be automatically sent to the server by the browser on every API call. Authentication API: To implement JWT cookie authentication we need to set up an API. For that, I had created a mock authentication API(Using the NestJS Se

ReactJS(v18) Authentication With JWT AccessToken And Refresh Token

In this article, we are going to do ReactJS(v18) application authentication using the JWT Access Token and Refresh Token. JSON Web Token(JWT): JSON Web Token is a digitally signed and secured token for user validation. The JWT is constructed with 3 important parts: Header Payload Signature Create ReactJS Application: Let's create a ReactJS application to accomplish our demo. npx create-react-app name-of-your-app Configure React Bootstrap Library: Let's install the React Bootstrap library npm install react-bootstrap bootstrap Now add the bootstrap CSS reference in 'index.js'. src/index.js: import 'bootstrap/dist/css/bootstrap.min.css' Create A React Component 'Layout': Let's add a React component like 'Layout' in 'components/shared' folders(new folders). src/components/shared/Layout.js: import Navbar from "react-bootstrap/Navbar"; import { Container } from "react-bootstrap"; import Nav from "react-boot

A Small Guide On NestJS Queues

NestJS Application Queues helps to deal with application scaling and performance challenges. When To Use Queues?: API request that mostly involves in time taking operations like CPU bound operation, doing them synchronously which will result in thread blocking. So to avoid these issues, it is an appropriate way to make the CPU-bound operation separate background job.  In nestjs one of the best solutions for these kinds of tasks is to implement the Queues. For queueing mechanism in the nestjs application most recommended library is '@nestjs/bull'(Bull is nodejs queue library). The 'Bull' depends on Redis cache for data storage like a job. So in this queueing technique, we will create services like 'Producer' and 'Consumer'. The 'Producer' is used to push our jobs into the Redis stores. The consumer will read those jobs(eg: CPU Bound Operations) and process them. So by using this queues technique user requests processed very fastly because actually