
Steps To Create, Run And Debug Dotnet Core Application In Visual Studio Code

Introduction:

Microsoft Visual Studio Code is a lightweight editor that supports most of the programming languages. Dotnet Core can be run and debug using Visual Studio Code as we do in Visual Studio editor which is the recommended and famous editor for Dotnet Applications.

Before starting anything, install the latest version of Dotnet Core SDK from the Microsoft DotnetCore website and also download the Visual Studio Code editor which is the free editor.

C# for Visual Studio Code Extensions:

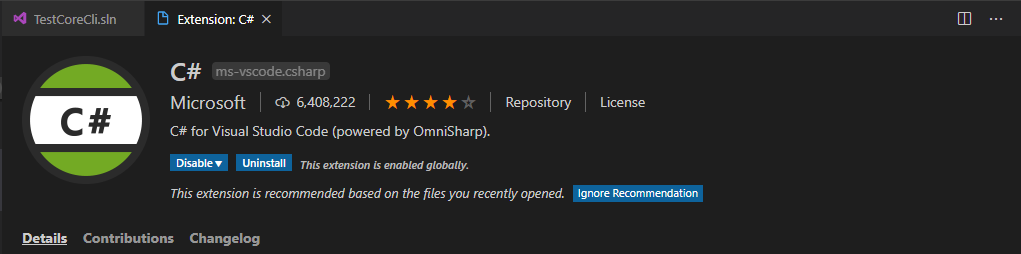
In Visual Studio Code, we can get a lot of extensions plugins which makes development more easy and fast. Similarly to work with C# we need to install the VS Code extension of "C# for Visual Studio Code". Few features of this extension like:
  • .NET Core lightweight development tool.
  • Good C# editing support.
  • Syntax Highlighting.
  • Good Code Intellisense.
  • Nice debugging support.

Create A Dotnet Core Solution:

In Visual Studio solution file automatically get created while creating the .NET Core application, but in Visual Studio Code, we need to create the solution file. It is not mandatory to have a solution file in .Net Core application, but it is an individual choice of having it like a parent of all .Net Core projects. ".sln" is the file extension for the solution file.

.NET Core CLI Commands we can generate a solution file using either Windows Command Prompt or Visual Studio Code Terminal (Powerfull command prompt comes with Visual Studio Code). The following command to create the ".sln" file.
dotnet sln new
To start creating a project let's create a root folder and I'm naming the folder as "TestCore" and then open the visual studio code and go to the "File" menu and select on the "Open Folder" option, then choose our folder to created previously.

Now go to the "View" menu and select on the "Terminal" option, then enter the above CLI command on the Terminal as below.
Now after executing the command ".sln" file gets created with the name of the root folder as below.

.NET Core Application Templates:

.Net core provided all templated options to create applications like MVC, Web API, Blazor, etc. Few of the CLI commands to create projects with their respective templates as follows:

CLI command to create .Net Core Console Application
dotnet new console -n Your_Application_Name
CLI command to create .Net Core MVC Application
dontet new mvc -n Your_Application_Name
CLI command to create .Net Core Class Library
dotnet new classlib -n Your_Application_Name
So to check all types of templates supported by .NET Core run the following command
dotnet new -l 
On running the command it will show different templates as below:
 Let's test our setup by creating MVC template application as below:

Attach Project To Solution File:

Run the following command to add c# project to the solution file
dotnet sln Your_Solution_FileName.sln  add  Your_Project_Folder\Your_Project_Name.csproj

Add Project Reference:

Let's create a .NET Core ClassLibrary project by running the following command
dotnet new classlib -n Your_ApplicationName
Now let's add ClassLibrary project to the solution file as below
Now I'm going to add this ClassLibrary project reference into the MVC project. Adding a reference to the project can be done with the following command.
dotnet add Application_Expecting_Reference_Folder/Application_Expecting_Reference_Project reference Refered_Application_Folder/Refered_Application_Project
Now we can confirm the reference presence by opening the project as below.

Add Build And Debug Configuration Files:

Creating projects in the Visual Studio Code will show a notification to install build tools as below.
On selecting the 'Yes' button, we can observe a couple of JSON files with build settings as below.

Build And Run Project:

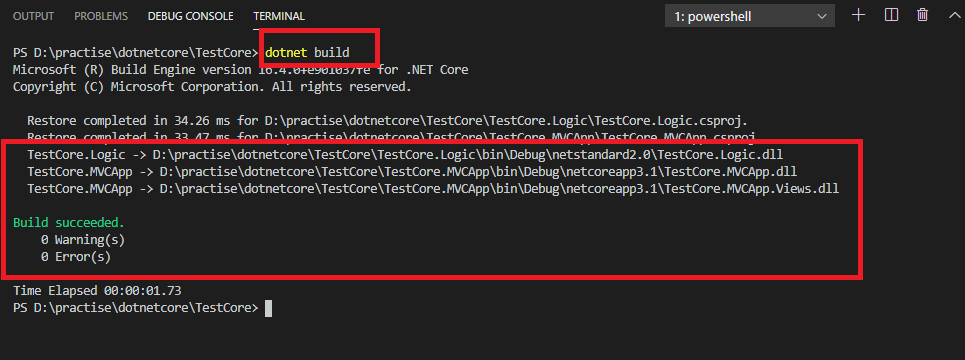
Building the project at the solution level will help in building all the projects that are added to the solution file. The command to build the project as below.
dotnet build

 Now go to the folder of an application be run and enter the following command to run the application
dotnet run

 Debugging From Visual Studio Code:

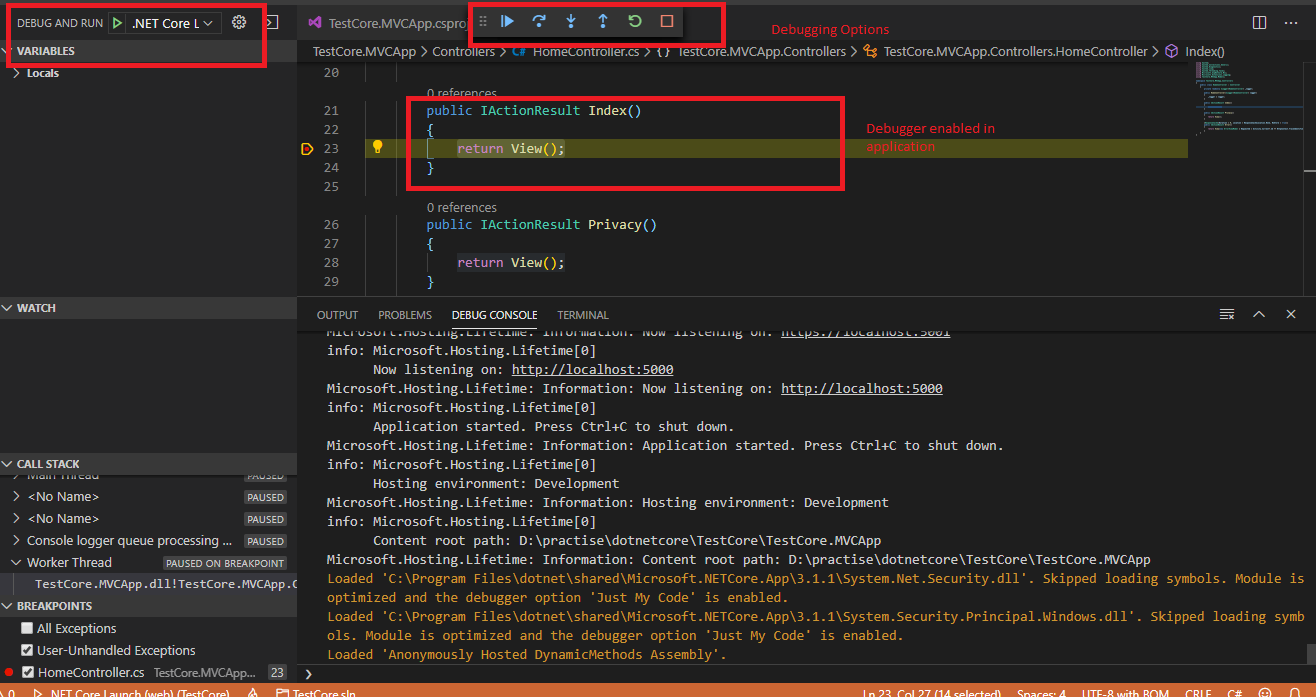
Visual Studio Code editor we can find the "Debug" options in menus as below
From Debug menu select option like "Start Debugging" and then the application will get run as below

Wrapping Up:

Hopefully, this article will help to create, run and build the .NET Core application in Visual Studio Code. I will love to have your feedback, suggestions and better techniques in the comment section.

Follow Me:

Comments

Popular posts from this blog

Angular 14 Reactive Forms Example

In this article, we will explore the Angular(14) reactive forms with an example. Reactive Forms: Angular reactive forms support model-driven techniques to handle the form's input values. The reactive forms state is immutable, any form filed change creates a new state for the form. Reactive forms are built around observable streams, where form inputs and values are provided as streams of input values, which can be accessed synchronously. Some key notations that involve in reactive forms are like: FormControl - each input element in the form is 'FormControl'. The 'FormControl' tracks the value and validation status of form fields. FormGroup - Track the value and validate the state of the group of 'FormControl'. FormBuilder - Angular service which can be used to create the 'FormGroup' or FormControl instance quickly. Form Array - That can hold infinite form control, this helps to create dynamic forms. Create An Angular(14) Application: Let'

.NET 7 Web API CRUD Using Entity Framework Core

In this article, we are going to implement a sample .NET 7 Web API CRUD using the Entity Framework Core. Web API: Web API is a framework for building HTTP services that can be accessed from any client like browser, mobile devices, and desktop apps. In simple terminology API(Application Programming Interface) means an interface module that contains programming functions that can be requested via HTTP calls either to fetch or update data for their respective clients. Some of the Key Characteristics of API: Supports HTTP verbs like 'GET', 'POST', 'PUT', 'DELETE', etc. Supports default responses like 'XML' and 'JSON'. Also can define custom responses. Supports self-hosting or individual hosting, so that all different kinds of apps can consume it. Authentication and Authorization are easy to implement. The ideal platform to build the REST full services. Install The SQL Server And SQL Management Studio: Let's install the SQL server on our l

ReactJS(v18) JWT Authentication Using HTTP Only Cookie

In this article, we will implement the ReactJS application authentication using the HTTP-only cookie. HTTP Only Cookie: In a SPA(Single Page Application) Authentication JWT token either can be stored in browser 'LocalStorage' or in 'Cookie'. Storing the JWT token inside of the cookie then the cookie should be HTTP Only. The HTTP-ONly cookie nature is that it will be only accessible by the server application. Client apps like javascript-based apps can't access the HTTP-Only cookie. So if we use the authentication with HTTP-only JWT cookie then we no need to implement the custom logic like adding authorization header or storing token data, etc at our client application. Because once the user authenticated cookie will be automatically sent to the server by the browser on every API call. Authentication API: To authenticate our client application with JWT HTTP-only cookie, I developed a NetJS(which is a node) Mock API. Check the GitHub link and read the document on G

.NET6 Web API CRUD Operation With Entity Framework Core

In this article, we are going to do a small demo on AspNetCore 6 Web API CRUD operations. What Is Web API: Web API is a framework for building HTTP services that can be accessed from any client like browser, mobile devices, desktop apps. In simple terminology API(Application Programming Interface) means an interface module that contains a programming function that can be requested via HTTP calls to save or fetch the data for their respective clients. Some of the key characteristics of API: Supports HTTP verbs like 'GET', 'POST', 'PUT', 'DELETE', etc. Supports default responses like 'XML' and 'JSON'. Also can define custom responses. Supports self-hosting or individual hosting, so that all different kinds of apps can consume it. Authentication and Authorization are easy to implement. The ideal platform to build REST full services. Create A .NET6 Web API Application: Let's create a .Net6 Web API sample application to accomplish our

Angular 14 State Management CRUD Example With NgRx(14)

In this article, we are going to implement the Angular(14) state management CRUD example with NgRx(14) NgRx Store For State Management: In an angular application to share consistent data between multiple components, we use NgRx state management. Using NgRx state helps to avoid unwanted API calls, easy to maintain consistent data, etc. The main building blocks for the NgRx store are: Actions - NgRx actions represents event to trigger the reducers to save the data into the stores. Reducer - Reducer's pure function, which is used to create a new state on data change. Store - The store is the model or entity that holds the data. Selector - Selector to fetch the slices of data from the store to angular components. Effects - Effects deals with external network calls like API. The effect gets executed based the action performed Ngrx State Management flow: The angular component needs data for binding.  So angular component calls an action that is responsible for invoking the API call.  Aft

Angular 14 Crud Example

In this article, we will implement CRUD operation in the Angular 14 application. Angular: Angular is a framework that can be used to build a single-page application. Angular applications are built with components that make our code simple and clean. Angular components compose of 3 files like TypeScript File(*.ts), Html File(*.html), CSS File(*.cs) Components typescript file and HTML file support 2-way binding which means data flow is bi-directional Component typescript file listens for all HTML events from the HTML file. Create Angular(14) Application: Let's create an Angular(14) application to begin our sample. Make sure to install the Angular CLI tool into our local machine because it provides easy CLI commands to play with the angular application. Command To Install Angular CLI npm install -g @angular/cli Run the below command to create the angular application. Command To Create Angular Application ng new name_of_your_app Note: While creating the app, you will see a noti

Unit Testing Asp.NetCore Web API Using xUnit[.NET6]

In this article, we are going to write test cases to an Asp.NetCore Web API(.NET6) application using the xUnit. xUnit For .NET: The xUnit for .Net is a free, open-source, community-focused unit testing tool for .NET applications. By default .Net also provides a xUnit project template to implement test cases. Unit test cases build upon the 'AAA' formula that means 'Arrange', 'Act' and 'Assert' Arrange - Declaring variables, objects, instantiating mocks, etc. Act - Calling or invoking the method that needs to be tested. Assert - The assert ensures that code behaves as expected means yielding expected output. Create An API And Unit Test Projects: Let's create a .Net6 Web API and xUnit sample applications to accomplish our demo. We can use either Visual Studio 2022 or Visual Studio Code(using .NET CLI commands) to create any.Net6 application. For this demo, I'm using the 'Visual Studio Code'(using the .NET CLI command) editor. Create a fo

Part-1 Angular JWT Authentication Using HTTP Only Cookie[Angular V13]

In this article, we are going to implement a sample angular application authentication using HTTP only cookie that contains a JWT token. HTTP Only JWT Cookie: In a SPA(Single Page Application) Authentication JWT token either can be stored in browser 'LocalStorage' or in 'Cookie'. Storing JWT token inside of the cookie then the cookie should be HTTP Only. The HTTP-Only cookie nature is that it will be only accessible by the server application. Client apps like javascript-based apps can't access the HTTP-Only cookie. So if we use authentication with HTTP only JWT cookie then we no need to implement custom logic like adding authorization header or storing token data, etc at our client application. Because once the user authenticated cookie will be automatically sent to the server by the browser on every API call. Authentication API: To implement JWT cookie authentication we need to set up an API. For that, I had created a mock authentication API(Using the NestJS Se

ReactJS(v18) Authentication With JWT AccessToken And Refresh Token

In this article, we are going to do ReactJS(v18) application authentication using the JWT Access Token and Refresh Token. JSON Web Token(JWT): JSON Web Token is a digitally signed and secured token for user validation. The JWT is constructed with 3 important parts: Header Payload Signature Create ReactJS Application: Let's create a ReactJS application to accomplish our demo. npx create-react-app name-of-your-app Configure React Bootstrap Library: Let's install the React Bootstrap library npm install react-bootstrap bootstrap Now add the bootstrap CSS reference in 'index.js'. src/index.js: import 'bootstrap/dist/css/bootstrap.min.css' Create A React Component 'Layout': Let's add a React component like 'Layout' in 'components/shared' folders(new folders). src/components/shared/Layout.js: import Navbar from "react-bootstrap/Navbar"; import { Container } from "react-bootstrap"; import Nav from "react-boot

A Small Guide On NestJS Queues

NestJS Application Queues helps to deal with application scaling and performance challenges. When To Use Queues?: API request that mostly involves in time taking operations like CPU bound operation, doing them synchronously which will result in thread blocking. So to avoid these issues, it is an appropriate way to make the CPU-bound operation separate background job.  In nestjs one of the best solutions for these kinds of tasks is to implement the Queues. For queueing mechanism in the nestjs application most recommended library is '@nestjs/bull'(Bull is nodejs queue library). The 'Bull' depends on Redis cache for data storage like a job. So in this queueing technique, we will create services like 'Producer' and 'Consumer'. The 'Producer' is used to push our jobs into the Redis stores. The consumer will read those jobs(eg: CPU Bound Operations) and process them. So by using this queues technique user requests processed very fastly because actually