%20JWT%20Authentication%20Using%20HTTP%20Only%20Cookie.png)
HTTP Only Cookie:
In a SPA(Single Page Application) Authentication JWT token either can be stored in browser 'LocalStorage' or in 'Cookie'. Storing the JWT token inside of the cookie then the cookie should be HTTP Only. The HTTP-ONly cookie nature is that it will be only accessible by the server application. Client apps like javascript-based apps can't access the HTTP-Only cookie. So if we use the authentication with HTTP-only JWT cookie then we no need to implement the custom logic like adding authorization header or storing token data, etc at our client application. Because once the user authenticated cookie will be automatically sent to the server by the browser on every API call.
Authentication API:
To authenticate our client application with JWT HTTP-only cookie, I developed a NetJS(which is a node) Mock API.
Check the GitHub link and read the document on GitHub for how to use it.
By default the NestJS also runs under port number 3000, so we have to change to use another port number since our react application also runs 3000. So where to change you can find the GitHub readme document.
By default the NestJS also runs under port number 3000, so we have to change to use another port number since our react application also runs 3000. So where to change you can find the GitHub readme document.
To avoid 'CORS' issue and to consume the API in our application our react js application URL need to be registered in the API project. So where to change you can find the GitHub readme document.
Create ReactJS Application:
Let's create a ReactJS application to accomplish our demo
npx create-react-app name-of-your-app
Configure React Bootstrap Library:
Let's install the React Bootstrap library
npm install react-bootstrap bootstrap
Now add the bootstrap CSS reference in 'index.js'.
src/index.js:
import "bootstrap/dist/css/bootstrap.min.css";
Install React Router Package:
Install the react-router package
npm i react-router-dom
Add the 'BrowserRouter' element in the 'index.js'
src/index.js:
import React from "react";
import ReactDOM from "react-dom/client";
import "./index.css";
import App from "./App";
import "bootstrap/dist/css/bootstrap.min.css";
import { BrowserRouter } from "react-router-dom";

const root = ReactDOM.createRoot(document.getElementById("root"));
root.render(
  <BrowserRouter>
    <App />
  </BrowserRouter>
);
Create A React Component 'Layout':
Let's create a react component like 'Layout' inside of the 'components/shared' folders.
src/components/shared/Layout.js:
import { Container, Navbar } from "react-bootstrap";

const Layout = ({ children }) => {
  return (
    <>
      <Navbar bg="primary" variant="dark">
        <Navbar.Brand>JWT HTTP-Only Cookie</Navbar.Brand>
      </Navbar>
      <Container>{children}</Container>
    </>
  );
};
export default Layout;
- Here we add the bootstrap 'Navbar'. All page-level components read as 'children' and are rendered here inside the container.
src/App.js:
import logo from "./logo.svg";
import "./App.css";
import Layout from "./components/shared/Layout";

function App() {
  return (
    <>
      <Layout></Layout>
    </>
  );
}
export default App;
Create A React Component 'Home':
Let's create a react component like 'Home' in 'pages' folder. The 'Home' component can be accessed by either authenticated or non-authenticated users just like the guest page.
src/pages/Home.js:
import { Card } from "react-bootstrap";

const Home = () => {
  return (
    <>
      <div
        className="d-flex justify-content-center align-items-center"
        style={{ minHeight: "500px", minWidth: "600px" }}
      >
        <Card>
          <Card.Body>
            <Card.Text>
              Welcome to demo on ReactJS (v18) Jwt Authentication with HTTP Only
              cookie
            </Card.Text>
          </Card.Body>
        </Card>
      </div>
    </>
  );
};
export default Home;
In the 'App' component add the route for the 'Home' component.src/App.js:
import logo from "./logo.svg";
import "./App.css";
import Layout from "./components/shared/Layout";
import { Route, Routes } from "react-router-dom";
import Home from "./Pages/Home";

function App() {
  return (
    <>
      <Layout>
        <Routes>
          <Route path="/" element={<Home />}></Route>
        </Routes>
      </Layout>
    </>
  );
}

export default App;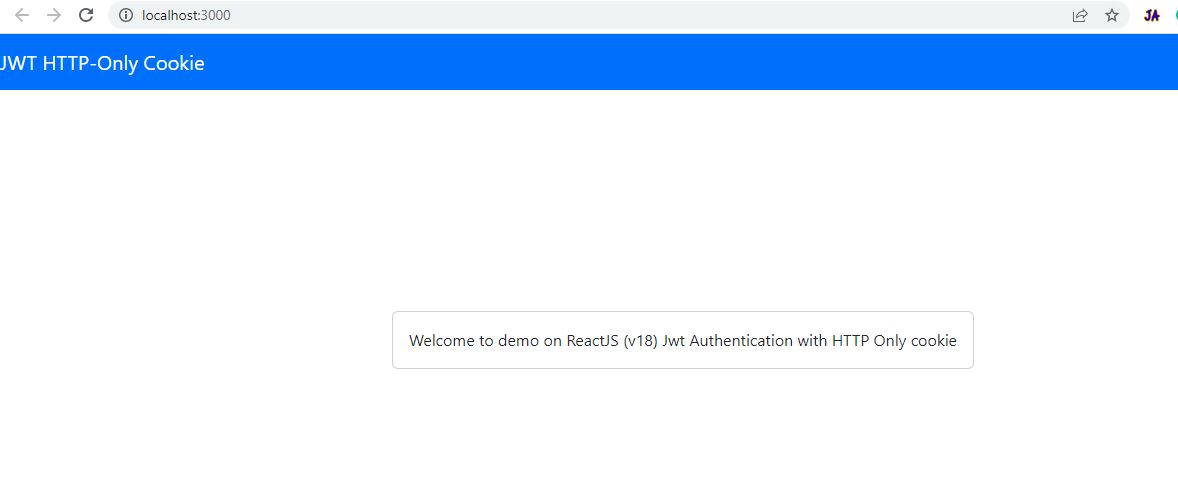
Create A React Component 'Login':
Let's create the react component 'Login' in the 'pages' folder.
src/pages/Login.js:
import { useRef } from "react";
import { Button, Col, Container, Row, Form } from "react-bootstrap";

const Login = () => {
  const email = useRef("");
  const password = useRef("");

  const loginSubmit = async () => {};
  return (
    <>
      <Container className="mt-2">
        <Row>
          <Col className="col-md-8 offset-md-2">
            <legend>Login Form</legend>
            <Form.Group className="mb-3" controlId="formBasicEmail">
              <Form.Label>Email address</Form.Label>
              <Form.Control type="email" ref={email} />
            </Form.Group>
            <Form.Group className="mb-3" controlId="formPasswor">
              <Form.Label>Password</Form.Label>
              <Form.Control type="password" ref={password} />
            </Form.Group>
            <Button variant="primary" type="button" onClick={loginSubmit}>
              Login
            </Button>
          </Col>
        </Row>
      </Container>
    </>
  );
};
export default Login;
- (Line: 5-6) The 'useRef' variables 'email' & 'password' to read the data from the form.
src/App.js:
import logo from "./logo.svg";
import "./App.css";
import Layout from "./components/shared/Layout";
import { Route, Routes } from "react-router-dom";
import Home from "./Pages/Home";
import Login from "./Pages/Login";

function App() {
  return (
    <>
      <Layout>
        <Routes>
          <Route path="/" element={<Home />}></Route>
          <Route path="/login" element={<Login />}></Route>
        </Routes>
      </Layout>
    </>
  );
}

export default App;
Now add the 'Login' menu item in the 'Layout' component.src/components/shared/Layout.js:
import { Container, Navbar, Nav } from "react-bootstrap";
import { Link } from "react-router-dom";

const Layout = ({ children }) => {
  return (
    <>
      <Navbar bg="primary" variant="dark">
        <Navbar.Brand as={Link} to="/">
          JWT HTTP-Only Cookie
        </Navbar.Brand>
        <Nav className="ms-auto">
          <Nav.Link as={Link} to="/login">
            Login
          </Nav.Link>
        </Nav>
      </Navbar>
      <Container>{children}</Container>
    </>
  );
};

export default Layout;
Install Axios:
To invoke the API calls let's install the Axios library.
npm i axios
Use ReactJS ContextAPI To Store Authentiction Information:
Authentication information has to be available to the entire ReactJS application, so we have to store it in some kind of store. For this demo, I'm going to store the authentication information with the help of ReactJs Context API. Let's create a file like 'AuthContext.js' inside of the 'components/shared' folders.
src/components/shared/AuthContext.js:
import axios from "axios";
import { createContext, useState } from "react";
import { useNavigate } from "react-router-dom";

const AuthContext = createContext();

export const AuthContextProvider = ({ children }) => {
  const [user, setUser] = useState(() => {
    let userProfle = localStorage.getItem("userProfile");
    if (userProfle) {
      return JSON.parse(userProfle);
    }
    return null;
  });
  const navigate = useNavigate();
  const login = async (payload) => {
    await axios.post("http://localhost:4000/auth/login", payload, {
      withCredentials: true,
    });
    let apiResponse = await axios.get("http://localhost:4000/user-profile", {
      withCredentials: true,
    });
    localStorage.setItem("userProfile", JSON.stringify(apiResponse.data));
    setUser(apiResponse.data);
    navigate("/");
  };
  return (
    <>
      <AuthContext.Provider value={{ user, login }}>
        {children}
      </AuthContext.Provider>
    </>
  );
};

export default AuthContext;
- (Line: 5) The 'createContext' assigned to the 'AuthContex' variable. The 'createContex' loads from the 'react' library.
- (Line: 7) Create our component for API context like 'AuthContextProvider'.
- (Line: 8-14) The 'user' state variable holds the authenticated user information. For the initial value here we check for browser local storage, this case helps when the user reloads the page.
- (Line: 15) Initialized the navigation variable.
- (Line: 16-26) In 'logn' method we invoke 2 API calls like 'user login API call', 'user profile API call'. The 'login' API call for user authentication on the success of the login API sends us an HTTPonly cookie. The 'user profile' API call is a secured API call that gets the authenticated information. Here for every API call, we have to pass configuration to API call like 'withCredentials' with 'true' because our client application and API application runs under different ports or domains so to store the login cookie into the browser or attach the cookie for every secured API endpoint request we need those configurations. Here 'user profile' API response saves into the 'user'(state variable) and browser local storage.
- (Line: 29-31) In the 'AuthContext.Provider' element, we configure the 'value' attribute to which we pass our 'login'(method), 'user'(variable) because these properties have to be accessed by any component in our application.
src/App.js:
import logo from "./logo.svg";
import "./App.css";
import Layout from "./components/shared/Layout";
import { Route, Routes } from "react-router-dom";
import Home from "./Pages/Home";
import Login from "./Pages/Login";
import { AuthContextProvider } from "./components/shared/AuthContext";

function App() {
  return (
    <>
      <AuthContextProvider>
        <Layout>
          <Routes>
            <Route path="/" element={<Home />}></Route>
            <Route path="/login" element={<Login />}></Route>
          </Routes>
        </Layout>
      </AuthContextProvider>
    </>
  );
}

export default App;
Use 'AuthContext' In Login Component:
Let's use the 'AuthContext' in the Login component to invoke the Login API.
src/page/Login.js:
import { useContext, useRef } from "react";
import { Button, Col, Container, Row, Form } from "react-bootstrap";
import AuthContext from "../components/shared/AuthContext";

const Login = () => {
  const email = useRef("");
  const password = useRef("");
  const { login } = useContext(AuthContext);

  const loginSubmit = async () => {
    let payload = {
      email: email.current.value,
      password: password.current.value,
    };
    await login(payload);
  };
  return (
    <>
      <Container className="mt-2">
        <Row>
          <Col className="col-md-8 offset-md-2">
            <legend>Login Form</legend>
            <Form.Group className="mb-3" controlId="formBasicEmail">
              <Form.Label>Email address</Form.Label>
              <Form.Control type="email" ref={email} />
            </Form.Group>
            <Form.Group className="mb-3" controlId="formPasswor">
              <Form.Label>Password</Form.Label>
              <Form.Control type="password" ref={password} />
            </Form.Group>
            <Button variant="primary" type="button" onClick={loginSubmit}>
              Login
            </Button>
          </Col>
        </Row>
      </Container>
    </>
  );
};
export default Login;
- (Line: 9) The 'useContext' loads from the 'react' library. So we pass our 'AuthContext' as input to the 'useContext' then it can expose the 'login' method reference.
- (Line: 10-16) Prepare the payload for login API and then invoke the login API call.
src/components/shared/Layout.js:
import { useContext } from "react";
import { Container, Navbar, Nav } from "react-bootstrap";
import { Link } from "react-router-dom";
import AuthContext from "./AuthContext";
const Layout = ({ children }) => {
const { user } = useContext(AuthContext);
return (
<>
<Navbar bg="primary" variant="dark">
<Navbar.Brand as={Link} to="/">
JWT HTTP-Only Cookie
</Navbar.Brand>
<Nav className="ms-auto">
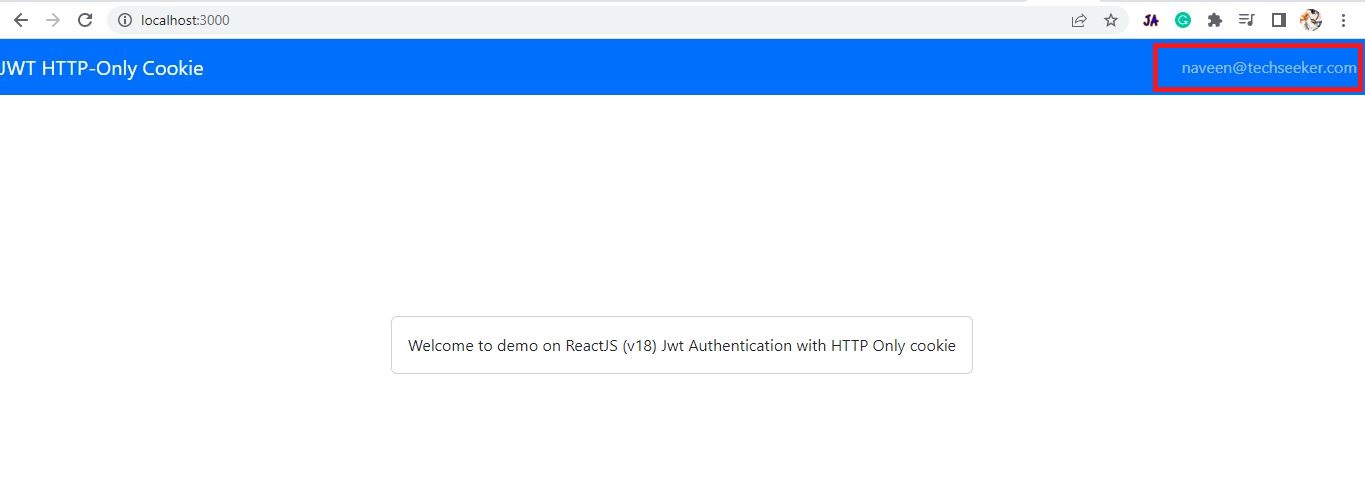
{user && <Nav.Link>{user?.email}</Nav.Link>}
{!user && (
<Nav.Link as={Link} to="/login">
Login
</Nav.Link>
)}
</Nav>
</Navbar>
<Container>{children}</Container>
</>
);
};
export default Layout;
- (Line: 7) Read the 'user' information from the 'AuthContext'.
- (Line: 15) Display authenticated user email address.
- (Line: 16-20) Show the login menu item if the user is not authenticated.


Create Rect Component 'Movies':
Let's create a React component like 'Movies' in the 'pages' folder.
src/pages/Movies.js:
const Movies = () => {
  return <></>;
};

export default Movies;
In the 'App' component add the route for the 'Movies' component.src/App.js:
import logo from "./logo.svg";
import "./App.css";
import Layout from "./components/shared/Layout";
import { Route, Routes } from "react-router-dom";
import Home from "./Pages/Home";
import Login from "./Pages/Login";
import { AuthContextProvider } from "./components/shared/AuthContext";
import Movies from "./Pages/Movies";

function App() {
  return (
    <>
      <AuthContextProvider>
        <Layout>
          <Routes>
            <Route path="/" element={<Home />}></Route>
            <Route path="/login" element={<Login />}></Route>
            <Route path="/movies" element={<Movies />}></Route>
          </Routes>
        </Layout>
      </AuthContextProvider>
    </>
  );
}
export default App;
In the 'Layout' component add the menu item for 'Movies' component.src/components/sharedLayout.js:
import { useContext } from "react";
import { Container, Navbar, Nav } from "react-bootstrap";
import { Link } from "react-router-dom";
import AuthContext from "./AuthContext";

const Layout = ({ children }) => {
  const { user } = useContext(AuthContext);
  return (
    <>
      <Navbar bg="primary" variant="dark">
        <Navbar.Brand as={Link} to="/">
          JWT HTTP-Only Cookie
        </Navbar.Brand>
        <Nav>
          {user && (
            <Nav.Link as={Link} to="/movies">
              Movies
            </Nav.Link>
          )}
        </Nav>
        <Nav className="ms-auto">
          {user && <Nav.Link>{user?.email}</Nav.Link>}
          {!user && (
            <Nav.Link as={Link} to="/login">
              Login
            </Nav.Link>
          )}
        </Nav>
      </Navbar>
      <Container>{children}</Container>
    </>
  );
};

export default Layout;
The 'Movies' Component Consume A Secured Endpoint:
Let's consume a secured API like 'liked-movies' from the 'Movies' component.
src/pages/Movies.js:
import axios from "axios";
import { useEffect, useState } from "react";
import Card from "react-bootstrap/Card";
import ListGroup from "react-bootstrap/ListGroup";

const Movies = () => {
  const [movies, setMovies] = useState([]);

  useEffect(() => {
    axios
      .get("http://localhost:4000/liked-movies", { withCredentials: true })
      .then((response) => {
        setMovies(response.data);
      });
  }, []);
  return (
    <>
      <div
        className="d-flex justify-content-center align-items-center"
        style={{ minHeight: "500px", minWidth: "600px" }}
      >
        <Card>
          <Card.Header>Liked Movies</Card.Header>
          <ListGroup variant="flush">
            {movies.map((item) => (
              <ListGroup.Item>{item}</ListGroup.Item>
            ))}
          </ListGroup>
        </Card>
      </div>
    </>
  );
};

export default Movies;
- (Line: 7) The 'useState' variable 'movies' to hold the API response.
- (Line: 9-15) Invoking the secured API.

Axios Interceptor To Invoke The Refresh Token Endpoint:
The JWT access token is a short-lived access token, on its expiration we have to invoke the refresh token endpoint so that it regenerates a new JWT access token and updates it into our HTTP-Only auth cookie.
Here we are going to write an Axios interceptor for invoking the refresh token API call. So let's create a file like the 'jwtInterceptor.js' file in the 'helpers' folder (new folder).
src/helpers/jwtInterceptor.js:
import axios from "axios";

const jwtInterceptor = axios.create({});

jwtInterceptor.interceptors.response.use(
  (response) => {
    return response;
  },
  async (error) => {
    if (error.response.status === 401) {
      await axios
        .get("http://localhost:4000/refresh-token", {
          withCredentials: true,
        })
        .catch((err) => {
          return Promise.reject(err);
        });
      console.log(error.config);
      return axios(error.config);
    } else {
      return Promise.reject(error);
    }
  }
);

export default jwtInterceptor;
- (Line: 3) Using 'axios.create({})' creating an instance of Axios and assign to the 'jwtInterceoptor' variable. Now 'jwtIntercoptor' is also an Axios that can be used to invoke the API calls.
- (Line: 5) Here configuring the 'interceptor' for the 'jwtInterceptor' variable for a response. That means this interceptor gets executed after API returns a response(either a success or an error response).
- (Line: 6-8) This method gets executed for success API response. Here we won't change any API flow.
- (Line: 9) This method gets executed for error API response.
- (Line: 10-20) If the error status is '401' that means unauthorized. then we are going to invoke the refresh token endpoint.
- (Line: 11-17) Invoking the refresh token endpoint.
- (Line: 19) Re-invoking the original API that failed due to the expiration of the access token.

Implement Protected Routes:
Now either authenticated users or non-authenticated users can access any route in our application. So we have to protect our routes like authenticated users can't access pages like 'login', similarly, non-authenticated users can't access the 'movies' page.
Let's create a react component like 'ProtectedRoute' in the 'components/shared' folders.
src/components/shared/ProtectedRoute.js:
import { useContext } from "react";
import { Navigate } from "react-router-dom";
import AuthContext from "./AuthContext";

const ProtectedRoute = ({ children, accessBy }) => {
  const { user } = useContext(AuthContext);

  if (accessBy === "non-authenticated") {
    if (!user) {
      return children;
    }
  } else if (accessBy === "authenticated") {
    if (user) {
      return children;
    }
  }
  return <Navigate to="/"></Navigate>;
};
export default ProtectedRoute;
- (Line: 5)The 'ProtectedRoute' component destructured props like 'children'(actual component to render for route), 'accessBy'(a custom configuration whether the route can be accessed by either authenticated or non-authenticated user).
- (Line: 6) Fetching the 'user' information form the 'AuthContext'.
- (Line: 8-12) If the 'accessBy' value is 'non-authenticated' and the user is not logged into our application then the user can access the page of the route.
- (Line: 13-17) If the 'accessBy' value is 'authenticated' and the user is logged into our application then the user can access the page of the route.
- (Line: 19) By default home page can be accessed by any kind of user we are redirected to the home page using the 'Navigate' component by specifying the route to redirect.
src/App.js:
import "./App.css";
import Layout from "./components/shared/Layout";
import { Route, Routes } from "react-router-dom";
import Home from "./Pages/Home";
import Login from "./Pages/Login";
import { AuthContextProvider } from "./components/shared/AuthContext";
import Movies from "./Pages/Movies";
import ProtectedRoute from "./components/shared/ProtectedRoute";

function App() {
  return (
    <>
      <AuthContextProvider>
        <Layout>
          <Routes>
            <Route path="/" element={<Home />}></Route>
            <Route
              path="/login"
              element={
                <ProtectedRoute accessBy="non-authenticated">
                  <Login />
                </ProtectedRoute>
              }
            ></Route>
            <Route
              path="/movies"
              element={
                <ProtectedRoute accessBy="authenticated">
                  <Movies />
                </ProtectedRoute>
              }
            ></Route>
          </Routes>
        </Layout>
      </AuthContextProvider>
    </>
  );
}

export default App;
Implement Logout:
Let's implement our logout logic in the 'AuthContextProvider' component.
src/components/shared/AuthContext.js:
import axios from "axios";
import { createContext, useState } from "react";
import { useNavigate } from "react-router-dom";

const AuthContext = createContext();

export const AuthContextProvider = ({ children }) => {
  const [user, setUser] = useState(() => {
    let userProfle = localStorage.getItem("userProfile");
    if (userProfle) {
      return JSON.parse(userProfle);
    }
    return null;
  });
  const navigate = useNavigate();
  const login = async (payload) => {
    await axios.post("http://localhost:4000/auth/login", payload, {
      withCredentials: true,
    });
    let apiResponse = await axios.get("http://localhost:4000/user-profile", {
      withCredentials: true,
    });
    localStorage.setItem("userProfile", JSON.stringify(apiResponse.data));
    setUser(apiResponse.data);
    navigate("/");
  };

  const logout = async () => {
    await axios.get("http://localhost:4000/logout", { withCredentials: true });
    localStorage.removeItem("userProfile");
    setUser(null);
    navigate("/login");
  };

  return (
    <>
      <AuthContext.Provider value={{ user, login, logout }}>
        {children}
      </AuthContext.Provider>
    </>
  );
};

export default AuthContext;
- (Line: 28-33) Invoking the 'Logout' API call. Then remove the user profile information from the browser's local storage. Then empty the 'user' state variable and then navigate to 'login' page.
- (Line: 37) Expose our 'logout' method by registering the 'value' attribute of 'AuthContext.Provider'.
src/components/shared/Layout.js:
import { useContext } from "react";
import { Container, Navbar, Nav, Button } from "react-bootstrap";
import { Link } from "react-router-dom";
import AuthContext from "./AuthContext";

const Layout = ({ children }) => {
  const { user, logout } = useContext(AuthContext);
  return (
    <>
      <Navbar bg="primary" variant="dark">
        <Navbar.Brand as={Link} to="/">
          JWT HTTP-Only Cookie
        </Navbar.Brand>
        <Nav>
          {user && (
            <Nav.Link as={Link} to="/movies">
              Movies
            </Nav.Link>
          )}
        </Nav>
        <Nav className="ms-auto">
          {user && <Nav.Link>{user?.email}</Nav.Link>}
          {!user && (
            <Nav.Link as={Link} to="/login">
              Login
            </Nav.Link>
          )}
        </Nav>
        {user && (
          <Button variant="outline-success" type="button" onClick={() => {logout()}}>
            Logout
          </Button>
        )}
      </Navbar>
      <Container>{children}</Container>
    </>
  );
};

export default Layout;
- (Line: 7) Access the 'logout' method reference from the 'AuthContext'.
- (Line: 30-32) Registered the 'Logout' button with our 'logout' method.

Support Me!
Buy Me A Coffee
PayPal Me
Video Session:
Wrapping Up:
Hopefully, I think this article delivered some useful information on the ReactJS(v18) Authentication using HTTP-Only Cookie. I love to have your feedback, suggestions, and better techniques in the comment section below.
Just wondering why you need both the JWT and the auth cookie? If the auth cookie is supplied on every API call, the JWT shouldn't be needed
ReplyDeleteMan, just what i needed, thanks a lot !
ReplyDeleteGreat content !!! <3
ReplyDelete