
A Small Demo On OData(v8) In .NET 7 API Application

In this article, we are going to implement a sample on OData in .NET7 API application.

OData:

The OData(Open Data Protocol) is an application-level protocol for interacting with data via the restful interface. OData supports the description of data models, editing, and querying of data according to those models.

OData query features are:
  • $select
  • $orderBy
  • $filter
  • $skip
  • $count
  • $expand

Sample SQL Table Scripts:

Let's run the below sample SQL script to create a table like 'Employee'.
Sample SQL Script:
Create Table Employee(
Id INT IDENTITY(1,1) NOT NULL,
FirstName VARCHAR(200) NULL,
LastName VARCHAR(200) NULL,
Salary Decimal(18,2) NULL,
JobRole VARCHAR(50) NULL
CONSTRAINT PK_Employee PRIMARY KEY (Id)
)

Create .NET7 Web API Application:

Let's create the .NET 7 Web API application to accomplish our demo. Here to create .NET 7 application we use IDE's(editors) either Visual Studio 2022 or Visual Studio Code(Using .NET CLI command). In this demo, we are going to use Visual Studio Code(using .NET CLI command)

.NET CLI command to create API project.
dotnet new webapi -o name_of_your_project

Install Entity Framework Core NuGet Package:

Let's install the entity framework core NuGet package.

Visual Studio 2022:
Install-Package Microsoft.EntityFrameworkCore -Version 7.0.3

Visual Studio Code:
dotnet add package Microsoft.EntityFrameworkCore --version 7.0.3

Let's install the entity framework core SQL NuGet package.

Visual Studio 2022:
Install-Package Microsoft.EntityFrameworkCore.SqlServer -Version 7.0.3

Visual Studio Code:
dotnet add package Microsoft.EntityFrameworkCore.SqlServer --version 7.0.3

Create DatabaseContext:

Let's create an 'Employee' class in 'Data/Entities' folder(new folders) that represents our 'Employee' table.
Data/Entities/Employee.cs:
namespace Dot7.OData.Demo.Data.Entities;
public class Employee
{
    public int Id{get;set;}
    public string? FirstName{get;set;}
    public string? LastName{get;set;}
    public decimal? Salary{get;set;}
    public string? JobRole{get;set;}
}
Let's create our database context class like 'MyWorldDbContext.cs' in 'Data' folder.
Data/MyWorldDbContext.cs:
using Dot7.OData.Demo.Data.Entities;
using Microsoft.EntityFrameworkCore;
namespace Dot7.OData.Demo.Data;
public class MyWorldDbContext : DbContext
{
    public MyWorldDbContext(DbContextOptions<MyWorldDbContext> options) : base(options)
    {
    }
    public DbSet<Employee> Employee { get; set; }
}
  • (Line: 4) The 'Microsoft.EntityFrameworkCore.DbContext' needs to be inherited by our 'MyWorldDbContext' to act as a Database context class.
  • (Line: 6) The 'Microsoft.EntityFrameworkDbContextOptions' is an instance of options that we are going to register in 'Program.cs' like 'database provider', 'connection string', etc.
  • (Line: 9) Our table classes must be registered inside of our database context class with 'DbSet<T>' so the entity framework can communicate with the tables of the database.
Now let's add the connection string into the 'appsettings.Development.json'.
appsettings.Development.json:
"ConnectionStrings": {
  "MyWorldDbConnection": "Data Source=(localdb)\\MSSQLLocalDB;Initial Catalog=MyWorldDB;Integrated Security=True;Connect Timeout=30"
}
Now let's register our DatabaseContext into our 'Program.cs'.
Program.cs:
builder.Services.AddDbContext<MyWorldDbContext>(options => {
    options.UseSqlServer(builder.Configuration.GetConnectionString("MyWorldDbConnection"));
});

Create An 'EmployeeController': 

Let's create a new controller like 'EmployeeController'.
Controllers/EmployeeController.cs:
using Dot7.OData.Demo.Data;
using Microsoft.AspNetCore.Mvc;
namespace Dot7.OData.Demo.Controllers;
[ApiController]
[Route("[controller]")]
public class EmployeeController: ControllerBase
{
    private readonly MyWorldDbContext _myWorldDbContext;
    public EmployeeController(MyWorldDbContext myWorldDbContext)
    {
        _myWorldDbContext = myWorldDbContext;
    }
}
  • Here injected our 'MyWordDbContext'(database context) into the controller constructor.

Install OData NuGet Package:

Let's install the OData NuGet Package.

Visual Studio 2022:
Install-Package Microsoft.AspNetCore.OData -Version 8.0.12

Visual Studio Code:
dotnet add package Microsoft.AspNetCore.OData --version 8.0.12

Register OData Service:

Now we have to extend the 'AddControllers()' service to register our OData service. Also, we have to register our OData query types like 'Select', 'filter', 'count', etc.
Program.cs:
builder.Services.AddControllers().AddOData(options =>
    options.Select().Filter().Count().OrderBy().Expand());

Create Action Method With Queriable Return Type:

Let's create an action method of the queriable return type.
Controllers/EmployeeController.cs:
[HttpGet]
public IActionResult Get()
{
	return Ok(_myWorldDbContext.Employee.AsQueryable());
}
  • Here we use 'AsQueryable()' method.

OData EnableQuery Attribute:

EnableQuery OData attribute needs to be decorated on top of the action method or controller so that we can use OData queries.
Controller/EmployeeController.cs:
using Microsoft.AspNetCore.OData.Query;

[EnableQuery]
[HttpGet]
public IActionResult Get()
{
	return Ok(_myWorldDbContext.Employee.AsQueryable());
}

$select:

The $select system query option allows clients to request a specific set of properties for each entity or complex type. The set of properties will be comma separated while requesting.
http://localhost:5093/employee?$select=firstname,salary


The '$select' operator requested only 2-props in the above URL, so our entity framework query generates as below.

$filter:

The $filter filters data based on a boolean condition. The following are conditional operators that have to be used in 'URLs':
  • eq- equals to
  • ne - not equals to
  • gt -greater than
  • ge - greater than or equal
  • lt - less than
  • le - less than or equal

http://localhost:5093/employee?$filter=salary eq 19000
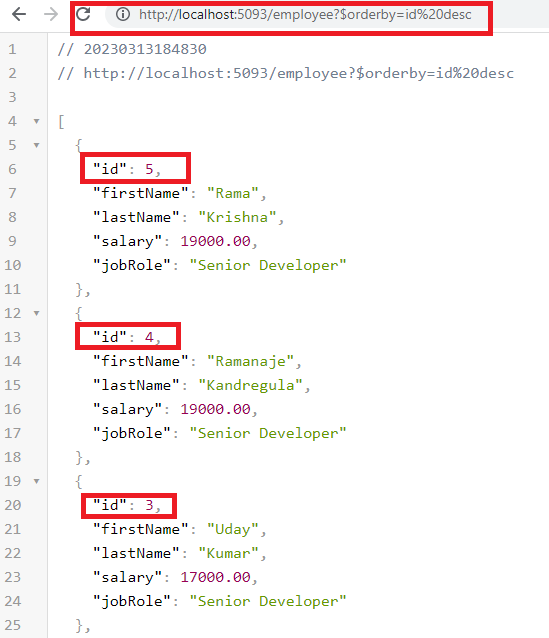
Now let's see how the entity framework core generates filter query

$orderby:

The $orderby sorts the data using 'asc' and 'desc' keywords. We can do sorting on multiple properties using comma separation.
http://localhost:5093/employee?$orderby=id desc

Let's observe the query generated by the entity framework core.

$skip:

The $skip skips the specified number of records and fetches the remaining data
http://localhost:5093/employee?$skip=2


Let's check the query generated by the entity framework core.

$top:

The $top fetches specified the count of top records in the collection. so to work this operator, we must specify an extension method like 'SetMaxTo(specify_max_number)'.
Program.cs:
builder.Services.AddControllers().AddOData(options =>
    options.Select().Filter().Count().OrderBy().Expand().SetMaxTop(100));
  • Here 'SetMaxTop' method configure with '100' means maximum top 100 records.
http://localhost:5093/employee?$top=2

Let's check the query generated by the entity framework core.

SQL Child Table Script(With Onet-To-Many Relationship):

Let's create a child table like 'EmployeeAddresses' for the 'Employee' table with a one-to-many relationship.
Sample EmployeeAddresses Script:
Create Table EmployeeAddresses(
Id int IDENTITY (1,1) NOT NULL,
HouseNumber VARCHAR(100),
City VARCHAR(100),
State VARCHAR(100),
Country varchar(100),
EmployeeId int NOT NULL
CONSTRAINT PK_Employee_Addresses_Id PRIMARY KEY (Id)
CONSTRAINT FK_Employee_Addresses_EmployeeId FOREIGN KEY (EmployeeId)
REFERENCES Employee (Id)
)

Create EmployeeAddresses Entity And Configure With DatabaseContext:

Let's create a 'EmployeeAddresses' entity in the 'Data/Entities' folder.
Data/Entities/EmployeeAddresses:
namespace Dot7.OData.Demo.Data.Entities;
public class EmployeeAddresses
{
    public int Id { get; set; }
    public string? HouseNumber { get; set; }
    public string? City { get; set; }
    public string? State { get; set; }
    public string? Country { get; set; }
    public int EmployeeId { get; set; }
    public Employee Employee { get; set; }
}
  • (Line: 10) The 'Employee' is a navigation property that says one 'EmployeeAdresses' can have one 'Employee'.
Now in the 'Employee' class, we need to add the navigation property of 'EmployeeAddresses' that says one 'Employee' can have multiple 'EmployeeAddress'.
Data/Entities/Employee.cs:
namespace Dot7.OData.Demo.Data.Entities;
public class Employee
{
    public int Id { get; set; }
    public string? FirstName { get; set; }
    public string? LastName { get; set; }
    public decimal? Salary { get; set; }
    public string? JobRole { get; set; }
    public List<EmployeeAddresses> EmployeeAddresses { get; set; }
}
Now update our DatabaseContext as follow:
Entities/MyWorldDbContext.cs:
using Dot7.OData.Demo.Data.Entities;
using Microsoft.EntityFrameworkCore;
namespace Dot7.OData.Demo.Data;
public class MyWorldDbContext : DbContext
{
    public MyWorldDbContext(DbContextOptions<MyWorldDbContext> options) : base(options)
    {

    }
    public DbSet<Employee> Employee { get; set; }
    public DbSet<EmployeeAddresses> EmployeeAddresses { get; set; }
    protected override void OnModelCreating(ModelBuilder modelBuilder)
    {
        modelBuilder.Entity<EmployeeAddresses>()
        .HasOne(_ => _.Employee)
        .WithMany(_ => _.EmployeeAddresses)
        .HasForeignKey(_ => _.EmployeeId);
    }
}
  • (Line: 14-17) Here using fluent API we configured one to many relationships between 'Employee' and 'EmployeeAddresses'.

$expand:

Using $expand we can query the internal or navigating property object. So we have to assign the navigation property name to the '$expand' then we can apply all other operations like '$select', '$filter', '$skip' on the navigation property type.
http://localhost:5093/Employee?$expand=EmployeeAddresses($select=Id, city)


Now let's observe the query generated by the entity framework core.

$count:

In an original OData, the response contains some additional OData properties like '@odata.context', '@odata.nextLink', '@Odata.count', etc. If we observe in all previous responses in this article doesn't contain the data properties, that is because the implementation uses normal web API routing. So $count can't be seen with the above implementation. So to make $count work we need to implement odata routing.

So let's create a new controller like 'EmployeeODataController' in the controller's folder.
Controllers/EmployeeODataController.cs:
using Dot7.OData.Demo.Data;
using Microsoft.AspNetCore.Mvc;
using Microsoft.AspNetCore.OData.Query;
namespace Dot7.OData.Demo.Controllers;
public class EmployeeODataController:ControllerBase
{
    private readonly MyWorldDbContext _myWorldDbContext;
    public EmployeeODataController(MyWorldDbContext myWorldDbContext)
    {
        _myWorldDbContext = myWorldDbContext;
    }
    [EnableQuery]
    public IActionResult Get()
    {
        return Ok(_myWorldDbContext.Employee.AsQueryable());
    }
}
  • Here the difference between 'EmployeeController.cs' and 'EmployeeODataController.cs' is removed the 'ApiController' and 'RouteController' which means we disabled the Asp.Net Core Web API routing.
Now in the above action method, our return type is 'Employee', so we have to register the our 'Employee' type with OData EDM(Entity Data Model). The Entity Data Model is used to map our response type so that the OData engine can analyze its queries. So in 'Program.cs' let's crate method that will return the ODATA EDM.
Program.cs:
static IEdmModel GetEdmModel()
{
	ODataConventionModelBuilder modelBuilder = new ODataConventionModelBuilder();
	modelBuilder.EntitySet<Employee>("EmployeeOData");
	return modelBuilder.GetEdmModel();
}
  • (Line: 4) Our 'Employee'(response model or entity class) registered as 'EntitySet' with name like 'EmployeeOData'. Here the name("EmployeeOData") should match our controller name("EmployeeODataController") because this name going to be used as part of the URL.
Now we need to register our 'GetEdmModel' method with 'AddRouteComponents()'.
Program.cs:
builder.Services.AddControllers()
.AddOData(options =>
    options.Select().Filter().Count().OrderBy().Expand().SetMaxTop(100)
    .AddRouteComponents("odata",GetEdmModel()));
  • Here 'Odata' will be used as a route prefix for all the models registered in the 'GetEdmModel'.
So our new odata endpoint looks like below
http://localhost:5093/odata/EmployeeOData

  • Here we can see our odata property like '@odata.context'
So our URL with '$count' looks as below
http://localhost:5093/odata/EmployeeOData?$count=true

Support Me!
Buy Me A Coffee PayPal Me

Video Session:

Wrapping Up:

Hopefully, I think this article delivered some useful information on OData Version 8 in .NET7 API. I love to have your feedback, suggestions, and better techniques in the comment section below.

Refer:

Follow Me:

Comments

Popular posts from this blog

.NET6 Web API CRUD Operation With Entity Framework Core

In this article, we are going to do a small demo on AspNetCore 6 Web API CRUD operations. What Is Web API: Web API is a framework for building HTTP services that can be accessed from any client like browser, mobile devices, desktop apps. In simple terminology API(Application Programming Interface) means an interface module that contains a programming function that can be requested via HTTP calls to save or fetch the data for their respective clients. Some of the key characteristics of API: Supports HTTP verbs like 'GET', 'POST', 'PUT', 'DELETE', etc. Supports default responses like 'XML' and 'JSON'. Also can define custom responses. Supports self-hosting or individual hosting, so that all different kinds of apps can consume it. Authentication and Authorization are easy to implement. The ideal platform to build REST full services. Create A .NET6 Web API Application: Let's create a .Net6 Web API sample application to accomplish our

Angular 14 Reactive Forms Example

In this article, we will explore the Angular(14) reactive forms with an example. Reactive Forms: Angular reactive forms support model-driven techniques to handle the form's input values. The reactive forms state is immutable, any form filed change creates a new state for the form. Reactive forms are built around observable streams, where form inputs and values are provided as streams of input values, which can be accessed synchronously. Some key notations that involve in reactive forms are like: FormControl - each input element in the form is 'FormControl'. The 'FormControl' tracks the value and validation status of form fields. FormGroup - Track the value and validate the state of the group of 'FormControl'. FormBuilder - Angular service which can be used to create the 'FormGroup' or FormControl instance quickly. Form Array - That can hold infinite form control, this helps to create dynamic forms. Create An Angular(14) Application: Let'

Part-1 Angular JWT Authentication Using HTTP Only Cookie[Angular V13]

In this article, we are going to implement a sample angular application authentication using HTTP only cookie that contains a JWT token. HTTP Only JWT Cookie: In a SPA(Single Page Application) Authentication JWT token either can be stored in browser 'LocalStorage' or in 'Cookie'. Storing JWT token inside of the cookie then the cookie should be HTTP Only. The HTTP-Only cookie nature is that it will be only accessible by the server application. Client apps like javascript-based apps can't access the HTTP-Only cookie. So if we use authentication with HTTP only JWT cookie then we no need to implement custom logic like adding authorization header or storing token data, etc at our client application. Because once the user authenticated cookie will be automatically sent to the server by the browser on every API call. Authentication API: To implement JWT cookie authentication we need to set up an API. For that, I had created a mock authentication API(Using the NestJS Se

Unit Testing Asp.NetCore Web API Using xUnit[.NET6]

In this article, we are going to write test cases to an Asp.NetCore Web API(.NET6) application using the xUnit. xUnit For .NET: The xUnit for .Net is a free, open-source, community-focused unit testing tool for .NET applications. By default .Net also provides a xUnit project template to implement test cases. Unit test cases build upon the 'AAA' formula that means 'Arrange', 'Act' and 'Assert' Arrange - Declaring variables, objects, instantiating mocks, etc. Act - Calling or invoking the method that needs to be tested. Assert - The assert ensures that code behaves as expected means yielding expected output. Create An API And Unit Test Projects: Let's create a .Net6 Web API and xUnit sample applications to accomplish our demo. We can use either Visual Studio 2022 or Visual Studio Code(using .NET CLI commands) to create any.Net6 application. For this demo, I'm using the 'Visual Studio Code'(using the .NET CLI command) editor. Create a fo

A Small Guide On NestJS Queues

NestJS Application Queues helps to deal with application scaling and performance challenges. When To Use Queues?: API request that mostly involves in time taking operations like CPU bound operation, doing them synchronously which will result in thread blocking. So to avoid these issues, it is an appropriate way to make the CPU-bound operation separate background job.  In nestjs one of the best solutions for these kinds of tasks is to implement the Queues. For queueing mechanism in the nestjs application most recommended library is '@nestjs/bull'(Bull is nodejs queue library). The 'Bull' depends on Redis cache for data storage like a job. So in this queueing technique, we will create services like 'Producer' and 'Consumer'. The 'Producer' is used to push our jobs into the Redis stores. The consumer will read those jobs(eg: CPU Bound Operations) and process them. So by using this queues technique user requests processed very fastly because actually

Angular 14 State Management CRUD Example With NgRx(14)

In this article, we are going to implement the Angular(14) state management CRUD example with NgRx(14) NgRx Store For State Management: In an angular application to share consistent data between multiple components, we use NgRx state management. Using NgRx state helps to avoid unwanted API calls, easy to maintain consistent data, etc. The main building blocks for the NgRx store are: Actions - NgRx actions represents event to trigger the reducers to save the data into the stores. Reducer - Reducer's pure function, which is used to create a new state on data change. Store - The store is the model or entity that holds the data. Selector - Selector to fetch the slices of data from the store to angular components. Effects - Effects deals with external network calls like API. The effect gets executed based the action performed Ngrx State Management flow: The angular component needs data for binding.  So angular component calls an action that is responsible for invoking the API call.  Aft

Usage Of CancellationToken In Asp.Net Core Applications

When To Use CancellationToken?: In a web application request abortion or orphan, requests are quite common. On users disconnected by network interruption or navigating between multiple pages before proper response or closing of the browser, tabs make the request aborted or orphan. An orphan request can't deliver a response to the client, but it will execute all steps(like database calls, HTTP calls, etc) at the server. Complete execution of an orphan request at the server might not be a problem generally if at all requests need to work on time taking a job at the server in those cases might be nice to terminate the execution immediately. So CancellationToken can be used to terminate a request execution at the server immediately once the request is aborted or orphan. Here we are going to see some sample code snippets about implementing a CancellationToken for Entity FrameworkCore, Dapper ORM, and HttpClient calls in Asp.NetCore MVC application. Note: The sample codes I will show in

Blazor WebAssembly Custom Authentication From Scratch

In this article, we are going to explore and implement custom authentication from the scratch. In this sample, we will use JWT authentication for user authentication. Main Building Blocks Of Blazor WebAssembly Authentication: The core concepts of blazor webassembly authentication are: AuthenticationStateProvider Service AuthorizeView Component Task<AuthenticationState> Cascading Property CascadingAuthenticationState Component AuthorizeRouteView Component AuthenticationStateProvider Service - this provider holds the authentication information about the login user. The 'GetAuthenticationStateAsync()' method in the Authentication state provider returns user AuthenticationState. The 'NotifyAuthenticationStateChaged()' to notify the latest user information within the components which using this AuthenticationStateProvider. AuthorizeView Component - displays different content depending on the user authorization state. This component uses the AuthenticationStateProvider

How Response Caching Works In Asp.Net Core

What Is Response Caching?: Response Caching means storing of response output and using stored response until it's under it's the expiration time. Response Caching approach cuts down some requests to the server and also reduces some workload on the server. Response Caching Headers: Response Caching carried out by the few Http based headers information between client and server. Main Response Caching Headers are like below Cache-Control Pragma Vary Cache-Control Header: Cache-Control header is the main header type for the response caching. Cache-Control will be decorated with the following directives. public - this directive indicates any cache may store the response. private - this directive allows to store response with respect to a single user and can't be stored with shared cache stores. max-age - this directive represents a time to hold a response in the cache. no-cache - this directive represents no storing of response and always fetch the fr

Angular 14 Crud Example

In this article, we will implement CRUD operation in the Angular 14 application. Angular: Angular is a framework that can be used to build a single-page application. Angular applications are built with components that make our code simple and clean. Angular components compose of 3 files like TypeScript File(*.ts), Html File(*.html), CSS File(*.cs) Components typescript file and HTML file support 2-way binding which means data flow is bi-directional Component typescript file listens for all HTML events from the HTML file. Create Angular(14) Application: Let's create an Angular(14) application to begin our sample. Make sure to install the Angular CLI tool into our local machine because it provides easy CLI commands to play with the angular application. Command To Install Angular CLI npm install -g @angular/cli Run the below command to create the angular application. Command To Create Angular Application ng new name_of_your_app Note: While creating the app, you will see a noti