
Redis Cache:
Redis is an open-source in-memory data structure store, used as a database cache. It supports data structures such as strings, hashes, lists, sets, sorted sets with range queries, etc.
Caching can significantly improve application performance and its scalability by reducing the workload to generate the content. If our server application runs on multiple servers then it is easy to share the Redis Cache between them.
Setup Redis Docker Image Container:
For this sample to use Redis instance locally we will use Docker. If you don't have any prior knowledge of docker, not a problem just follow the steps below. Click here for a video session on Redis docker setup
Note:
Skip this section if you already have redis direct instance or azure or any cloud provider that have redis
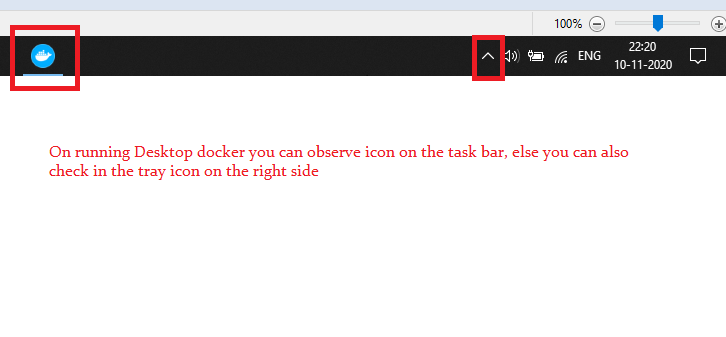
Step1:Download docker into our local system "https://docs.docker.com/desktop/". Docker was available for all desktop operating systems.

After downloading the docker installer, then install it. Now to run any docker containers(eg: Redis, MongoDB, PostgreSQL, etc) this docker instance we just installed should be active(should be running).
Now we need to pull the docker Redis image from the docker hub "https://hub.docker.com/_/redis".

Command To Pull Redis Image:
docker pull redis
The final step to run the docker Redis image container by mapping our local system port. By default, the Redis instance runs with the '6379' default port inside of the docker container. So to access the Redis we need to port mapping on starting off the container.
Command To Start Redis Container:
docker run --name your_containerName -p your_PortNumber:6379 -d redis
The '--name your_containerName' flag to specify the Redis container name. The '-p your_PortNumber:6379' mapping the Redis port '6379' to our local machine port all our application will use local machine port to communicate with Redis. The '-d' flag represents to run the container in the detached mode which means run in the background. At the last of the command 'redis' to specify the image to run in our container.
Step5:
After creating a docker container, it will be stored in our local machine so to start again the container any time run the following command
docker start your_container_name
Let test our Redis instance
Command To Use Redis CLI
docker exec -it your_docker_container_name redis-cli
Create A Sample NestJS Application:
Let's understand step by step implementation authentication in NestJs application, so let's begin our journey by creating a sample application.
Command To Install CLI:
npm i -g @nestjs/cli
Command To Create NestJS App:
nest new your_project_name
Install Cache Npm Packages:
NestJS Cache NPM Packages:
npm install cache-manager
npm install -D @types/cache-manager
npm install cache-manager-redis-store --save
Redis Store Configurations:
Now let's register the CacheModule with the Redis Store configurations in AppModule.
src/app.module.ts:
import { Module, CacheModule } from '@nestjs/common';
import * as redisStore from 'cache-manager-redis-store';
// code hidden for display purpose
@Module({
  imports: [CacheModule.register({
    store:redisStore,
    host: 'localhost',
    port: 5003
  })]
})
export class AppModule {}
- Imported 'CacheModule' that loads from '@nestjs/common' library.
- The 'register' method of CacheModule takes our Redis Store configuration for communication.
- The 'store' property assigned with 'redisStore' variable that represents the 'cache-manager-redis-store' library.
- The 'host' property must assign our Redis store value since here I'm using a local Redis instance my hostname will be 'localhost'.
- The 'post' property contains the Redis store running the port.
Inject CacheManager:
Now in our controllers to communicate with the Redis store we need to inject the CacheManager.
import { Controller, Get, Inject, CACHE_MANAGER } from '@nestjs/common';
import {Cache} from 'cache-manager';

@Controller()
export class AppController {
  constructor(@Inject(CACHE_MANAGER) private cacheManager: Cache) {}
}
- The 'Cache' type is generic that works with any cache store and provides default methods for cache communication. The 'CACHE_MANAGER' is a lookup for the provider to be injected which means it will inject the cache-store that is registered by the CacheModule, in our sample, it will inject Redis cache-store.
Get And Set Methods:
The 'Set' method is to store our data in the Redis store. The 'Get' method to fetch data from the Redis store.
Let's store a simple string and fetch it from the Redis store by creating a sample endpoint.
src/app.controller.cs:
import { Controller, Get, Inject, CACHE_MANAGER } from '@nestjs/common';
import {Cache} from 'cache-manager';

@Controller()
export class AppController {
  fakeString = "my name is naveen"
  constructor(@Inject(CACHE_MANAGER) private cacheManager: Cache) {}
  @Get("simple-string-fetch")
  async setGetSimpleString(){
    var value = await this.cacheManager.get('my-string');
    if(value){
      return {
        data: value,
        loadsFrom: 'redis cache'
      }
    }
    await this.cacheManager.set('my-string', this.fakeString,{ttl:300});
    return{
      data:this.fakeString,
      loadsFrom:'fake database'
    }
  }
}
- (Line: 6) The 'fakeString' variable will be used to store and fetch from the Redis store.
- (Line: 10) Here first we are trying to fetch the data from the Redis store by using the key 'my-string'.
- (Line: 11-16) If data exist in the Redis store then returns it as the output of the endpoint.
- (Line: 17) If data did not exist in the Redis store then we have to store it in the Redis store using my key 'my-string'. The property 'ttl'(Time To Live) set to 300sec(5minutes) as expiration.
- (Line: 18) Returns the data from the database(Here I'm using the constant variable in real application data needs to be loaded from the database) for the first request.

Let's create an object that we want to store its data in the Redis store.
src/shared/model/profile.ts:
export interface Profile {
    name:string,
    email:string
}
Let's create a new endpoint that stores the object in the Redis store.src/app.controller.ts:
import { Controller, Get, Inject, CACHE_MANAGER } from '@nestjs/common';
import {Cache} from 'cache-manager';
import { Profile } from './shared/models/profile';

@Controller()
export class AppController {
  fakeData:Profile = {
    name:'naveen',
    email:'naveen@gmail.com'
  }
  constructor(@Inject(CACHE_MANAGER) private cacheManager: Cache) {}

  @Get("fetch-object-cache")
  async getCache(){
    var data = await this.cacheManager.get<Profile>('my-object');
    if(data){
      return {
        data:data,
        loadsFrom: 'cache'
      };
    }

    await this.cacheManager.set<Profile>('my-object', this.fakeData, {ttl: 300});
    return{
      data:this.fakeData,
      loadFrom:'fake data base'
    }
  }
}
Del And Reset Methods Of Cache-Store:
The cache store provides the method 'del('key')' used to delete the record from the cache.
await this.cacheManager.del('your_key_to_delte');
The cache store provides the method 'reset()' used to clear the entire Redis store cache.
await this.cacheManager.reset()
Auto Cache Using Interceptor:
Using 'CacheInterceptor' we can enable auto cache on the controller which will affect all 'Get' action methods inside of the controller. In the auto cache, the 'key' value for storing cache will use the route value as key.
Let's update the AppModule to import the 'CacheInterceptor' provider and also need to configure the expiration globally that will be used by the auto cache.
src/app.module.ts:
import { Module, CacheModule, CacheInterceptor } from '@nestjs/common';
import * as redisStore from 'cache-manager-redis-store';
import { AppController } from './app.controller';
import { AppService } from './app.service';
import {APP_INTERCEPTOR} from '@nestjs/core';

@Module({
  imports: [CacheModule.register({
    store:redisStore,
    host: 'localhost',
    port: 5003,
    ttl:300
  })],
  controllers: [AppController],
  providers: [
    {
      provide:APP_INTERCEPTOR,
      useClass: CacheInterceptor
    },
    AppService
  ],
})
export class AppModule {}
- The 'CacheInterceptor' will enables the auto cache to the application. Its loads from the '@nestjs/common' library. To enable it we need to import it into the provider's array.
- (Line: 12)Cache expiration time set globally using 'ttl' property. So this expiration will be utilized by the auto cache as well.
src/app.controller.cs:
import { Controller, Get, UseInterceptors, CacheInterceptor } from '@nestjs/common';
import { Profile } from './shared/models/profile';
@Controller()
@UseInterceptors(CacheInterceptor)
export class AppController {
fakeData:Profile = {
name:'naen',
email:'naveen@gmail.com'
}
constructor() {}
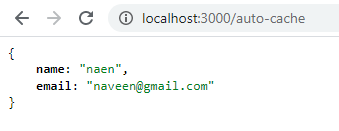
@Get("auto-cache")
get(){
return this.fakeData;
}
}

Override Auto Cache Key Name And Expiration:
An auto cache by default uses the endpoint rout value as 'key' to store into Redis store and uses the global configuration 'ttl' property for expiration. But we can override them by using decorator like '@CacheKey' to give our own 'key' to store data in the Redis store and '@CacheTTL' to set the expiration time which will override the global expiration.
Let's update our endpoint to use '@CacheKey', '@CacheTTL' decorators.
src/app.controller.cs:
import { Controller,
Get, UseInterceptors,
CacheInterceptor, CacheKey, CacheTTL } from '@nestjs/common';
import { Profile } from './shared/models/profile';

@Controller()
@UseInterceptors(CacheInterceptor)
export class AppController {
  fakeData:Profile = {
    name:'naen',
    email:'naveen@gmail.com'
  }
  constructor() {}

  @Get("auto-cache")
  @CacheKey('myCustomKey')
  @CacheTTL(300)
  get(){
    return this.fakeData;
  }
}
- (Line: 16) The '@CacheKey' decorator to give a custom 'key' name for the auto cache.
- (Line: 17) The '@CacheTTL' overrides the global expiration and can set the expiration for the action method level.

Support Me!
Buy Me A Coffee
PayPal Me
Wrapping Up:
Hopefully, I think this article delivered some useful information on Redis Store in the NestJS application. I love to have your feedback, suggestions, and better techniques in the comment section below.
thank you. This helped me to understand how redis work with nestjs.
ReplyDelete