
An Overview On ngx-print Library:
This library works based on directives. These directives make the printing HTML to PDF very easily with smooth transitions. The key terms of this library are:
- NgxPrintModule
- ngxPrint(Directive)
- printSectionId(Input Property)
- printTitle(Input Property)
- printStyle(Input Property)
- useExistingCss(Input Property)
- styleSheetFile(Input Property)
Create A Sample Angular Application:
Let's create a sample angular application where we are going to implement logic to use 'ngx-print' library.
Command To Install Angular CLI:(If not installed on your system previously)
npm install -g @angular/cli
Angular CLI Command To Create Angular App: ng new your_project_name
Command To Run App:
ng serve
Install Print Npm Package:
Command To Install Print Package
npm install ngx-print
After installing the npm package reference will be automatically added to the package.json file.
Import Print Module:
To work with the 'ngx-library' we need to import the 'NgxPrintModule' into our AppModule file.
src/app/app.module.ts:
import { BrowserModule } from '@angular/platform-browser';
import { NgModule } from '@angular/core';
import {NgxPrintModule} from 'ngx-print';

import { AppComponent } from './app.component';

@NgModule({
  declarations: [
    AppComponent
  ],
  imports: [
    BrowserModule,
    NgxPrintModule
  ],
  providers: [],
  bootstrap: [AppComponent]
})
export class AppModule { }
- Here imported 'NgxPrintModule' that is loads from the 'ngx-print' library.
'ngxPrint' Directive And 'printSelectionId' Input Property:
The 'ngxPrint' directive is the print triggering point. So it should be decorated on the button on which click we need to generate the HTML to PDF.
The 'printSelectionId' is angular input property. It should be decorated on the button like 'ngxPrint'. The value for the property is Html 'Id' value that means the Html within that 'Id' tag will be the selected region for generating the PDF.
Now let's implement logic to display todos which we want to display and print as PDF.
src/app/app.component.ts:
import { Component } from '@angular/core';

@Component({
  selector: 'app-root',
  templateUrl: './app.component.html',
  styleUrls: ['./app.component.css']
})
export class AppComponent {

  mytodos = [
    {
      item:'need to buy movie tickets',
      isCompleted:false
    },
    {
      item:'Gardening tomorrow 9:00AM',
      isCompleted:false
    },
    {
      item:'Car Washing',
      isCompleted:true
    },
    {
      item:'Buy a pen',
      isCompleted:false
    }
  ]
  title = 'print-sample';
}
- Here in our component added an array of todos items.
<div>
  <button  printSectionId="mytodosItemsId" ngxPrint >Print</button>
  <div id="mytodosItemsId">
    <h4 >My todos</h4>
    <div >
      <ul>
        <li *ngFor="let t of mytodos">
          <span [ngClass]="[t.isCompleted? 'itemCompleted':'itemInCompleted']">
		  {{t.item}}
		  </span>
        </li>
      </ul>
    </div>
  </div>
</div>
- (Line: 2) Print button decorated with 'ngxPrint' directive and 'printSectionId' input parameter. Here we want to print the data inside of the div id value 'mytodosItemId'.
- Here binding the todos item and based on todos item status dynamically adding the CSS class name.
.itemCompleted{
    color: purple;
    text-decoration: line-through;
}
.itemInCompleted{
    color: green;
    text-decoration: none;
}
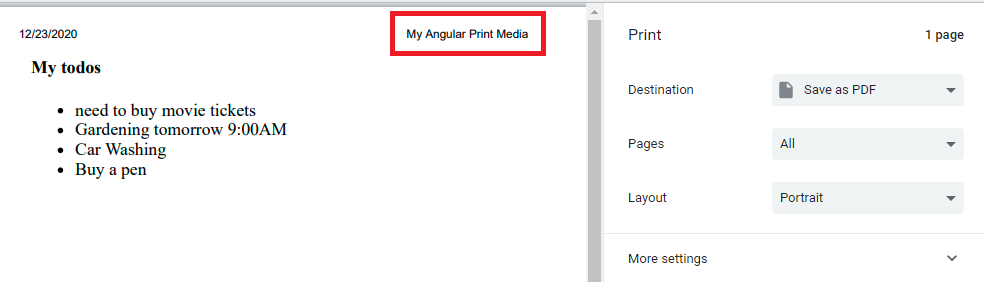
PDF Title:
We can also assign a PDF title by using the 'printTitle' input property that will be decorated on print button.
src/app/app.component.html:(Update print button)
<button
printSectionId="mytodosItemsId"
printTitle="My Angular Print Media"
ngxPrint>Print</button>
'printStyle' Input Property:
The 'printStyle' property is an object type where we can pass the style that we want to apply in our PDF file.
src/app/app.component.html:(Update print button)
<button
printSectionId="mytodosItemsId"
printTitle="My Angular Print Media"
ngxPrint
[printStyle]="{ h4: { color: 'red' } }"
>
Print
</button>
- Here we are applying style like all 'h4' tags in PDF should be in red color.

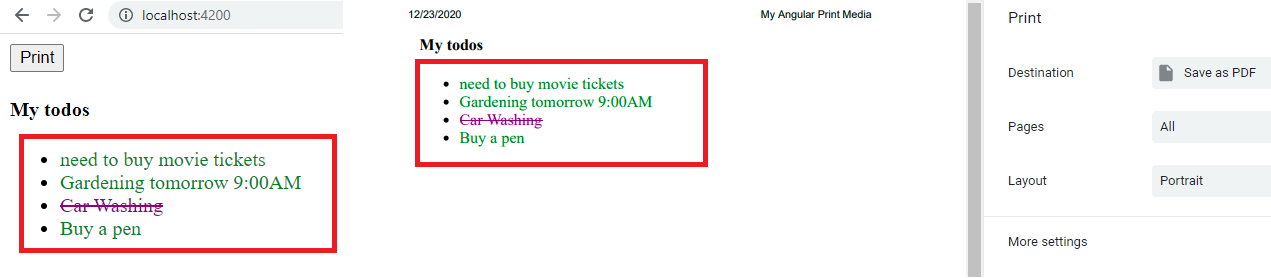
'useExistingCss' Input Property:
The 'useExistingCss' input property accepts a boolean value. This property defines pdf to use the styles on the web page.
src/app/app.component.html:(update print button)
<button
printSectionId="mytodosItemsId"
printTitle="My Angular Print Media"
ngxPrint
[useExistingCss]="true"
>
Print
</button>
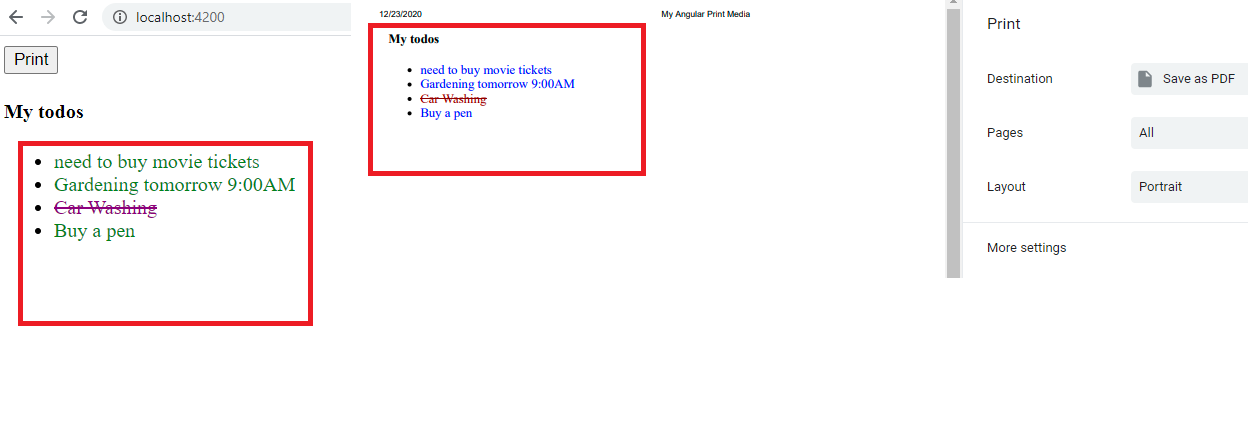
'styleSheetFile' Input Property:
The 'styleSheetFile' input property to load the external CSS file to style up the PDF file. This external file should be loads from the assets folder.
src/assets/pdf.css:
.itemCompleted{
    color: rgb(128, 0, 0);
    text-decoration: line-through;
}

.itemInCompleted{
    color: blue;
    text-decoration: none;
}
src/app/app.component.html:(update print button)
<button
printSectionId="mytodosItemsId"
printTitle="My Angular Print Media"
ngxPrint
styleSheetFile="assets/pdf.css"
>
Print
</button>
Support Me!
Buy Me A Coffee
PayPal Me
Wrapping Up:
Hopefully, I think this article delivered some useful information about 'ngx-print' library integration and implementation in angular application. I love to have your feedback, suggestions, and better techniques in the comment section below.
How to put a printer icon instead of Print word in the UI interface for printing?
ReplyDeleteHow to print same format as it is showing in webpage
ReplyDeleteHow to brack the pages with this library can you help me on this my friend
ReplyDeleteHow to apply white-space:pre-wrap for new lines, its not working with the library.
ReplyDeleteHow to use it from .ts file ?
ReplyDeleteI mean, how to use it from the component.ts
Delete