Part-3 |Blazor WebAssembly[.NET 7] JWT Authentication Series | Implement Blazor AuthenticationStateProvider & Invoke Secure Endpoint Using JWT Access Token
%20Form%20Validation%20%20React%20Hook%20Form(v7)%20%20React%20Bootstrap%20UI%20Form%20Components.png)
- Implement Blazor WebAssembly AuthenticationStateProvider
- Invoke Secure Endpoint Using JWT Access Token
AuthenticationStateProvider:
In Blazor WebAssembly user authentication information can be accessed using the 'AuthenticationStateProvider'.
Install 'Microsoft.AspNetCore.Components.Authorization' Package In Blazor Application:
Let's install the 'Microsoft.AspNetCore.Components.Authorization' package in to our 'Blazor WebAssembly' application.

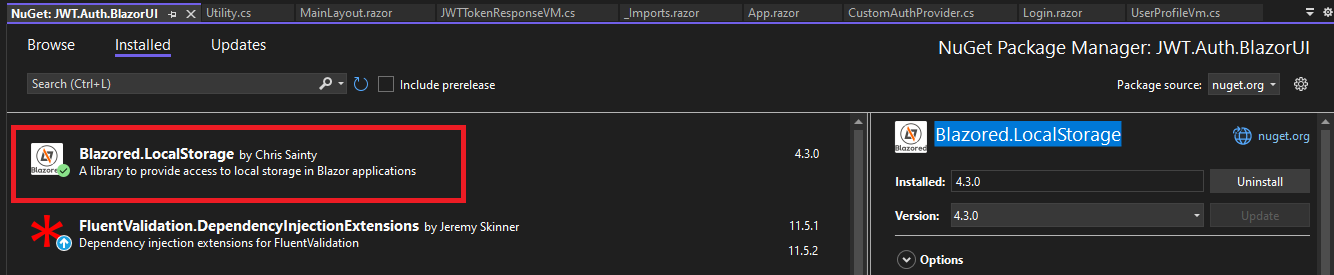
Install 'Blazored.LocalStorage' Package In Blazor Application:
To interact with browser's localstorage we have to install the 'Blazored.LocalStorage' package in the Blazor WebAssembly application.
Program.cs:
builder.Services.AddBlazoredLocalStorage();
Implement AuthenticationStateProvider In Blazor WebAssembly Application:
To create user authentication context we have to implement the 'AuthenticationStateProvider'. So let's create a class like 'CustomAuthProvider.cs' in 'Shared/Providers' folders.
Blazor_App/Shared/Providers/CustomAuthProvider.cs:
using Blazored.LocalStorage;
using Microsoft.AspNetCore.Components.Authorization;
using System.Security.Claims;
using System.Text.Json;

namespace JWT.Auth.BlazorUI.Shared.Providers
{
    public class CustomAuthProvider : AuthenticationStateProvider
    {
        private readonly ILocalStorageService _localStorageService;
        public CustomAuthProvider(ILocalStorageService localStorageService)
        {
            _localStorageService = localStorageService;
        }
        public override async Task<AuthenticationState> GetAuthenticationStateAsync()
        {
            var jwtToken = await _localStorageService.GetItemAsync<string>("jwt-access-token");
            if (string.IsNullOrEmpty(jwtToken))
            {
                return new AuthenticationState(
                    new ClaimsPrincipal(new ClaimsIdentity()));
            }
            return new AuthenticationState(
                    new ClaimsPrincipal(new ClaimsIdentity(ParseClaimsFromJwt(jwtToken), "jwtAuth")));
        }

        private static IEnumerable<Claim> ParseClaimsFromJwt(string jwt)
        {
            var claims = new List<Claim>();
            var payload = jwt.Split('.')[1];

            var jsonBytes = ParseBase64WithoutPadding(payload);

            var keyValuePairs = JsonSerializer.Deserialize<Dictionary<string, object>>(jsonBytes);
            claims.AddRange(keyValuePairs.Select(kvp => new Claim(kvp.Key, kvp.Value.ToString())));
            return claims;
        }
        private static byte[] ParseBase64WithoutPadding(string base64)
        {
            switch (base64.Length % 4)
            {
                case 2: base64 += "=="; break;
                case 3: base64 += "="; break;
            }
            return Convert.FromBase64String(base64);
        }

        public void NotifyAuthState()
        {
            NotifyAuthenticationStateChanged(GetAuthenticationStateAsync());
        }
    }
}
- (Line: 9) Inherit the 'Microsoft.AspNetCore.Components.Authorization.AuthenticationStateProvider'.
- (Line: 11-15) Injected the 'Blazored.Localstorage.ILocalStorageService'.
- (Line: 15) Here we implement the 'GetAuthenticationStateAsync()'.
- (Line: 18) Trying to read the jwt access token from the browser local storage.
- (Line: 19-23) If there is no jwt token then we create 'AuthenticationState' instance with empty 'ClaimsPrincipal' that makes user is not authenticated.
- (Line: 24-25) If token exist we will read cliams from it and then prepares the 'ClaimsPrincipal' instance and then will pass to the 'AuthenticationState'.
- (Line: 28-47) Decoding our JWT access token to read user claims from it.
- (Line: 51) The 'NotifyAuthenticationStateChanged' is used to refresh the 'AuthenticationState' provider.
Blazor_Project/Program.cs:
builder.Services.AddAuthorizationCore();
builder.Services.AddScoped<AuthenticationStateProvider, CustomAuthProvider>();
Render the 'CascadingAuthenticationState' component in 'App.razor'.
Blazor_Project/App.razor:
<CascadingAuthenticationState>
    <Router AppAssembly="@typeof(App).Assembly">
        <Found Context="routeData">
            <RouteView RouteData="@routeData" DefaultLayout="@typeof(MainLayout)" />
            <FocusOnNavigate RouteData="@routeData" Selector="h1" />
        </Found>
        <NotFound>
            <PageTitle>Not found</PageTitle>
            <LayoutView Layout="@typeof(MainLayout)">
                <p role="alert">Sorry, there's nothing at this address.</p>
            </LayoutView>
        </NotFound>
    </Router>
</CascadingAuthenticationState>
Now conditionally display 'Login' & 'Registration' links in the 'MainLayout.razor'.Blazor_Project/Shared/MainLayout.razor:(HTML Part)
<MudAppBar Color="Color.Primary" >
	<MudLink Underline="Underline.None" Color="Color.Inherit" Href="/">JWT Auth Demo</MudLink>
	<MudSpacer />
	<AuthorizeView>
		<Authorized>
			<span>@(UserDisplayName(context.User.Claims.ToList()))</span>
		</Authorized>
		<NotAuthorized>
			<MudLink Underline="Underline.None" Color="Color.Inherit" Href="/login" Class="mr-2">Login</MudLink>
			<MudLink Underline="Underline.None" Color="Color.Inherit" Href="/registration">Registration</MudLink>
		</NotAuthorized>
	</AuthorizeView>

</MudAppBar>
- Here 'AuthorizeView' component helps to render the content based on user authentication. The 'Authorized' component renders if user authenticated. In Authorized component we can access user information throught 'context.User'. The 'NotAuthorized' component renders the content if user not authenticated.
@code {
    private string UserDisplayName(List<Claim> claims)
    {
        var firstName = claims.Where(_ => _.Type == "FirstName").Select(_ => _.Value).FirstOrDefault();
        var lastName = claims.Where(_ => _.Type == "LastName").Select(_ => _.Value).FirstOrDefault();

        if(!string.IsNullOrEmpty(firstName) || !string.IsNullOrEmpty(lastName))
        {
            return $"{firstName} {lastName}";
        }
        var email = claims.Where(_ => _.Type == "Email").Select(_ => _.Value).FirstOrDefault();
        return email;
    }
}
- Here we preparing authenticated user name to display on the menu.
Blazor_Project/ViewModels/Account/JWTTokenResponseVm.cs:
namespace JWT.Auth.BlazorUI.ViewModels.Account
{
    public class JWTTokenResponseVM
    {
        public string AccessToken { get; set; }
    }
}
Now store the JWT access token to browser local storage.Blazor_Project/Pages/Account/Login.razor:(HTML Part)
  The lang-* class specifies the language file extensions.
@page "/login"
@using System.Text.Json;
@using System.Text;
@using Blazored.LocalStorage;
@using JWT.Auth.BlazorUI.Shared.Providers;
@inject HttpClient _http
@inject ILocalStorageService _localStorageService
@inject AuthenticationStateProvider _authStateProvider;
<div class="ma-6 d-flex justify-center">
    <MudChip Color="Color.Primary">
        <h3>Login Form</h3>
    </MudChip>

</div>
<div class="ma-6 d-flex  justify-center">
    <MudCard Width="500px">
        <MudForm Model="loginModel" @ref="form" Validation="loginValidation.ValidateValue">
            <MudCardContent>
                @if (!string.IsNullOrEmpty(APIErrorMessage))
                {
                    <MudChip Class="d-flex justify-center" Color="Color.Error">
                        <h3>@APIErrorMessage</h3>
                    </MudChip>
                }
                <MudTextField @bind-Value="loginModel.Email"
                              For="@(() => loginModel.Email)"
                              Immediate="true"
                              Label="Email" />
                <MudTextField @bind-Value="loginModel.Password"
                              For="@(() => loginModel.Password)"
                              Immediate="true"
                              Label="Password" InputType="InputType.Password" />
                <MudCardActions>
                    <MudButton Variant="Variant.Filled" Color="Color.Primary" Class="ml-auto" OnClick="LoginAsync">Login</MudButton>
                </MudCardActions>
            </MudCardContent>
        </MudForm>
    </MudCard>
</div>
- (Line: 8) Injected the 'ILocalStorageService'.
- (Line: 9) Injected the 'AuthenticationStateProvider'.
@code {
    LoginVm loginModel = new LoginVm();

    LoginValidationVm loginValidation = new LoginValidationVm();

    MudForm form;

    string APIErrorMessage = string.Empty;

    private async Task LoginAsync()
    {
        await form.Validate();
        if (form.IsValid)
        {
            var jsonPayload = JsonSerializer.Serialize(loginModel);
            var requestContent = new StringContent(jsonPayload, Encoding.UTF8, "application/json");


            var response = await _http.PostAsync("/api/User/login", requestContent);

            if (response.StatusCode == System.Net.HttpStatusCode.BadRequest)
            {
                var errors = await response.Content
                .ReadFromJsonAsync<Dictionary<string, List<string>>>();
                if (errors.Count > 0)
                {
                    foreach (var item in errors)
                    {
                        foreach (var errorMessage in item.Value)
                        {
                            APIErrorMessage = $"{errorMessage} | ";
                        }
                    }
                }
            }
            else if (response.StatusCode == System.Net.HttpStatusCode.OK)
            {
                var tokenResponse = await response.Content.ReadFromJsonAsync<JWTTokenResponseVM>();
                await _localStorageService.SetItemAsync<string>("jwt-access-token", tokenResponse.AccessToken);
                (_authStateProvider as CustomAuthProvider).NotifyAuthState();
            }
            else
            {
                APIErrorMessage = "Unable to do login, please try later";
            }
        }
    }
}
- (Line: 39) Storing our Jwt access token to the browser local storage.
- (Line: 40) Refreshing the AuthenticationStateProvider by calling the 'NotifyAuthState' method from the 'CustomAuthProvider'.

Configure JWT Authentication Service In API Project:
Install the 'Microsoft.AspNetCore.Authentication.JwtBearer' package in the API project.

Now register the Jwt authentication service in 'Program.cs'.
API_Project/Program.cs:
builder.Services.AddAuthentication(JwtBearerDefaults.AuthenticationScheme)
.AddJwtBearer(options =>
{
	var tokenSettings = builder.Configuration.GetSection("TokenSettings").Get<TokenSettings>();
	options.TokenValidationParameters = new TokenValidationParameters
	{
		ValidateIssuer = true,
		ValidIssuer = tokenSettings.Issuer,

		ValidateAudience = true,
		ValidAudience = tokenSettings.Audience,

		ValidateIssuerSigningKey = true,
		IssuerSigningKey = new SymmetricSecurityKey(Encoding.UTF8.GetBytes(tokenSettings.SecretKey)),

		ClockSkew = TimeSpan.Zero
	};
});
- (Line: 1) Defined the authentication type by assigning the name of the authentication type like 'JwtBearerDefaults.AuthenticationScheme'.
- (Line: 1-18) Defined the JwtBearer service with the required configuration to validate the JWT token.
- (Line: 4) Loading the token settings from the JSON file.
- (Line: 5) Initialized the 'TokenValidationParameter' instance.
- (Line: 7&8) The 'ValidIssuer' assign the value from the token settings and enable issuer validation by setting 'true' for 'ValidateIssuer'. So these configurations check the issue value inside of token matches.
- (Line: 10&11) validate the audience value in the token
- (Line: 13&14) validate the sing in signature key value.
- (Line: 16) The 'ClockSkew' set to '0' seconds considers token expiration exactly, the default value of 'ClockSkew' is '300s' seconds which means the toke will live for extra 5 minutes of original expiration time.
API_Project/Controllers/WeatherForecastController.cs:

Use HTTPClientFactory In Blazor WebAssembly Application:
Note: Currently We using default HTTPClient instance directly in our Blazor Pages. Next step we will create HTTP Delegate Handler for bi-passing the request. So to configure the HTTP Delegate Hander easily it is easy with HTTPClientFactory. So let's remove the 'HTTPClient' instance injection and replace with 'IHttpClientFactory' instance in all Blazor pages.
In Blazor Application let's install the package like the 'Microsoft.Extensions.Http' package.

Now register the 'Named Type' HttpClient instance in the 'Program.cs'
BlazorWasm_Project/Program.cs:
//builder.Services.AddScoped(sp => new HttpClient { BaseAddress = new Uri("https://localhost:7045/"), });

builder.Services.AddHttpClient("API", options => {
    options.BaseAddress = new Uri("https://localhost:7045/");
})
- Here 'API' name to register the HTTPClient instance with some configuration like domain. Same name will be used to create the HTTPClient instance from the HTTPClientFactory.
BlazorWasm_Project/Pages/Accounts/Login.razor:
@page "/login"
@using System.Text.Json;
@using System.Text;
@using Blazored.LocalStorage;
@using JWT.Auth.BlazorUI.Shared.Providers;
@inject IHttpClientFactory _httpClientFactory
@inject ILocalStorageService _localStorageService
@inject AuthenticationStateProvider _authStateProvider;
@inject NavigationManager _navigationManager

<! -- HTML content hidden for display purpose -->

@code {
    LoginVm loginModel = new LoginVm();

    LoginValidationVm loginValidation = new LoginValidationVm();

    MudForm form;

    string APIErrorMessage = string.Empty;

    private async Task LoginAsync()
    {
        await form.Validate();
        if (form.IsValid)
        {
            var jsonPayload = JsonSerializer.Serialize(loginModel);
            var requestContent = new StringContent(jsonPayload, Encoding.UTF8, "application/json");

            var httpClient = _httpClientFactory.CreateClient("API");

            var response = await httpClient.PostAsync("/api/User/login", requestContent);

            if (response.StatusCode == System.Net.HttpStatusCode.BadRequest)
            {
                var errors = await response.Content
                .ReadFromJsonAsync<Dictionary<string, List<string>>>();
                if (errors.Count > 0)
                {
                    foreach (var item in errors)
                    {
                        foreach (var errorMessage in item.Value)
                        {
                            APIErrorMessage = $"{errorMessage} | ";
                        }
                    }
                }
            }
            else if (response.StatusCode == System.Net.HttpStatusCode.OK)
            {
                var tokenResponse = await response.Content.ReadFromJsonAsync<JWTTokenResponseVM>();
                await _localStorageService.SetItemAsync<string>("jwt-access-token", tokenResponse.AccessToken);
                (_authStateProvider as CustomAuthProvider).NotifyAuthState();
                _navigationManager.NavigateTo("/fetchdata");
            }
            else
            {
                APIErrorMessage = "Unable to do login, please try later";
            }
        }
    }
}
- (Line: 6) Injected the 'IHttpClientFactory'
- (Line: 9) Injected the 'NavigationManager'
- (Line: 30) Creating the 'HttpClient' instance from the 'IHttpClientFactory' by using the registered name.
- (Line: 54) On successful login navigate to 'fetchdata' page.
BlazorWasm_Project/Pages/Accounts/Registration.razor:
@page "/registration"
@using System.Text.Json;
@using System.Text;
@inject IHttpClientFactory _httpClientFactory
@inject NavigationManager _navigationManager

<!-- Html content hidden for display purpose -->

@code {
    RegistrationVM registrationModel = new RegistrationVM();

    RegistrationValidationVm registrationValidator;

    MudForm form;

    string APIErrorMessage = string.Empty;


    protected override Task OnInitializedAsync()
    {
        var httpClient = _httpClientFactory.CreateClient("API");
        registrationValidator = new RegistrationValidationVm(httpClient);
        return base.OnInitializedAsync();
    }


    private async Task RegisterAsync()
    {
        await form.Validate();
        if (form.IsValid)
        {
            // invoke register API call.
            var jsonPayload = JsonSerializer.Serialize(registrationModel);
            var requestContent = new StringContent(jsonPayload, Encoding.UTF8, "application/json");

            var httpClient = _httpClientFactory.CreateClient("API");
            var response = await httpClient.PostAsync("/api/user/register", requestContent);
            if(response.StatusCode == System.Net.HttpStatusCode.BadRequest)
            {
                var errors = await response.Content
                .ReadFromJsonAsync<Dictionary<string, List<string>>>();
                if(errors.Count > 0)
                {
                    foreach (var item in errors)
                    {
                        foreach (var errorMessage in item.Value)
                        {
                            APIErrorMessage = $"{errorMessage} | ";
                        }
                    }
                }
            }
            else if(response.StatusCode == System.Net.HttpStatusCode.OK)
            {
                _navigationManager.NavigateTo("/registration-confirmation");
            }
            else
            {
                APIErrorMessage = "Failed To Register User Please Try After SomeTime";
            }
        }
    }
}
- (Line: 4) Injected the 'IHttpClientFactory'.
- (Line: 22&37) Creating the HttpClient instance from the IHttpClientFactory.
BlazorWasm_Project/Pages/FetchData.razor:
@page "/fetchdata"

@inject IHttpClientFactory _httpClientFactory

<!-- Html content hidden for display purpose -->

@code {
    private WeatherForecast[]? forecasts;

    protected override async Task OnInitializedAsync()
    {

        var httpClient = _httpClientFactory.CreateClient("API");
        forecasts = await httpClient.GetFromJsonAsync<WeatherForecast[]>("/WeatherForecast");
    }

    public class WeatherForecast
    {
        public DateOnly Date { get; set; }

        public int TemperatureC { get; set; }

        public string? Summary { get; set; }

        public int TemperatureF => 32 + (int)(TemperatureC / 0.5556);
    }
}
- (Line: 3) Injected the 'IHttpClientFactory'.
- (Line: 13) Creating the HttpClient instance from the 'IHttpClientFactory'.
- (Line: 14) Configured the 'WeatherForeCast' endpoint.
BlazorWasm_Project/Shared/MainLayout.razor:
<MudAppBar Color="Color.Primary" >
	<MudLink Underline="Underline.None" Color="Color.Inherit" Href="/">JWT Auth Demo</MudLink>
	<AuthorizeView>
		<Authorized>
			<MudLink Underline="Underline.None" Color="Color.Inherit" Href="/fetchdata" Class="ml-2">Weather Forecast</MudLink>
		</Authorized>
	</AuthorizeView>
	<MudSpacer />
	<AuthorizeView>
		<Authorized>
			<span>@(UserDisplayName(context.User.Claims.ToList()))</span>
		</Authorized>
		<NotAuthorized>
			<MudLink Underline="Underline.None" Color="Color.Inherit" Href="/login" Class="mr-2">Login</MudLink>
			<MudLink Underline="Underline.None" Color="Color.Inherit" Href="/registration">Registration</MudLink>
		</NotAuthorized>
	</AuthorizeView>
</MudAppBar>
- (Line: 5) The 'Weather Forecast' menu item.
Create DelegatingHandler In Blazor Application:
The DelegatingHandler helps to bypass the request. Here in our case, we want to add the authorization heder with jwt token as value.
Let's create a class like 'CustomHttpHandler.cs' in the 'Shared/Providers' folder.
BlazorWasm_Project/Shared/Providers/CustomHttpHandler.cs:
using Blazored.LocalStorage;

namespace JWT.Auth.BlazorUI.Shared.Providers
{
    public class CustomHttpHandler: DelegatingHandler
    {
        private readonly ILocalStorageService _localStorageService;
        public CustomHttpHandler(ILocalStorageService localStorageService)
        {
            _localStorageService = localStorageService;
        }
        protected override async Task<HttpResponseMessage> SendAsync(HttpRequestMessage request, CancellationToken cancellationToken)
        {
            if(request.RequestUri.AbsolutePath.ToLower().Contains("login") ||
                request.RequestUri.AbsolutePath.ToLower().Contains("registration"))
            {
                return await base.SendAsync(request, cancellationToken);
            }

            var jwtToken = await _localStorageService.GetItemAsync<string>("jwt-access-token");

            if (!string.IsNullOrEmpty(jwtToken))
            {
                request.Headers.Add("Authorization", $"bearer {jwtToken}");
            }

            return await base.SendAsync(request, cancellationToken);
        }
    }
}
- (Line: 5) Implement the 'DelegatingHandler' abstract class.
- (Line: 7-11) Injected the 'ILocalStorageService'.
- (Line: 12-29) Override the 'SendAsync' method. For 'login' & 'registration' endpoint normal flow. For another endpoint request, we are adding the 'Authorization' header with the JWT token as a value.
BlazorWasm_Project/Program.cs:
builder.Services.AddHttpClient("API", options => {
    options.BaseAddress = new Uri("https://localhost:7045/");
})
.AddHttpMessageHandler<CustomHttpHandler>();

builder.Services.AddScoped<CustomHttpHandler>();

Implement Route Protection:
If the user is not authenticated and trying to consume secured pages then need to restrict access. If the user is authenticated and trying to consume pages like 'login', 'registration', etc then need to restrict access.
Let's create a new component like 'RedirectToLogin.razor'
BlazorWasm_Project/Shared/RedirectToLogin.razor:
<h3>RedirecToLogin</h3>
@inject NavigationManager _navigation
@code {
    protected override void  OnInitialized()
    {
        _navigation.NavigateTo("/login");
    }
}
- Here we just redirecting to the 'Login.razor' component.
BlazorWasm_Project/App.razor:
<CascadingAuthenticationState>
    <Router AppAssembly="@typeof(App).Assembly">
        <Found Context="routeData">
             <AuthorizeRouteView RouteData="@routeData" DefaultLayout="@typeof(MainLayout)">
                 <NotAuthorized>
                    @if (context.User.Identity?.IsAuthenticated != true)
                    {
                        <RedirecToLogin/>
                    }

                 </NotAuthorized>

                 </AuthorizeRouteView>
            <FocusOnNavigate RouteData="@routeData" Selector="h1" />
        </Found>
        <NotFound>
            <PageTitle>Not found</PageTitle>
            <LayoutView Layout="@typeof(MainLayout)">
                <p role="alert">Sorry, there's nothing at this address.</p>
            </LayoutView>
        </NotFound>
    </Router>
</CascadingAuthenticationState>
- (Line: 4-13) Configured the 'AuthoirzedRouteView' component, inside of it added not the 'NotAutherized' component. So if any user tries to access an au authorized page then content inside of 'NotAuthenticated' gets executed. Here we checking the user is authenticated or not if not authenticated then we invoke the 'RedireToLogin' component.
BlazorWasm_Project/Pages/FetchData.razor:
@using Microsoft.AspNetCore.Authorization;
@attribute [Authorize]
Now if the user is authenticated and tries to access the 'login' or 'registration' page then let's redirect user to home page. In our application home page is a guest page both authenticated and non-authenticated users can access. Now let's add the following code Login.razor and 'Registration.razor' pages
BlazorWasm_Project/Pages/Accounts/(Login.razor and Registraion.razor):
[CascadingParameter]
public Task<AuthenticationState> authState { get; set; }

protected override async Task OnInitializedAsync()
{
	var user = (await authState).User;
	if (user.Identity.IsAuthenticated)
	{
		_navigationManager.NavigateTo("/");
	}
	base.OnInitializedAsync();
}
In the next article, we will implement the Refresh Token.Hopefully, I think this article delivered some useful information on the.NET7 Blazor WebAssembly JWT Authentication. using I love to have your feedback, suggestions, and better techniques in the comment section below.
Refer:
Part-4 |Blazor WebAssembly[.NET 7] JWT Authentication Series | Implement Refresh Token & User Logout
I am using your articles as a reference. When do you think you will publish the next one?
ReplyDeleteBest regards and thank you in advance.