
NgRx Data:
In general angular application uses NgRx store, effects, entity, etc libraries to maintain state. The trade-off with the '@ngrx/store' is we have to write a huge number of actions, reducers, effects, selectors, HTTP API calls per entity model, etc resulting in more numbers of files needing to be maintained.
Using NgRx Data we can reduce our code to very little despite having a large number of entity models in our application. The NgRx Data is an abstraction over the Store, Effects, and Entity that reduces the amount of code we have to write. By gaining the abstraction benefit, we are going to lose our direct interaction with NgRx libraries.
When to use NgRx Data?:
- NgRx Data is a good choice when our application involves a lot of 'Create', 'Read', 'Update', 'Delete' operations.
- Our Entity Model should contain a primary key value or unique key.
- No requirement to interact with Ngrx libraries.
Most recommended way to use NgRx Data(@ngrx/data) along with NgRx Store(@ngrx/store) combination.

NgRx Data Flow:
- Using NgRx Data we never contact the store directly, every store operation is carried out implicitly.
- In NgRx Data our main point of contact to interact with the store is EntityCollectionService.
- Using EntityCollectionService for each entity can invoke API calls with default methods like 'getAll()','add()', 'delete()', 'update()'.
- So from our angular component, we need to invoke any one method from the 'EntityCollectionService'.
- Then internally EntityActions gets triggered and raises the action method to invoke the API call base on our entity model.
- On API success EntityAction raises a new action method to invoke the 'EntityCollectionReducers'.
- So from the 'EntityCollectionReducer' appropriate reducer gets invoked and updates the data to store.
- On stage change, selectors will fetch the data into the angular component from the store.
Create An Angular(14) Application:
Let's create an angular(14) application to accomplish our demo.
Command To Create Angular Application
ng new your_app_name
ng new your_app_name
Install the bootstrap package
Command To Create Angular Application
npm install bootstrap
npm install bootstrap
Configure Bootstrap CSS and JS files in 'angular.json'.

src/app/app.component.html:
<nav class="navbar navbar-dark bg-warning">
  <div class="container-fluid">
    <div class="navbar-brand">Bakery Store</div>
  </div>
</nav>
Setup JSON Server:
Let's set up a fake API by setting up the JSON server in our local machine.
Run the below command to install the JSON server globally onto your local machine.
npm install -g json-server
Now go to our angular application and add a command to run the JSON server into the 'package.json' file.

npm run json-run
After running the above command for the first time, a 'db.json' file gets created, so this file act as a database. So let's add some sample data in the 'db.json' file as below.

Now access the API endpoint like 'http://localhost:3000/cakes'.

Install NgRx Packages:
To implement NgRx Data we have to depend on 'NgRx Store', 'NgRx Effects', and 'NgRx Entity', so we have to install all those packages.
Command To Install NgRx Store
ng add @ngrx/store@latest
ng add @ngrx/store@latest
Command To Install NgRx Effects
ng add @ngrx/effects@latest
ng add @ngrx/effects@latest
Command To Install NgRx Entity
ng add @ngrx/entity@latest
ng add @ngrx/entity@latest
Command To Install NgRx Data
ng add @ngrx/data@latest
ng add @ngrx/data@latest
Command To Install NgRx DevTools
ng add @ngrx/store-devtools@latest
ng add @ngrx/store-devtools@latest
After installing the NgRx package, import the 'HttpClientModule' in 'AppModule'.
src/app/app.module.ts:
import { HttpClientModule } from '@angular/common/http';
// existing hidden for display purpose
@NgModule({
  imports: [
    HttpClientModule
  ]
})
export class AppModule { }
Create An Angular Feature Module(Ex: Cakes Module) And A Component(Ex: Home Component):
Let's create a Feature Module or Child Module. Run the below command to create.
ng generate module cakes --routing

ng generate component cakes/home --skip-tests

In this demo, we will implement lazy loading. So let's configure routing for the 'Cakes' module to load lazily.
src/app/app-routing.module.ts:
// existing code hidden for display purpose
const routes: Routes = [{
  path:'',
  loadChildren: () => import("./cakes/cakes.module").then(_ => _.CakesModule)
}];
Let's configure the route for the 'Home' component in the 'Cakes' routing module.src/app/cakes/cakes-routing.module.ts:
import { HomeComponent } from './home/home.component';
// existing code hidden for display purpose
const routes: Routes = [
  {
    path: '',
    component: HomeComponent,
  },
];
Create A Model And A Entity Metadata In Cake Module(Feature/Child Module):
NgRx data depends on the Model or Entity which is the type for the data to be stored. Each model must be registered in the 'Entity MetaData'.
Let's create a 'Cakes' Model in our Feature Module(Cake Module).
ng generate interface cakes/store/cakes
src/app/cakes/store/cakes.ts:
export interface Cakes {
  id: number;
  name: string;
  description: string;
  cost: number;
}
Let's create an Entity Meta Data for our Feature Module(Cake Module) like 'cakes-entity-metadata.ts'.src/app/cakes/store/cake-entity-metadata.ts:
import { EntityMetadataMap } from "@ngrx/data";
import { Cakes } from "./cakes";

export const cakesEntityMetaData: EntityMetadataMap = {
    Cake:{
        selectId:(cake:Cakes) => cake.id
    }
}
- Here 'EntityMetadataMap' loads from the '@ngrx/data'. Here we have to register all the entity models(eg: Cakes) that are related to our feature module(eg: Cakes module).
- (Line: 5) Here defined the entity name like 'Cake'. This name plays a very crucial role in our NgRx data. By pluralizing the entity name like 'Cakes' then NgRx Data will generate the URLs of our API with plural names.
- In general, our entity model should contain the primary key property mostly 'Id' to work with NgRx Data. By default 'Id' property will be recognized by the NgRx Data, but if we want to specify our custom property as the primary key then we have to use the 'selectId' property like above.
- Along with 'selectId' property, EntityMetadataMap provides so many different props, so explore them if needed.
Now register the 'cookieEntityMetaData' in 'CookiesModule'.
src/app/cookies/cookies.module.ts:
import { EntityDefinitionService } from '@ngrx/data';
import { cakesEntityMetaData } from './store/cakes-entity-metadata';

@NgModule({
  declarations: [HomeComponent],
  imports: [CommonModule, CakesRoutingModule],
})
export class CakesModule {
  constructor(entityDefinitionService: EntityDefinitionService) {
    entityDefinitionService.registerMetadataMap(cakesEntityMetaData);
  }
}
- Here using 'EntityDefinitionService' registered our 'cakesEntityMetaData'.
EntityCollectionService:
An EntityCollectionService is the main tool for the NgRx data to handle the 'dispatcher' and 'selector$' that manages an entity collection cached in the NgRX store.
The 'Dispatcher' features a command method that dispatches entity actions to the NgRx store. So these dispatcher commands can update the store directly or invoke the HTTP request. In case of invoking HTTP requests, on successful response again new action will be invoked to update the entity collection in the store.
The 'selectors$' are properties returning selector observables. Each observable watches for a specific change in the cached entity collection and emits the changed value.
Implement Read Operation:
Let's implement the read operation which means invoking the API call, saving the API response into the store, and then reading the data from the store.
Let's update the logic in 'home.component.ts' as below
src/app/cakes/home/home.component.ts:
import { Component, OnInit } from '@angular/core';
import {
  EntityCollectionService,
  EntityCollectionServiceFactory,
} from '@ngrx/data';
import { Observable } from 'rxjs';
import { Cakes } from '../store/cakes';

@Component({
  selector: 'app-home',
  templateUrl: './home.component.html',
  styleUrls: ['./home.component.css'],
})
export class HomeComponent implements OnInit {
  constructor(serviceFactory: EntityCollectionServiceFactory) {
    this.cakeService = serviceFactory.create<Cakes>('Cake');
    this.allCakes$ = this.cakeService.entities$;
  }

  allCakes$: Observable<Cakes[]>;
  cakeService: EntityCollectionService<Cakes>;

  ngOnInit(): void {
    this.cakeService.getAll();
  }
}
- (Line: 15) Here injected the 'EntityCollectionServiceFactory' that loads from the '@ngrx/data'.
- (Line: 16) Creating the instance of 'EntityCollectionService' from the 'EntityCollectionServiceFactory'. Here we used the name 'Cake' this name is nothing but the property name that we registered in the 'cakesEntityMetaData'.
- (Line: 17) Here 'EntityCollectionService.entities$' observable fetches the data that was stored in the NgRx store.
- (Line: 20) Here declared the 'allCakes$' variable which is of type 'Observable<Cakes[]>'.
- (Line: 21) Here declared the 'cakeService' variable which is of type 'EntityCollectionService<Cakes>'.
- (Line: 24) The 'EntityCollectionService.getAll()' is a default HTTP get method that will implicitly frame URL based property name(eg: 'Cake') in 'cakeEntityMetaData', implicitly invokes the actions, 'effects', 'reducer' to generate the state based on the API repsonse.
<div class="container mt-2">
  <div class="row row-cols-1 row-cols-md-3 g-4">
    <div class="col" *ngFor="let cake of allCakes$ | async">
      <div class="card">
        <div class="card-body">
          <h5 class="card-title">{{ cake.name }}</h5>
          <ul class="list-group list-group-flush">
            <li class="list-group-item">Price: {{ cake.cost }}</li>
          </ul>
        </div>
        <div class="card-body">
          <p>{{ cake.description }}</p>
        </div>
      </div>
    </div>
  </div>
</div>
Now if we run the application API call will fail because the auto-generated API URL by NgRx Data is "http://localhost:4000/api/cakes/", but the actual API URL is "http://locast:3000/cakes". To update the API URL we have to implement the DefultHttpURLGenerator service.Let's create a service that implements DefaultHttpURLGenerator.
ng generate class shared/store/customurl-http-generator --skip-tests
src/app/shared/store/customurl-http-generator.ts:
import { Injectable } from '@angular/core';
import { DefaultHttpUrlGenerator, HttpResourceUrls, Pluralizer } from '@ngrx/data';
@Injectable()
export class CustomurlHttpGenerator extends DefaultHttpUrlGenerator {
  constructor(pluralizer: Pluralizer) {
    super(pluralizer);
  }

  protected override getResourceUrls(
    entityName: string,
    root: string,
    trailingSlashEndpoints?: boolean
  ): HttpResourceUrls {
    let resourceURLs = this.knownHttpResourceUrls[entityName];
    if (entityName == 'Cake') {
      resourceURLs = {
        collectionResourceUrl: 'http://localhost:3000/cakes/',
        entityResourceUrl: 'http://localhost:3000/cakes/',
      };
      this.registerHttpResourceUrls({ [entityName]: resourceURLs });
    }
    return resourceURLs;
  }
}
- (Line: 4) Extending the 'DefaultHttpUrlGenerator' that loads from the '@ngrx/data'
- (Line: 9) Overriding the 'getResourURLS'
- Here based on the 'entityName' we replacing the API URL. Here 'entityName' is nothing but the property name in the 'cakeEntityMetaData'.
src/app/app.module.ts:
import { EntityDataModule, HttpUrlGenerator } from '@ngrx/data';
import { CustomurlHttpGenerator } from './shared/store/customurl-http-generator';
// existing code hidden for display purpose
@NgModule({

  providers: [
    {
      provide: HttpUrlGenerator,
      useClass: CustomurlHttpGenerator,
    },
  ]
})
export class AppModule { }
Now we can observe data get rendered.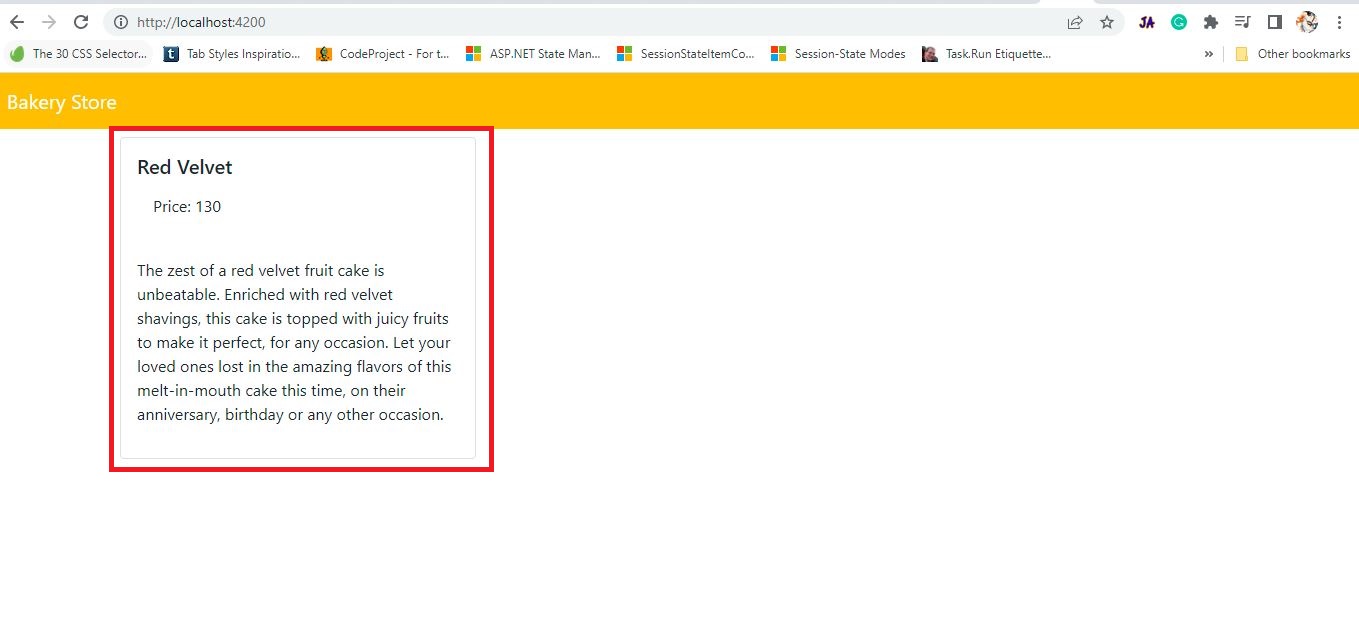
Create 'Add' Component:
Let's create a new component like 'Add' at the 'Cakes' module.
ng generate component cakes/add --skip-tests
Let's configure the 'Add' component routing in 'CakeRoutingModule'.
src/app/cakes/cakes-routing.module.ts:
import { AddComponent } from './add/add.component';
// exisiting code removed for display purpose
const routes: Routes = [
  {
    path: 'add',
    component: AddComponent
  },
];
Implementing Create Operation:
Let's implement the 'Create' operation using NgRx Data.
Let's update the logic in the 'Add' component as below.
src/app/cakes/add/add.component.ts:
import { Component, OnInit } from '@angular/core';
import { Router } from '@angular/router';
import { EntityCollectionService, EntityCollectionServiceFactory } from '@ngrx/data';
import { Cakes } from '../store/cakes';

@Component({
  selector: 'app-add',
  templateUrl: './add.component.html',
  styleUrls: ['./add.component.css']
})
export class AddComponent implements OnInit {

  constructor(
    serviceFactory: EntityCollectionServiceFactory,
    private router: Router
  ) {
    this.cakeService = serviceFactory.create<Cakes>('Cake');
  }
  cakeService: EntityCollectionService<Cakes>;

  cakeForm: Cakes = {
    id: 0,
    description: '',
    name: '',
    cost: 0,
  };

  ngOnInit(): void {}

  save() {
    this.cakeService.add(this.cakeForm).subscribe(() => {
      this.router.navigate(['/']);
    });
  }

}
- (Line: 14) Injected the 'EntityCollectionServiceFactory' that loads from the '@ngrx/data'
- (Line: 15) Injected the 'Router' service that loads from the '@angular/router'.
- (Line: 17) Creating the 'EntityCollectionService' instance using 'EntityCollectionServiceFactory'. Here service name 'Cake' is the property name in 'cakeEntityMetaData'.
- (Line: 19) Declared 'cakeService' variable of type 'EntityCollectionService'.
- (Line: 21-26) The 'cakeForm' variable binds with angular form.
- (Line: 31-33) The 'EntiyCollectionService.add()' method invokes the HTTP Post call to create a item at server.
<div class="container">
  <legend>Add A New Cake</legend>
  <div class="mb-3">
    <label for="txtName" class="form-label">Name of Cake</label>
    <input
      type="text"
      [(ngModel)]="cakeForm.name"
      class="form-control"
      id="txtName"
    />
  </div>
  <div class="mb-3">
    <label for="txtdescription" class="form-label">Description</label>

    <textarea
      type="text"
      [(ngModel)]="cakeForm.description"
      class="form-control"
      id="txtdescription"
    ></textarea>
  </div>
  <div class="mb-3">
    <label for="txtCost" class="form-label">Cost</label>
    <input
      type="number"
      [(ngModel)]="cakeForm.cost"
      class="form-control"
      id="txtCost"
    />
  </div>
  <button type="button" class="btn btn-warning" (click)="save()">Create</button>
</div>
Let's import the 'FormsModule' in the 'CakesModule'.src/app/cakes/cakes.module.ts:
import { FormsModule } from '@angular/forms';
// existing code hidden for display purpose
@NgModule({
  imports: [FormsModule],
})
export class CakesModule {
  constructor(entityDefinitionService: EntityDefinitionService) {
    entityDefinitionService.registerMetadataMap(cakesEntityMetaData);
  }
}
In 'home.component.html' add the 'Add A New Cake' button.
src/app/cakes/home/home.component.html:
<div class="row">
<div class="col col-md4 offset-md-4">
  <a routerLink="/add" class="btn btn-warning">Add A New Book</a>
</div>
</div>
(step:1)

(step 2)

Create 'Edit' Component:
Let's create a new component like 'Edit' at the 'Cake' module.
ng generate component cakes/edit --skip-tests
Let's add the 'Edit' component route to the 'Cake' module.
import { EditComponent } from './edit/edit.component';

const routes: Routes = [
  {
    path: 'edit/:id',
    component: EditComponent
  }
];
- Here ':id' represents the dynamic value part of the path.
Implement Update Operation:
Let's implement the update operation using the NgRx Data.
Let's update the logic in the 'Edit' component as below.
src/app/cakes/edit/edit.component.ts:
import { Component, OnInit } from '@angular/core';
import { ActivatedRoute, Router } from '@angular/router';
import { EntityCollectionService, EntityCollectionServiceFactory } from '@ngrx/data';
import { combineLatest } from 'rxjs';
import { Cakes } from '../store/cakes';

@Component({
  selector: 'app-edit',
  templateUrl: './edit.component.html',
  styleUrls: ['./edit.component.css']
})
export class EditComponent implements OnInit {

  constructor(
    serviceFactory: EntityCollectionServiceFactory,
    private router: Router,
    private route: ActivatedRoute
  ) {
    this.cakeService = serviceFactory.create<Cakes>('Cake');
  }
  cakeService: EntityCollectionService<Cakes>;

  cakeForm: Cakes = {
    id: 0,
    description: '',
    name: '',
    cost: 0,
  };

  ngOnInit(): void {
    let fetchFormData$ = combineLatest([
      this.route.paramMap,
      this.cakeService.entities$,
    ]).subscribe(([params, cakes]) => {
      var id = Number(params.get('id'));
      var filteredCake = cakes.filter((_) => _.id == id);
      if (filteredCake) {
        this.cakeForm = { ...filteredCake[0] };
      }
    });
  }
  update() {
    this.cakeService.update(this.cakeForm).subscribe(() => {
      this.router.navigate(["/"]);
    })
  }

}
- (Line: 31-40) Here 'combineLatest' that load from the 'rxjs'. The 'combineLatest' executes with the latest output from all observables registered inside of it. Here we fetch the item 'id' value from the URL and filter it against the store data to populate it on the edit form.
- (Line: 43) The 'EntityCollectionService.update()' is used to invoke the HTTP PUT API call to update the data at the server.
Let's add the 'Edit' button to the 'app.component.html'.
src/app/app.component.html:
<div class="card-body">
  <a class="btn btn-warning" [routerLink]="['/edit', cake.id]">Edit</a> |
</div>
- Here generating the 'edit' button URL dynamically by adding the 'id' value.


Implement Delete Operation:
Let's implement the delete operation using the NgRx data.
Let's update the 'home.component.ts' as below.
src/app/cakes/home/home.component.ts:
import { Component, OnInit } from '@angular/core';
import {
  EntityCollectionService,
  EntityCollectionServiceFactory,
} from '@ngrx/data';
import { Observable } from 'rxjs';
import { Cakes } from '../store/cakes';

declare var window: any;

@Component({
  selector: 'app-home',
  templateUrl: './home.component.html',
  styleUrls: ['./home.component.css'],
})
export class HomeComponent implements OnInit {
  constructor(serviceFactory: EntityCollectionServiceFactory) {
    this.cakeService = serviceFactory.create<Cakes>('Cake');
    this.allCakes$ = this.cakeService.entities$;
  }

  allCakes$: Observable<Cakes[]>;
  cakeService: EntityCollectionService<Cakes>;

  deleteModal: any;
  idToDelete: number = 0;

  ngOnInit(): void {
    this.deleteModal = new window.bootstrap.Modal(
      document.getElementById('deleteModal')
    );

    this.cakeService.getAll();
  }

  openDeleteModal(id: number) {
    this.idToDelete = id;
    this.deleteModal.show();
  }

  confirmDelete() {
    this.cakeService.delete(this.idToDelete)
    .subscribe((data) => {
      this.deleteModal.hide();
    })
  }
}
- (Line: 9) Declare the window instance.
- (Line: 25) The 'deleteModal' variable is declared to assign the instance of the bootstrap modal.
- (Line: 26) The 'idToDelete' variable to store the item to delete.
- (Line: 29-31) The instance of the bootstrap is assigned to the 'deleteModal'.
- (Line: 36-39) The 'openDeleteModal' opens the popup to display the delete confirmation. The 'show()' method opens the bootstrap modal.
- (Line: 41-46) The 'EntityCollectionServices.delete()' method invokes the HTTP delete API call.
<div class="container mt-2">
  <div class="row">
    <div class="col col-md4 offset-md-4">
      <a routerLink="/add" class="btn btn-warning">Add A New Book</a>
    </div>
  </div>
  <div class="row row-cols-1 row-cols-md-3 g-4">
    <div class="col" *ngFor="let cake of allCakes$ | async">
      <div class="card">
        <div class="card-body">
          <h5 class="card-title">{{ cake.name }}</h5>
          <ul class="list-group list-group-flush">
            <li class="list-group-item">Price: {{ cake.cost }}</li>
          </ul>
        </div>
        <div class="card-body">
          <p>{{ cake.description }}</p>
        </div>
        <div class="card-body">
          <a class="btn btn-warning" [routerLink]="['/edit', cake.id]">Edit</a> |
          <button type="button" class="btn btn-danger" (click)="openDeleteModal(cake.id)">
            Delete
          </button>
        </div>
      </div>
    </div>
  </div>
</div>

<div
  class="modal fade"
  id="deleteModal"
  tabindex="-1"
  aria-labelledby="exampleModalLabel"
  aria-hidden="true"
>
  <div class="modal-dialog">
    <div class="modal-content">
      <div class="modal-header">
        <h5 class="modal-title" id="exampleModalLabel">Delete Confirmation</h5>
        <button
          type="button"
          class="btn-close"
          data-bs-dismiss="modal"
          aria-label="Close"
        ></button>
      </div>
      <div class="modal-body">Are you sure to delete this item?</div>
      <div class="modal-footer">
        <button type="button" class="btn btn-secondary" data-bs-dismiss="modal">
          Close
        </button>
        <button type="button" class="btn btn-danger" (click)="confirmDelete()">
          Confirm Delete
        </button>
      </div>
    </div>
  </div>
</div>
- (Line: 21-23) The 'Delete' button click event registered with 'openDeleteModal()' method.
- (Line: 30-51) Delete confirmation popup modal HTML.

Support Me!
Buy Me A Coffee
PayPal Me
Video Session:
Wrapping Up:
Hopefully, I think this article delivered some useful information on the Angular 14 State Management CRUD example with NgRx(14) Data. using I love to have your feedback, suggestions, and better techniques in the comment section below.
This is a very good tutorial to learn ngrx-data. Thank you. It was only a bit difficult to follow it because sometimes there were the wrong file names given. And also some tiny code snippets were missing in the blog but with the video I got it finally. I think a remote-repository would be helpful like GitHub to verify the code in order to make it easier to get a running copy of this tutorial. I am also a newbie and it took a bit to understand that it cannot work when I only have the client running. So I opened a second terminal to run the server in parallel. And also my bootstrap-cards have another display in the browser than yours. Actually they look quite unorganised and also the input-fields look different. I do not know why. But I wanted to learn ngrx-data so for this reason it was a great tutorial. Thank you very much.
ReplyDelete