
Targets Of Blazor WebAssembly Cookie Auth Series:
Let's have look at this Blazor WebAssmbly series:
- Part -1 is simple asp.net core cookie authentication.
- Part-2 is cookie authentication with FaceBook.
- Part-3 is cookie authentication with Twitter.
- Part-4 is cookie authentication with Google.
- Part-5 is cookie authentication with Microsoft.
Blazor WebAssembly Cookie Authentication Flow:

- We must have 2 applications 'Blazor WebAssembly Application'(which runs on the user browser), and 'Asp.Net Core API'(which runs on the server).
- Blazor WebAssembly requests the API for user authentication by sending the user credentials to API.
- For valid credentials, API generates auth cookie and sends it to the client application.
- So after successful authentication of every request from Blazor WebAssembly to API, the auth cookie will be attached to every subsequent request to make the request as authenticated.
Create A Sample User Table:
Let's run the below SQL script to create a sample user table.
CREATE TABLE [dbo].[User](
	[Id] [int] IDENTITY(1,1) NOT NULL,
	[Email] [varchar](200) NULL,
	[FirstName] [varchar](100) NULL,
	[LastName] [varchar](100) NULL,
	[Password] [varchar](200) NULL,
	[ExternalLoginName] [varchar](50) NULL,
 CONSTRAINT [PK_User] PRIMARY KEY CLUSTERED
(
	[Id] ASC
)WITH (PAD_INDEX = OFF, STATISTICS_NORECOMPUTE = OFF, IGNORE_DUP_KEY = OFF, ALLOW_ROW_LOCKS = ON, ALLOW_PAGE_LOCKS = ON) ON [PRIMARY]
) ON [PRIMARY]
Create A .NET6 Web API Application:
Let's create a .Net6 Web API sample application to accomplish our demo. We can use either Visual Studio 2022 or Visual Studio Code(using .NET CLI commands) to create any .NET6 application. For this demo, I'm using the 'Visual Studio Code'(using the .NET CLI command) editor.
.NET CLI Command:
dotnet new webapi -o Your_Project_Name
dotnet new webapi -o Your_Project_Name
Install EntityFramework Core NuGet Package Into API Project:
Now install the following package into the API project.
Let's install the Entity Framework Core NuGet package.
Package Manager Command:
Install-Package Microsoft.EntityFrameworkCore -Version 6.0.3
Install-Package Microsoft.EntityFrameworkCore -Version 6.0.3
.NET CLI Command:
dotnet add package Microsoft.EntityFrameworkCore --version 6.0.3
dotnet add package Microsoft.EntityFrameworkCore --version 6.0.3
Let's install the Entity Framework Core SQL NuGet package.
Package Manager Command:
Install-Package Microsoft.EntityFrameworkCore.SqlServer -Version 6.0.3
Install-Package Microsoft.EntityFrameworkCore.SqlServer -Version 6.0.3
.NET CLI Command:
dotnet add package Microsoft.EntityFrameworkCore.SqlServer --version 6.0.3
dotnet add package Microsoft.EntityFrameworkCore.SqlServer --version 6.0.3
Configure Database Conext In API App:
Let's create an entity of our table like 'User.cs'.
API_Project/Data/Entities/Users.cs:
namespace CookieApi.Data.Entities;

public class User
{
    public int Id { get; set; }
    public string? Email { get; set; }
    public string? FirstName { get; set; }
    public string? LastName { get; set; }
    public string? Password{get;set;}
    public string? ExternalLoginName{get;set;}
}
Now let's create a Database Context entity like 'CookieAuthContext.cs'.API_Project/Data/CookieAuthContext.cs:
using CookieApi.Data.Entities;
using Microsoft.EntityFrameworkCore;

namespace CookieApi.Data;

public class CookieAuthContext:DbContext
{
    public CookieAuthContext(DbContextOptions<CookieAuthContext> option):base(option)
    {

    }
    public DbSet<User> User {get;set;}
}
- Inside the Database context, we need to register our table classes like we registered our 'User'.
API_Project/appsettings.Development.json:
"ConnectionStrings": {
  "CookieAuthConnection":""
}
Now register our database context entity in 'Program.cs'.API_Project/Program.cs:
builder.Services.AddDbContext<CookieAuthContext>(options => {
    options.UseSqlServer(builder.Configuration.GetConnectionString("CookieAuthConnection"));
});
Create A AuthController In API Project:
Let's create a 'AuthController' in our API Project. In this controller, we are going to add our action methods like 'Login', 'Logout', 'UserProfile'.
API_Project/Controllers/AuthController.cs:
using CookieApi.Data;
using Microsoft.AspNetCore.Mvc;

namespace CookieApi.Controllers;

[ApiController]
[Route("[controller]")]
public class AuthController:ControllerBase
{
    private readonly CookieAuthContext _cookieAuthContext;
    public AuthController(CookieAuthContext cookieAuthContext)
    {
        _cookieAuthContext = cookieAuthContext;
    }
}
- Here injected our 'CookieAuthContext' into the 'AuthController'.
Add User Login Endpoint In API Project:
Let's create DTO(data transfer object) for our HTTP POST login endpoint like 'LoginDto.cs'.
API_Project/Dtos/LoginDto.cs:
namespace CookieApi.Dtos;

public class LoginDto
{
    public string Email { get; set; }
    public string Password { get; set; }
}
Note: In this demo, I'm going to store the raw password in the table which is very bad practice, we have to hash the password stored into the database. For custom hashing, you can refer to my article.
API_Project/Controllers/AuthController.cs:
using System.Security.Claims;
using CookieApi.Data;
using CookieApi.Dtos;
using Microsoft.AspNetCore.Authentication;
using Microsoft.AspNetCore.Authentication.Cookies;
using Microsoft.AspNetCore.Mvc;
using Microsoft.EntityFrameworkCore;

// code hidden for display purpose

[HttpPost]
[Route("login")]
public async Task<IActionResult> LoginAsync(LoginDto login)
{
	var user = await _cookieAuthContext
	.User.Where(_ => _.Email.ToLower() == login.Email.ToLower() &&
	_.Password == login.Password && _.ExternalLoginName == null)
	.FirstOrDefaultAsync();
	if (user == null)
	{
		return BadRequest("Invalid Credentials");
	}

	var claims = new List<Claim>
	{
		new Claim("userid", user.Id.ToString()),
		new Claim(ClaimTypes.Email, user.Email)
	};

	var claimsIdentity = new ClaimsIdentity(
		claims, CookieAuthenticationDefaults.AuthenticationScheme);

	var authProperties = new AuthenticationProperties();

	await HttpContext.SignInAsync(
		CookieAuthenticationDefaults.AuthenticationScheme,
		new ClaimsPrincipal(claimsIdentity),
		authProperties);
	return Ok("Success");
}
- (Line: 15-18) Fetching the user from the database using 'Email', 'Password. Here we check 'ExternalLoginName' for 'null' which means it is a user email and password authentication because users can have different authentication like 'Google', 'Facebook', etc with the same email address.
- (Line: 19-22) User credentials are invalid then we return as a bad request.
- (Line: 24-28) Defining authenticated user claims that will be stored in the authentication cookie.
- (Line: 31&32) Initialized 'ClaimsIdentity' that need 'User Claims' and 'AuthenticationType'.
- (Line: 35-38) Invoking the 'HttpContext.SignInAsync()' method that generates the authentication cookie.
Add User Logout Endpoint In API Project:
Let's add HTTP Post 'LogoutAsync' action method into the 'AuthController'.
API_Project/Controllers/AuthController.cs:
[HttpPost]
[Route("logout")]
public async Task<IActionResult> LogoutAsync()
{
	await HttpContext.SignOutAsync();
	return Ok("success");
}
- (Line: 5) Invokes the 'HttpContext.SingOutAsync()' method to logout the user by clearing the authenticated user cookie.
Add UserProfile Auth Protection Endpoint In API Project:
Let's create a response DTO for our user profile endpoint like 'UserProfileDto.cs'.
API_Projects/Dtos/UserProfileDto.cs:
namespace CookieApi.Dtos;

public class UserProfileDto
{
    public int UserId { get; set; }
    public string Email { get; set; }
    public string FirstName { get; set; }
    public string LastName { get; set; }
}
Let's add authentication-protected action methods like 'UserProfileAsync' in 'AuthController'.API_Project/Controllers/AuthController.cs:
[Authorize]
[HttpGet]
[Route("user-profile")]
public async Task<IActionResult> UserProfileAsync()
{
	int userId =HttpContext.User.Claims
	.Where(_ => _.Type =="userid")
	.Select(_ =>Convert.ToInt32( _.Value))
	.First();

	var userProfile = await _cookieAuthContext
	.User
	.Where(_ => _.Id == userId)
	.Select(_ => new UserProfileDto{
		UserId = _.Id,
		Email = _.Email,
		FirstName = _.FirstName,
		LastName = _.LastName
	}).FirstOrDefaultAsync();

	return Ok(userProfile);
}
- (Line: 1) Our 'user-profile' endpoint is protected by user authentication by enabling the 'Authorize' attribute.
- (Line: 6-9) Fetching the authenticated user id claim from the requests HttpContext.
- (Line: 11-19) Defining the user profile information based on the authenticated user.
Configure Required Services And Middlewares In API Project:
Our API and Blazor Webassembly(application going to be created in upcoming steps) application run on different domains so we have to enable the 'Cors' service.
API_Project/Program.cs:
builder.Services.AddAuthentication(
    CookieAuthenticationDefaults.AuthenticationScheme
)
.AddCookie();
builder.Services.AddCors(options =>
{
    options.AddPolicy("CorsSpecs",
    builder =>
    {
        builder
            .AllowAnyHeader()
            .AllowAnyMethod()
            .SetIsOriginAllowed(options => true)
            .AllowCredentials();
    });
});

// Above the below line register Cors
var app = builder.Build();
- (Line: 1-4) Registered cookie authentication.
- (Line: 7) Defined name to our 'Cors' service.
- (Line: 11&12) Allowing all 'Headers' and 'Methods'.
- (Line: 13&14) In our blazor application after the successful authentication, every other request carries auth cookie along with it. To accept auth cookie from a request from a different domain must add the 'AllowCredentials()' method. That 'AllowCredentials()' method fails to work with 'AllowAnyOrigin()' method, so we have to configure 'SetIsOringAllowed(option => true)' if we use 'AllowedCredentials()'.
API_Project/Program.cs:
app.UseCors("CorsSpecs");
app.UseAuthentication();

//just above the 'UseAuthorization'
//middleware add our required middlewares
app.UseAuthorization();
Create A .NET6 Blazor WebAssembly Application:
Let's create a .Net6 Blazor WebAssembly sample application to accomplish our demo. We can use either Visual Studio 2022 or Visual Studio Code(using .NET CLI commands) to create any .NET6 application. For this demo, I'm using the 'Visual Studio Code'(using the .NET CLI command) editor.
.NET CLI Command:
dotnet new blazorwasm -o Your_Project_Name
dotnet new blazorwasm -o Your_Project_Name
Install Required Packages In The BlazorWasm App:
Let's install the Blazor WebAssembly Authentication library.
Package Manager:
Install-Package Microsoft.AspNetCore.Components.WebAssembly.Authentication -Version 6.0.3
Install-Package Microsoft.AspNetCore.Components.WebAssembly.Authentication -Version 6.0.3
.NET CLI Command:
dotnet add package Microsoft.AspNetCore.Components.WebAssembly.Authentication --version 6.0.3
dotnet add package Microsoft.AspNetCore.Components.WebAssembly.Authentication --version 6.0.3
Let's install the 'Microsoft.Extensions.Http' library.
Package Manager:
Install-Package Microsoft.Extensions.Http -Version 6.0.0
Install-Package Microsoft.Extensions.Http -Version 6.0.0
.NET CLI Command:
dotnet add package Microsoft.Extensions.Http --version 6.0.0
dotnet add package Microsoft.Extensions.Http --version 6.0.0
Let's install the 'Blazored.LocalStorage' library.
Package Manager:
Install-Package Blazored.LocalStorage -Version 4.2.0
Install-Package Blazored.LocalStorage -Version 4.2.0
.NET CLI Command:
dotnet add package Blazored.LocalStorage --version 4.2.0
dotnet add package Blazored.LocalStorage --version 4.2.0
Register Installed Packages Services In Blazor APP:
Let's add the below namespaces to the '_Imports.razor'
BlazorWasm_Project/_Imports.razor:
@using Microsoft.AspNetCore.Authorization
@using Microsoft.AspNetCore.Components.Authorization
@using Blazored.LocalStorage
Let's register the below services into the 'Program.cs'.
BlazorWasm_Project/Program.cs:
builder.Services.AddOptions();
builder.Services.AddAuthorizationCore();
builder.Services.AddBlazoredLocalStorage();
Implement AuthenticationStateProvider:
In blazor authentication carried by the 'Microsoft.AspNetCore.Components.Authorization.AuthenticationStateProvider'. Let's implement AuthenticationStateProvider to customize the user login.
Let's create a custom AuthenticationStateProvider like 'CustomAuthStateProvider'.
BlazorWasm_Project/Providers/CustomAuthStateProvider:
using System.Security.Claims;
using Microsoft.AspNetCore.Components.Authorization;

namespace Bwasm.Cookie.Providers;

public class CustomAuthStateProvider : AuthenticationStateProvider
{
    private ClaimsPrincipal claimsPrincipal = new ClaimsPrincipal(new ClaimsIdentity());
    public override async Task<AuthenticationState> GetAuthenticationStateAsync()
    {
        return new AuthenticationState(claimsPrincipal);
    }
}
- (Line: 6) The 'CustomAuthStateProvider' implements the 'Microsoft.AspNetCore.Component.Authorization.AuthenticationStateProvider'.
- (Line: 8) Initially empty 'ClaimsPrincipal' means no user claims(user not authenticated).
- (Line: 9-12) Implemented the 'GetAuthenticationStateAsync()' method of type 'Task<AuthenticationState>'. So blazor invokes this method to get information about the authenticated user. If this method returns empty claims then authentication is not taken place and then if this method returns a collection of claims then the user is authenticated with the Blazor application.
BlazorWasm_Project/_Import.razor:
@using Bwasm.Cookie.ProvidersNow register the 'CustomAuthStateProvider' in 'Program.cs'.
BlazorWasm_Project/Program.cs:
builder.Services
.AddScoped<AuthenticationStateProvider, CustomAuthStateProvider>();
In 'App.razor' add the 'CascadingAuthenticationState' and 'AuthorizeRouteView' components to pass the authentication user information to the blazor components.
BlazorWasm_Project/App.razor:
<CascadingAuthenticationState>
    <Router AppAssembly="@typeof(App).Assembly">
        <Found Context="routeData">
            <AuthorizeRouteView RouteData="@routeData" DefaultLayout="@typeof(MainLayout)" />
            <FocusOnNavigate RouteData="@routeData" Selector="h1" />
        </Found>
        <NotFound>
            <PageTitle>Not found</PageTitle>
            <LayoutView Layout="@typeof(MainLayout)">
                <p role="alert">Sorry, there's nothing at this address.</p>
            </LayoutView>
        </NotFound>
    </Router>
</CascadingAuthenticationState>
Add Auth Cookie Credential To A Request By Implementing DelegateHandler In Blazor App:
Our Blazor web assembly application and API application run on different domains. So our blazor application invokes the API endpoint then the auth cookie of the API endpoint will not be sent by default. So to send auth cookie along with an API request we have to implement the HttpClient DelegateHandler.
Now let's create our DelegateHandler like 'CookieHandler'.
BlazorWasm_Project/Handlers/CookieHandler.cs
using Microsoft.AspNetCore.Components.WebAssembly.Http;

namespace Bwasm.Cookie.Handler;

public class CookieHandler : DelegatingHandler
{
    protected override async Task<HttpResponseMessage> SendAsync(HttpRequestMessage request, CancellationToken cancellationToken)
    {
        request.SetBrowserRequestCredentials(BrowserRequestCredentials.Include);

        return await base.SendAsync(request, cancellationToken);
    }
}
- (Line: 9) Explicitly defining to pass the browser credentials(auth credentials) for every request if they exist.
BlazorWasm_Project/Program.cs:
builder.Services.AddScoped<CookieHandler>();
Register HttpClient Service In Blazor App:
Let's register the 'Named' HttpClient where we define the API domain and the DelegateHandler.
BlazorWasm_Project/Program.cs:
builder.Services.AddHttpClient("API", options => {
    options.BaseAddress = new Uri("https://localhost:7244/");
})
.AddHttpMessageHandler<CookieHandler>();
Create ApiLogic In Blazor App:
Let's implement all our API logic into a class like 'ApiLogic'. So let's create files like 'IApiLogic.cs', 'ApiLogic.cs'.
BlazorWasm_Project/Logics/IApiLogic.cs:
namespace Bwasm.Cookie.Logics;
public interface IApiLogic
{

}
BlazorWasm_Project/Logics/ApiLogic.cs:
namespace Bwasm.Cookie.Logics;
public class ApiLogic: IApiLogic
{
    private readonly IHttpClientFactory _httpClientFactory;
    public ApiLogic(IHttpClientFactory httpClientFactory)
    {
        _httpClientFactory = httpClientFactory;
    }
}
- Here injected the 'HttpClientFactory' instase:
BlazorWasm_Project/_Import.razor:
@using Bwasm.Cookie.LogicsRegister the 'ApiLogic' in Program.cs.
BlazorWasm_Project/Program.cs:
builder.Services.AddScoped<IApiLogic, ApiLogic>();
Logic To Invoke Use Login API:
Let's create a payload model like 'LoginModel'.
BlazorWasm_Project/Models/LoginModel.cs:
namespace Bwasm.Cookie.Models;

public class LoginModel
{
    public string Email { get; set; }
    public string Password { get; set; }
}
Add the below namespace in '_Import.razor'.
BlazorWasm_Project/_Import.razor:
@using Bwasm.Cookie.ModelsNow in 'IApiLogic' add a method definition like the below.
BlazorWasm_Project/Logics/IApiLogic.cs:
Task<string> LoginAsync(LoginModel login);Now in 'ApiLogic' implement the 'LoginAsync' method.
BlazorWasm_Project/Logics/ApiLogic.cs:
using System.Text;
using System.Text.Json;
using Bwasm.Cookie.Models;

public async Task<string> LoginAsync(LoginModel login)
{
	var client = _httpClientFactory.CreateClient("API");
	string payload = JsonSerializer.Serialize(login);
	var content = new StringContent(payload, Encoding.UTF8, "application/json");
	var response = await client.PostAsync("/Auth/login", content);
	if (response.IsSuccessStatusCode)
	{
		return "Success";
	}
	else
	{
		return "failed";
	}
}
- (Line: 8) Creating HttpClient instance from the IHttpClientFactory using the name of the HttpClient instance registered in 'Program.cs'.
- (Line: 9&10) Formating user payload.
- (Line: 11) Invoking the user login endpoint.
- (Line: 12-19) If authentication is successful return a message like 'Success' or else return 'failed'.
Create Login.razor Component In Blazor App:
Let's create the login form by creating the 'Login.razor'.
BlazorWasm_Project/Pages/Login.razor:(HTML Part)
@page "/login"
@inject IApiLogic _apiLogic
@inject AuthenticationStateProvider _authStateProvider
@inject NavigationManager _navigationManager
@inject ILocalStorageService _localStorageService;

<div class="row">
    <div class="col-md-6 offset-md-3">
        <legend>User Login</legend>
        <div class="mb-3">
            <label for="txtEmail" class="form-label">Email</label>
            <input @bind="loginModel.Email" type="text" class="form-control" id="txtEmail" />
        </div>

        <div class="mb-3">
            <label for="txtPassword" class="form-label">Password</label>
            <input @bind="loginModel.Password" type="password" class="form-control" id="txtPassword" />
        </div>
        <button type="button" @onclick="UserLogin" class="btn btn-primary">Login</button>
    </div>
</div>
- (Line: 1) Define the route using the '@page' directive.
- (Line: 2-5) Injected all the required services.
- (Line: 7-21) Login form.
- (Line: 12&17) Enable form model binding using the '@bind' directive on textboxes.
- (Line: 19) Here 'Login' button click event registered with the 'UserLogin' method.
@code {
    private LoginModel loginModel = new LoginModel();

    private async Task UserLogin()
    {
        var message = await _apiLogic.LoginAsync(loginModel);
        if (message == "Success")
        {
            await _localStorageService.SetItemAsStringAsync("isauthenticated", "true");
            _navigationManager.NavigateTo("/",true);
        }
    }
}
- (Line: 2) The 'LoginModel' is used to capture the form data.
- (Line: 6) Invokes the user login endpoint.
- (Line: 9) Using LocalStorageService we are setting the 'isauthenticated' value to the browser's local storage. This value helps to invoke the 'UserProfile API' (which will implement in upcoming steps) whose data is used to bind on our Blazor application.
- (Line: 10) On successful authentication user navigated to the home page by forcibly reloading the page.
Update AuthenticationState With LoggedIn User In Blazor App:
Let's add a new method like 'SetAuthInfo' in 'CustomAuthStateProvider' for updating the 'AuthenticationState'.
Blazorwasm_Project/Providers/CustomAuthStateProvider.cs:
public void SetAuthInfo(UserProfileModel userProfile)
{
	var identity = new ClaimsIdentity(new[]{
		new Claim(ClaimTypes.Email, userProfile.Email),
		new Claim(ClaimTypes.Name, $"{userProfile.FirstName} {userProfile.LastName}"),
		new Claim("UserId", userProfile.ToString())
	}, "AuthCookie");

	claimsPrincipal = new ClaimsPrincipal(identity);
	NotifyAuthenticationStateChanged(GetAuthenticationStateAsync());
}
- Here 'UserProfileModel' will be the response of the 'user-profile' endpoint(Which we implement in upcoming steps). Creating the new user claims based on the 'UserProfileModel'. Then the newly created ClaimsPrincipal was assigned to the 'claimsPrincipal' variable. The 'NotifyAuthenicationStateChanged' method refreshes the 'AuthenticationState' data.
Logic To Invoke The UserProfile Endpoint In Blazor App:
Let's add a method definition like 'UserProfileAsync' in 'IApiLogic'.
BlazorWasm_Project/Logics/IApiLogic.cs:
Task<(string Message, UserProfileModel? UserProfile)> UserProfileAsync();Now implement the 'UserProfileAsync' in 'ApiLogic'.
BlazorWasm_Project/Logics/ApiLogic.cs:
public async Task<(string Message, UserProfileModel? UserProfile)> UserProfileAsync()
{
	var client = _httpClientFactory.CreateClient("API");
	var response = await client.GetAsync("/Auth/user-profile");
	if (response.IsSuccessStatusCode)
	{
		return ("Success", await response.Content.ReadFromJsonAsync<UserProfileModel>());
	}
	else
	{
		if (response.StatusCode == System.Net.HttpStatusCode.Unauthorized)
		{
			return ("Unauthorized", null);
		}
		else
		{
			return ("Failed", null);
		}
	}
}
Invoke User Profile Endpoint At OnNavigateAsync Method In Blazor App:
Now our goal is to call the user profile endpoint inside of the 'OnNavigateAsync' method. But 'OnNavigateAsync' method gets executed for every navigation. So we have to conditionally invoke the user profile endpoint to reduce unwanted API calls. So we depend on the local storage variable that is 'isuserauthenticated' and 'AuthenticationState' value. So that we can maintain user authentication in our blazor webassembly very comfortably even if the page reloads.
BlazorWasm_Project/App.razor:(Html Part)
@inject ILocalStorageService _localStorageService;
@inject IApiLogic _apiLogic
@inject AuthenticationStateProvider _authStateProvider
<CascadingAuthenticationState>
    <Router AppAssembly="@typeof(App).Assembly" OnNavigateAsync="@OnNavigateAsync">
        <!-- existing code hidden for display purpose -->
    </Router>
</CascadingAuthenticationState>
- (Line: 1-3) Injected all required services.
- (Line: 5) The 'OnNavigateAsync' event callback is registered with the 'OnNavigateAsync' method that executes for every navigation.
@code{
    private async Task OnNavigateAsync(NavigationContext args)
    {
        var auth =  await _localStorageService.GetItemAsync<string>("isauthenticated");
        var user = (await( _authStateProvider as CustomAuthStateProvider)
        .GetAuthenticationStateAsync()).User;

        if(!string.IsNullOrEmpty(auth) && !user.Identity.IsAuthenticated ){
            var response = await _apiLogic.UserProfileAsync();
            if (response.Message == "Success")
            {
                ( _authStateProvider as CustomAuthStateProvider)
                .SetAuthInfo(response.UserProfile);
            }
            else if(response.Message == "Unauthorized"){
                await _localStorageService.RemoveItemAsync("isauthenticated");
            }
        }
    }
}
- (Line: 4) Fetch the browser's local storage value that is 'isauthenticated'.
- (Line: 5-6) Getting the authenticated user information.
- (Line: 8-18) If the local storage variable exists and no user information from authenticated state provider which means the page is reloading so at that time we will lose our authentication state provider information so to get that info we will call user profile API then we can re-populate the authentication state provider with user information. So to re-populate the user information we can call 'CustomAuthStateProvider.SetAuthInfo()' method.
Clear AuthenticationState On User Logout In Blazor App:
Let's implement logic to clear the AuthentictionState for the user logout.
BlazorWasm_Project/Providers/CustomAuthStateProvider.cs:
public void ClearAuthInfo()
{
	claimsPrincipal = new ClaimsPrincipal(new ClaimsIdentity());
	NotifyAuthenticationStateChanged(GetAuthenticationStateAsync());
}
- Just assign the empty 'ClaimsPrincipal' object to clear the 'AuthenticationState'.
Logic To Invoke Logout Endpoint In Blazor App:
Let's add a method definition like 'LogoutAsync' in 'IAppLogic'.
BlazorWasm_Project/Logics/IAppLogic.cs:
Task<string> LogoutAsync();Let's implement 'LogoutAsync' method in 'AppLogic'.
BlazorWasm_Project/Logics/AppLogic.cs:
public async Task<string> LogoutAsync()
{
	var client = _httpClientFactory.CreateClient("API");
	var response = await client.PostAsync("/Auth/logout", null);
	if (response.IsSuccessStatusCode)
	{
		return "Success";
	}
	return "Failed";
}
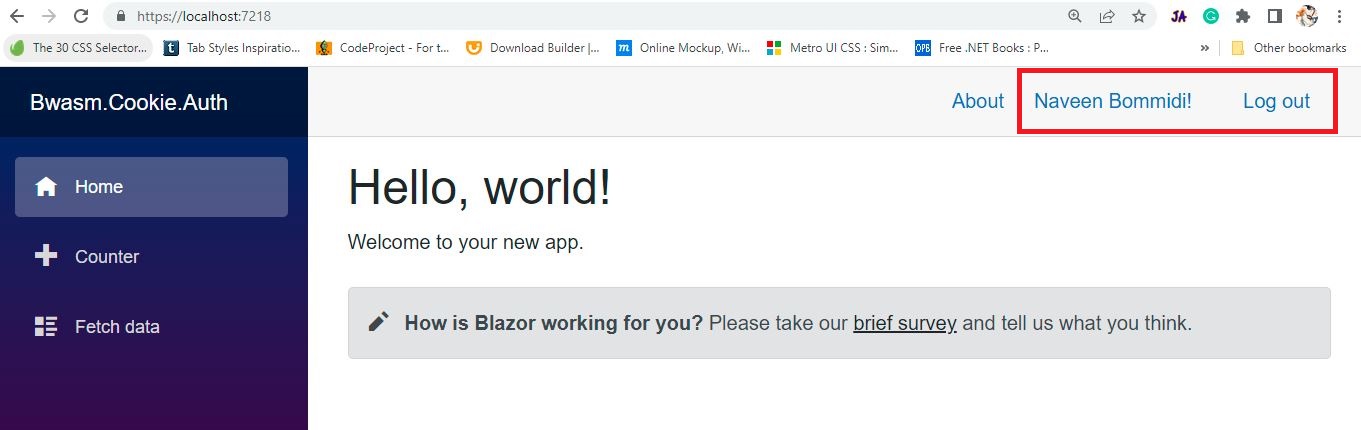
Create A LoginDisplay.razor Component In Blazor App:
Let's create LoginDisplay.razor component which we will use in the application menu to render the 'Login' links if the user is not authenticated or 'Logout', 'User Name' links if the user is authenticated.
BlazorWasm_Project/Shared/LoginDisplay.razor:(Html Part)
@inject AuthenticationStateProvider _authStateProvider
@inject NavigationManager _navigationManager
@inject IApiLogic _apiLogic
@inject ILocalStorageService _localStorageService;

<AuthorizeView>
    <Authorized>
        <a href="">@context.User.Identity?.Name!</a>
        <button type="button"  @onclick="Logout" class="nav-link btn btn-link">Log out</button>
    </Authorized>
    <NotAuthorized>
        <a href="/login">Log in</a>
    </NotAuthorized>
</AuthorizeView>
- (Line: 1-4) Injected the required services.
- (Line: 8) Rendering the authenticated user name.
- (Line: 9) Here 'Log out' click event registered with the 'Logout' method.
@code {
    private async Task Logout()
    {
        var response = await _apiLogic.LogoutAsync();
        if (response == "Success")
        {
            (_authStateProvider as CustomAuthStateProvider).ClearAuthInfo();
            await _localStorageService.RemoveItemAsync("isauthenticated");
            _navigationManager.NavigateTo("/", true);
        }

    }
}
- (Line: 4) Invoked Logout API.
- (Line: 7) Clearing the Authenication state provider.
- (Line: 8) Clearing the local storage variable.
- (Line: 9) Finally, reload the entire page to clear all user information.
BlazorWasm_Project/Shared/MainLayout.razor:
<LoginDisplay></LoginDisplay>Step1:

Step 2:

Step 3:

Step 4:
Support Me!
Buy Me A Coffee
PayPal Me
Video Session:
Wrapping Up:
Hopefully, I think this article delivered some useful information about Blazor WebAssembly Cookie Authentication. using I love to have your feedback, suggestions, and better techniques in the comment section below.
Refer:
Part-2 Blazor WebAssembly Cookie Authentication With Facebook
Part-3 Blazor WebAssembly Cookie Authentication With Twitter
Part-3 Blazor WebAssembly Cookie Authentication With Twitter
Very greatful for this guide. There was a slight problem with the UserProfile object, but no biggie. As soon as I understand the code completely and can verify that it is indeed secure I will send over a few cups of coffee. If it's not secure I'll send you a few less cups, since it's still useful to me. 😁
ReplyDelete