
.Net5 HttpClient Retry Policy And Circuit Breaker Policy

In this article, we are going to learn about HttpClient policies like retry policy, circuit breaker policy.

Retry Policy:

By using HttpClientFactory it is very easy to configure the retry calls. We can configure the retry count. So if an HTTP call fails and if we configured our retry policy then the framework will automatically attempt to retry HTTP call up to the specified retry count number.

Circuit Breaker Policy:

The circuit breaker policy prevents our application to perform the operation that is likely to fail. An application can use both Retry Policy and Circuit Breaker Policy. 

Let's understand the circuit breaker policy flow:
  • Assume like in our application configured retry policy. Retry policy should have like count for retires and timespan between each retry.
  • Next circuit breaker policy configured with 2 parameters like count and timespan. If the number of consecutive HTTP failed calls count matches with the circuit breaker policy count then the circuit will open means subsequent requests or retry won't invoke Http Call they simply return the error message to the user directly. If we want we can write middleware to format the error response from the circuit breaker. The timespan parameter in the circuit breaker defines the period of the circuit opened.
  • After circuit timespan parameter time completed, then the circuit will be closed and flow will repeat.

Create .Net5 Web APIs:

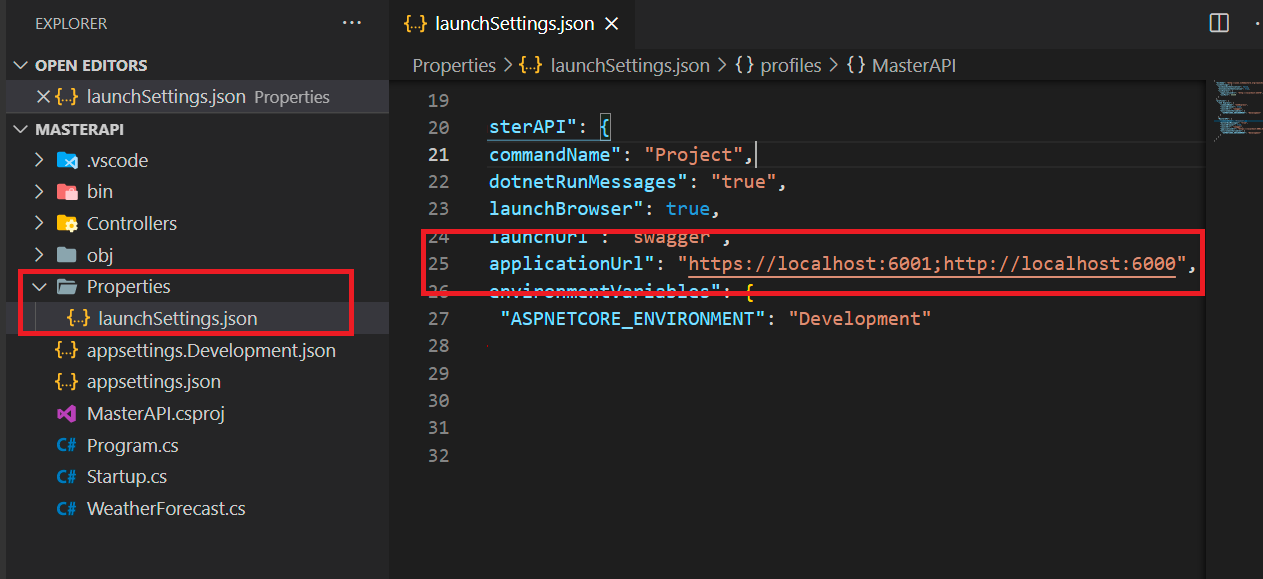
For our demo purpose let's create 2 .Net5 Web API projects. Name them like 'MasterAPI' and 'ClienAPI'. By default, the Web API project template contains whether forecast endpoint. So our goal is to consume the 'MaserAPI' endpoint by our 'ClientAPI'. Since dotnet application locally by default run under ports like '5001' and '5000', so for 'MasterAPI' change them to '6001' and '6000'.

Typed Client:

Either using  Typed Client or Named Client techniques of HttpClient only can be configured with Retry or Circuit Breaker policies. So here I'm going to create a Typed Client in the 'ClientAPI' project to consume the endpoint from 'MaserAPI'.


Now create a Typed Client class and name it as 'TestClient.cs' and here implement our logic to fetch the data from the 'MasterAPI' endpoint.
ClientAPI/TestClient.cs:
using System.Collections.Generic;
using System.Net.Http;
using System.Net.Http.Json;
using System.Threading.Tasks;

namespace ClientAPI
{
    public class TestClient
    {
        private readonly HttpClient _httpClient;
        public TestClient(HttpClient httpClient)
        {
            _httpClient = httpClient;
        }

        public async Task<List<WeatherForecast>> GetWeather()
        {
            return await _httpClient.GetFromJsonAsync<List<WeatherForecast>>("WeatherForecast");
        }
    }
}
Now register our Typed Client in 'Startup.cs'
Startup.cs:
services.AddHttpClient<TestClient>(client => {
  client.BaseAddress = new Uri("https://localhost:6001");
})
.SetHandlerLifetime(TimeSpan.FromMinutes(5));
  • Registered base domain for our Typed Client.
  • Lifetime for HttpClient instance set to 5 minutes.
Now let's create a new controller like 'TestController.cs'.
Controllers/TestController.cs:
using System.Threading.Tasks;
using Microsoft.AspNetCore.Mvc;

namespace ClientAPI.Controllers
{
    [ApiController]
    [Route("[controller]")]

    public class TestController : ControllerBase
    {
        private readonly TestClient _testClient;
        public TestController(TestClient testClient)
        {
            _testClient = testClient;
        }

        [HttpGet]
        [Route("weather")]
        public async Task<IActionResult> GetWeatherAsync()
        {
            return Ok(await _testClient.GetWeather());
        }
    }
}
Now run both 'MasterAPI' and 'ClientAPI' projects. The result of 'ClientAPI' looks as below.

Install Polly Library:

To register policies we have to install a Microsoft extension library. We have to install this library in our 'ClientAPI' project
Package Manager:
Install-Package Microsoft.Extensions.Http.Polly -Version 5.0.1
.Net CLI
dotnet add package Microsoft.Extensions.Http.Polly --version 5.0.1

Configure Retry Policy:

Now in the 'ClientAPI' project, we are going to register Retry Policy to our Typed Client(TestClient.cs).

Let's create a static method of our retry policy in 'Startup.cs'
Startup.cs:
private static IAsyncPolicy<HttpResponseMessage> GetRetryPolicy()
{
	return HttpPolicyExtensions
	.HandleTransientHttpError()
	.WaitAndRetryAsync(5, retryAttempt => TimeSpan.FromSeconds(10));
}
  • Here our policy is like on HTTP call error, the application has to retry the HTTP calls for '5' times of an interval of 10 seconds on each failure.
Let's register this policy method.
Startup.cs:
services.AddHttpClient<TestClient>(client =>
{
	client.BaseAddress = new Uri("https://localhost:6001");
})
.SetHandlerLifetime(TimeSpan.FromMinutes(5))
.AddPolicyHandler(GetRetryPolicy());
Now to test this Http calls retry, stop running the 'MasterAPI' and then run the 'ClientAPI'.
Here we can observe the HTTP calls retry. Once the retry count registered in policy exceeded then the application returns the error message to users.

Configure Circuit Breaker Policy:

Now in our 'ClientAPI' project, we will register one more policy called Circuit Breaker Policy. Circuit Breaker Policy breaks or opens the flow which means the subsequent request will receive an error message from the circuit breaker as a response without invoking the HTTP call. This will very helpful in some cases like our third-party API if they down instead of invoking them every time circuit breaker will give the error response without invoking the HTTP call for a specified amount of time, this approach will help to boost our application.

Now let's create a static method in 'Startup.cs' that implements Circuit Breaker Policy.
Startup.cs:
private static IAsyncPolicy<HttpResponseMessage> GetCircuitBreakerPolicy()
{
	return HttpPolicyExtensions
	.HandleTransientHttpError()
	.CircuitBreakerAsync(3, TimeSpan.FromMinutes(1));
}
  • Here Circuit Breaker will opens or breaks after 3 consecutive errors, so the next subsequent request will receive an error response directly from Circuit Breaker without invoking HTTP call, this will continue till the time specified, here in our sample we specified 1 minute. 
  • So for this 1-minute Circuit Breaker in opening or breaking state, once this time is finished then Circuit Breaker will close and the immediate next request will invoke the HTTP calls.
Now register Circuit Breaker to Typed Client as policy.
Startup.cs:
services.AddHttpClient<TestClient>(client =>
{
	client.BaseAddress = new Uri("https://localhost:6001");
})
.SetHandlerLifetime(TimeSpan.FromMinutes(5))
.AddPolicyHandler(GetRetryPolicy())
.AddPolicyHandler(GetCircuitBreakerPolicy());
Now to test the circuit breaker, let's stop running 'MasterAPI', then run our 'ClientAPI'.
Now request 'ClientAPI', since we have registered retry policy, our request will be automatically retiring the HTTP call on every failure.
Now on completion of 3 failure HTTP calls continually, the Circuit Breaker will open or breaks the follow and returns the error response to the client. This opening or breaking state will remains for 1-minute as we specified.
Now in another browser tab request API again, then you can observe you will receive an error immediately from the circuit breaker without invoking HTTP call.
So that all about the register Retry and Circuit breaker policies for HttpClient.

Video Session:

Support Me!
Buy Me A Coffee PayPal Me

Wrapping Up:

Hopefully, I think this article delivered some useful information on HttpClient Policies like Retry and Circuit Breaker. I love to have your feedback, suggestions, and better techniques in the comment section below.

Follow Me:

Comments

Popular posts from this blog

Angular 14 Reactive Forms Example

In this article, we will explore the Angular(14) reactive forms with an example. Reactive Forms: Angular reactive forms support model-driven techniques to handle the form's input values. The reactive forms state is immutable, any form filed change creates a new state for the form. Reactive forms are built around observable streams, where form inputs and values are provided as streams of input values, which can be accessed synchronously. Some key notations that involve in reactive forms are like: FormControl - each input element in the form is 'FormControl'. The 'FormControl' tracks the value and validation status of form fields. FormGroup - Track the value and validate the state of the group of 'FormControl'. FormBuilder - Angular service which can be used to create the 'FormGroup' or FormControl instance quickly. Form Array - That can hold infinite form control, this helps to create dynamic forms. Create An Angular(14) Application: Let'

.NET 7 Web API CRUD Using Entity Framework Core

In this article, we are going to implement a sample .NET 7 Web API CRUD using the Entity Framework Core. Web API: Web API is a framework for building HTTP services that can be accessed from any client like browser, mobile devices, and desktop apps. In simple terminology API(Application Programming Interface) means an interface module that contains programming functions that can be requested via HTTP calls either to fetch or update data for their respective clients. Some of the Key Characteristics of API: Supports HTTP verbs like 'GET', 'POST', 'PUT', 'DELETE', etc. Supports default responses like 'XML' and 'JSON'. Also can define custom responses. Supports self-hosting or individual hosting, so that all different kinds of apps can consume it. Authentication and Authorization are easy to implement. The ideal platform to build the REST full services. Install The SQL Server And SQL Management Studio: Let's install the SQL server on our l

ReactJS(v18) JWT Authentication Using HTTP Only Cookie

In this article, we will implement the ReactJS application authentication using the HTTP-only cookie. HTTP Only Cookie: In a SPA(Single Page Application) Authentication JWT token either can be stored in browser 'LocalStorage' or in 'Cookie'. Storing the JWT token inside of the cookie then the cookie should be HTTP Only. The HTTP-ONly cookie nature is that it will be only accessible by the server application. Client apps like javascript-based apps can't access the HTTP-Only cookie. So if we use the authentication with HTTP-only JWT cookie then we no need to implement the custom logic like adding authorization header or storing token data, etc at our client application. Because once the user authenticated cookie will be automatically sent to the server by the browser on every API call. Authentication API: To authenticate our client application with JWT HTTP-only cookie, I developed a NetJS(which is a node) Mock API. Check the GitHub link and read the document on G

.NET6 Web API CRUD Operation With Entity Framework Core

In this article, we are going to do a small demo on AspNetCore 6 Web API CRUD operations. What Is Web API: Web API is a framework for building HTTP services that can be accessed from any client like browser, mobile devices, desktop apps. In simple terminology API(Application Programming Interface) means an interface module that contains a programming function that can be requested via HTTP calls to save or fetch the data for their respective clients. Some of the key characteristics of API: Supports HTTP verbs like 'GET', 'POST', 'PUT', 'DELETE', etc. Supports default responses like 'XML' and 'JSON'. Also can define custom responses. Supports self-hosting or individual hosting, so that all different kinds of apps can consume it. Authentication and Authorization are easy to implement. The ideal platform to build REST full services. Create A .NET6 Web API Application: Let's create a .Net6 Web API sample application to accomplish our

Angular 14 State Management CRUD Example With NgRx(14)

In this article, we are going to implement the Angular(14) state management CRUD example with NgRx(14) NgRx Store For State Management: In an angular application to share consistent data between multiple components, we use NgRx state management. Using NgRx state helps to avoid unwanted API calls, easy to maintain consistent data, etc. The main building blocks for the NgRx store are: Actions - NgRx actions represents event to trigger the reducers to save the data into the stores. Reducer - Reducer's pure function, which is used to create a new state on data change. Store - The store is the model or entity that holds the data. Selector - Selector to fetch the slices of data from the store to angular components. Effects - Effects deals with external network calls like API. The effect gets executed based the action performed Ngrx State Management flow: The angular component needs data for binding.  So angular component calls an action that is responsible for invoking the API call.  Aft

Angular 14 Crud Example

In this article, we will implement CRUD operation in the Angular 14 application. Angular: Angular is a framework that can be used to build a single-page application. Angular applications are built with components that make our code simple and clean. Angular components compose of 3 files like TypeScript File(*.ts), Html File(*.html), CSS File(*.cs) Components typescript file and HTML file support 2-way binding which means data flow is bi-directional Component typescript file listens for all HTML events from the HTML file. Create Angular(14) Application: Let's create an Angular(14) application to begin our sample. Make sure to install the Angular CLI tool into our local machine because it provides easy CLI commands to play with the angular application. Command To Install Angular CLI npm install -g @angular/cli Run the below command to create the angular application. Command To Create Angular Application ng new name_of_your_app Note: While creating the app, you will see a noti

Unit Testing Asp.NetCore Web API Using xUnit[.NET6]

In this article, we are going to write test cases to an Asp.NetCore Web API(.NET6) application using the xUnit. xUnit For .NET: The xUnit for .Net is a free, open-source, community-focused unit testing tool for .NET applications. By default .Net also provides a xUnit project template to implement test cases. Unit test cases build upon the 'AAA' formula that means 'Arrange', 'Act' and 'Assert' Arrange - Declaring variables, objects, instantiating mocks, etc. Act - Calling or invoking the method that needs to be tested. Assert - The assert ensures that code behaves as expected means yielding expected output. Create An API And Unit Test Projects: Let's create a .Net6 Web API and xUnit sample applications to accomplish our demo. We can use either Visual Studio 2022 or Visual Studio Code(using .NET CLI commands) to create any.Net6 application. For this demo, I'm using the 'Visual Studio Code'(using the .NET CLI command) editor. Create a fo

Part-1 Angular JWT Authentication Using HTTP Only Cookie[Angular V13]

In this article, we are going to implement a sample angular application authentication using HTTP only cookie that contains a JWT token. HTTP Only JWT Cookie: In a SPA(Single Page Application) Authentication JWT token either can be stored in browser 'LocalStorage' or in 'Cookie'. Storing JWT token inside of the cookie then the cookie should be HTTP Only. The HTTP-Only cookie nature is that it will be only accessible by the server application. Client apps like javascript-based apps can't access the HTTP-Only cookie. So if we use authentication with HTTP only JWT cookie then we no need to implement custom logic like adding authorization header or storing token data, etc at our client application. Because once the user authenticated cookie will be automatically sent to the server by the browser on every API call. Authentication API: To implement JWT cookie authentication we need to set up an API. For that, I had created a mock authentication API(Using the NestJS Se

ReactJS(v18) Authentication With JWT AccessToken And Refresh Token

In this article, we are going to do ReactJS(v18) application authentication using the JWT Access Token and Refresh Token. JSON Web Token(JWT): JSON Web Token is a digitally signed and secured token for user validation. The JWT is constructed with 3 important parts: Header Payload Signature Create ReactJS Application: Let's create a ReactJS application to accomplish our demo. npx create-react-app name-of-your-app Configure React Bootstrap Library: Let's install the React Bootstrap library npm install react-bootstrap bootstrap Now add the bootstrap CSS reference in 'index.js'. src/index.js: import 'bootstrap/dist/css/bootstrap.min.css' Create A React Component 'Layout': Let's add a React component like 'Layout' in 'components/shared' folders(new folders). src/components/shared/Layout.js: import Navbar from "react-bootstrap/Navbar"; import { Container } from "react-bootstrap"; import Nav from "react-boot

A Small Guide On NestJS Queues

NestJS Application Queues helps to deal with application scaling and performance challenges. When To Use Queues?: API request that mostly involves in time taking operations like CPU bound operation, doing them synchronously which will result in thread blocking. So to avoid these issues, it is an appropriate way to make the CPU-bound operation separate background job.  In nestjs one of the best solutions for these kinds of tasks is to implement the Queues. For queueing mechanism in the nestjs application most recommended library is '@nestjs/bull'(Bull is nodejs queue library). The 'Bull' depends on Redis cache for data storage like a job. So in this queueing technique, we will create services like 'Producer' and 'Consumer'. The 'Producer' is used to push our jobs into the Redis stores. The consumer will read those jobs(eg: CPU Bound Operations) and process them. So by using this queues technique user requests processed very fastly because actually