
Redis Cache Implementation In .NetCore Web API Using Distributed Caching Technique(Redis Docker Instance)

Redis Cache:

Redis is an open-source in-memory data structure store, used as a database, cache. It supports data structures such as strings, hashes, lists, sets, sorted sets with range queries, etc.

Setup Redis Docker Instance:

For this sample to use Redis instance locally we will use Docker. If you don't have any prior knowledge of docker, not a problem just follow the steps below. Click here for a video session on Redis docker setup
Note:
Skip this section if you already have redis direct instance or azure or any cloud provider that have redis
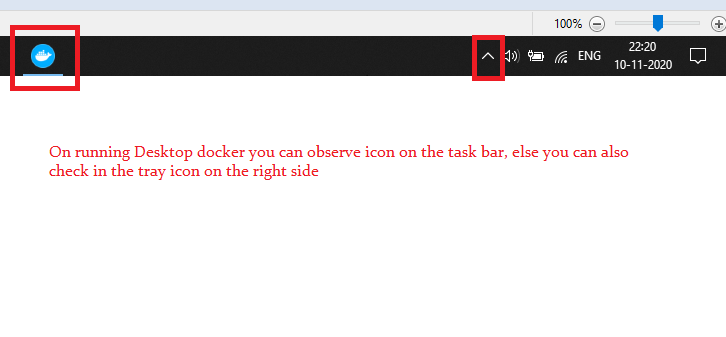
Step1:
Download docker into our local system "https://docs.docker.com/desktop/". Docker was available for all desktop operating systems.
Step2:
After downloading the docker installer, then install it. Now to run any docker containers(eg: Redis, MongoDB, PostgreSQL, etc) this docker instance we just installed should be active(should be running).
Step3:
Now we need to pull the docker Redis image from the docker hub "https://hub.docker.com/_/redis".
Command To Pull Redis Image:
docker pull redis
Step4:
The final step to run the docker Redis image container by mapping our local system port. By default, the Redis instance runs with the '6379' default port inside of the docker container. So to access the Redis we need to port mapping on starting off the container.
Command To Start Redis Container:
docker run --name your_containerName -p your_PortNumber:6379 -d redis
The '--name your_containerName' flag to specify the Redis container name. The '-p your_PortNumber:6379' mapping the Redis port '6379' to our local machine port all our application will use local machine port to communicate with Redis. The '-d' flag represents to run the container in the detached mode which means run in the background. At the last of the command 'redis' to specify the image to run in our container.
Step5:
After creating a docker container, it will be stored in our local machine so to start again the container any time run the following command
docker start your_container_name

Step6:(Optional Step)
Let test our Redis instance

Command To Use Redis CLI
docker exec -it your_docker_container_name redis-cli

Create A Sample API Project:

Let's understand the flow of Redis cache by implementing a sample API application.

Install StackExchange.Redis Package:

Package Manager:
Install-Package Microsoft.Extensions.Caching.StackExchangeRedis
CLI Command:
dotnet add pakcage Microsoft.Extensions.Caching.StackExchangeRedis

Sample Todos Endpoint:

Let's begin by creating a sample 'Todos' endpoint where we are going to integrate Redis cache in upcoming steps.
Controllers/TodosController.cs:
using System;
using System.Collections.Generic;
using System.Linq;
using System.Text.Json;
using System.Threading.Tasks;
using Microsoft.AspNetCore.Http;
using Microsoft.AspNetCore.Mvc;
using Microsoft.Extensions.Caching.Distributed;

namespace Redis.Sample.Api.Controllers
{
  [Route("api/[controller]")]
  [ApiController]
  public class TodosController : ControllerBase
  {
	List<string> todos = new List<string> { "shopping", "Watch Movie", "Gardening" };
	
	[Route("all")]
	public async Task<IActionResult> GetAll()
	{
		List<string> myTodos = todos;
		bool IsCached = false;
		return Ok(new { IsCached, myTodos });
	}
  }
}
  • Here implemented endpoint that returns simple static todos list collection(in a real-time application we have to fetch data from a database, for demo purpose I'm simply using static todos collection). 
  • The 'IsCached' property helps to identify whether data loaded from the cache or not(we will make its value dynamic in upcoming steps)

Configure AddStackExchangeRedisCache Service:

To integrate Redis functionality configure the 'AddStackExchangeRedisCache()' service in startup file.
Startup.cs:(ConfigureServices Method)
services.AddStackExchangeRedisCache(options => {
 options.Configuration = "localhost:5003";
});
  • For 'Configuration' we passed the Redis connection string(Here my docker Redis instance exposed to my machine with port 5003).

IDistributedCache Interface:

IDistributedCache Interface is implemented from the 'Microsoft.Extensions.Caching.Distributed' library. IDistributeCache is not specific to Redis Cache, but it was implemented like generic which supports all kinds of Distributed Cache like Redis, SQL Server Cache, etc. IDistributeCache supports the default dependency inject of .NET Core, so it can be easily injected in the application where ever needed. IDistributedCache Interface holds a set of methods that helps to work with cache, some of the methods like as below.
  • Get, GetAsync, GetStringAsync - fetches the cached data by the key passed to the method.
  • Set, SetAsync, SetStringAsync - saves the data to the cache table with a specific key.
  • Remove, RemoveAsync - removes the cached data with specific to key passed.
Now inject the IDistributedCache interface into our Todos endpoint controller.
Controllers/TodosController.cs:
namespace Redis.Sample.Api.Controllers
{
  [Route("api/[controller]")]
  [ApiController]
  public class TodosController : ControllerBase
  {
    List<string> todos = new List<string> { "shopping", "Watch Movie", "Gardening" };
    private readonly IDistributedCache _distributedCache;
    public TodosController(IDistributedCache distributedCache)
    {
	 _distributedCache = distributedCache;
    }
  }
}

Use SetStringAsync And GetStringAsync:

SetStringAsync - This asynchronous method used to save the string of data with a key for it like a dictionary. If we intended to save any object or collection of an object into Redis then we can serialize them to string and store in the cache.

GetStringAsync - This asynchronous method used to fetch the stored string data from the cache-store using its respective key value.

Let us now store our todos data to Redis cache, so update our endpoint action method as below.
Controllers/TodosController.cs:
[HttpGet]
[Route("all")]
public async Task<IActionResult> GetAll()
{
  List<string> myTodos = new List<string>();
  bool IsCached = false;
  string cachedTodosString = string.Empty;
  cachedTodosString = await _distributedCache.GetStringAsync("_todos");
  if (!string.IsNullOrEmpty(cachedTodosString))
  {
   // loaded data from the redis cache.
   myTodos = JsonSerializer.Deserialize<List<string>>(cachedTodosString);
   IsCached = true;
  }
  else
  {
   // loading from code (in real-time from database)
   // then saving to the redis cache 
   myTodos = todos;
   IsCached = false;
   cachedTodosString = JsonSerializer.Serialize<List<string>>(todos);
   await _distributedCache.SetStringAsync("_todos", cachedTodosString);
  }
  return Ok(new { IsCached, myTodos });
}
  • (Line: 5) The 'myTodos' variable to store our final result of todos collection.
  • (Line: 6)  The 'IsCached' variable indicates data loaded from Redis cache or not. The variable added for understanding purposes.
  • (Line: 8) The 'GetStringAsync('your_key')' method to fetch the value Redis cache based on the key.
  • (Line: 9) Checks data exist in the cache-store.
  • (Line: 12) Since we get string data from the Redis cache, then we need to deserialize them to respective object types.
  • (Line: 15-23) If data doesn't exist in Redis.
  • (Line: 19) Assigning our static todo data to our result variable(in real-time application fetch data from database)
  • (Line: 21) Serializing our todos collection to string.
  • (Line: 22) The 'SetStringAsync('your_key','your_string_value')' method to store data to Redis with respective of the given key.
Now run the application, for the first time data will be loaded directly and store in the Redis cache
Now access endpoint again, now data gets loaded from the Redis cache.
You confirm data storing correctly or not in docker redis-cli.

InstanceName Option:

The 'key' name we used here like '_todos' to store data in Redis cache. In real-time we may build multiple applications that all are going to share Redis cache, in this case, simple key names(eg: '_todos') may get conflicted between the application. So to avoid this kind of issue dotnet provides as a global setting to set a key prefix which is like a namespace. The best value to assign value to a key prefix is the project name.
Startup.cs:
services.AddStackExchangeRedisCache(options => {
  options.Configuration = "localhost:5003";
  options.InstanceName = "Redis.Sample.Api";
});
  • (Line: 3) The 'InstanceName' will be prefixed to every Redis key while saving data and also prefix with the key to fetching the data.

Cache Expiration:

The cache should have an expiry date. To define expiration we have two options which are mandatory for a good coding approach.
  • Absolute Expiration.
  • Sliding Expiration.
Absolute Expiration - Maximum time period to store in the cache. After expiration Redis will automatically delete all keys and its values automatically.

Sliding Expiration - Maximum time period to store data without consuming by the applications. If an application not using any particular keys for a specific time it is always good to clear them from the cache before its Absolute Expiration. This type of expiration will be called a Sliding Expiration. One important thing to remember Sliding Expiration always less than Absolute Expiration time. If you set Sliding Expiration more than Absolute Expiration id doesn't make any sense because data will be cleared after the Absolute Expiration time.
Controllers/TodosController.cs:
[HttpGet]
[Route("all")]
public async Task<IActionResult> GetAll()
{
  List<string> myTodos = new List<string>();
  bool IsCached = false;
  string cachedTodosString = string.Empty;
  cachedTodosString = await _distributedCache.GetStringAsync("_todos");
  if (!string.IsNullOrEmpty(cachedTodosString))
  {
   // loaded data from the redis cache.
   myTodos = JsonSerializer.Deserialize<List<string>>(cachedTodosString);
   IsCached = true;
  }
  else
  {
   // loading from code (in real-time from database)
   // then saving to the redis cache 
   myTodos = todos;
   IsCached = false;
   cachedTodosString = JsonSerializer.Serialize<List<string>>(todos);
   var expiryOptions = new DistributedCacheEntryOptions()
   {
	AbsoluteExpirationRelativeToNow = TimeSpan.FromSeconds(60),
	SlidingExpiration = TimeSpan.FromSeconds(30)
   };
   await _distributedCache.SetStringAsync("_todos", cachedTodosString, expiryOptions);
  }
  return Ok(new { IsCached, myTodos });
}
  • (Line: 22-26) Creating 'Absolute Expiration' and 'Sliding Expiration'. The time specified for sliding expiration set less than absolute expiration.
  • (Line: 27) The 'SetStringAsync()' method is an overloaded method that takes expiration configuration as an input value.

Remove Cache:

It is always good to have an endpoint to clear the cache. The 'RemoveAsync' methods will remove our cached data with respect to the key passed to it.
Controllers/TodosController.cs:
[HttpGet]
[Route("clear-cache")]
public async Task<IActionResult> ClearCache(string key)
{
  await _distributedCache.RemoveAsync(key);
  return Ok(new { Message = $"cleared cache for key -{key}" });
}
That's all about the core topics and their implementation for integrating Redis cache into our API.

Support Me!
Buy Me A Coffee PayPal Me

Wrapping Up:

Hopefully, I think this article delivered some useful information on setting up a Redis instance using docker and then consuming the Redis cache into our dotnet core API application. I love to have your feedback, suggestions, and better techniques in the comment section below.

Refer:

Follow Me:

Comments

Popular posts from this blog

Angular 14 Reactive Forms Example

In this article, we will explore the Angular(14) reactive forms with an example. Reactive Forms: Angular reactive forms support model-driven techniques to handle the form's input values. The reactive forms state is immutable, any form filed change creates a new state for the form. Reactive forms are built around observable streams, where form inputs and values are provided as streams of input values, which can be accessed synchronously. Some key notations that involve in reactive forms are like: FormControl - each input element in the form is 'FormControl'. The 'FormControl' tracks the value and validation status of form fields. FormGroup - Track the value and validate the state of the group of 'FormControl'. FormBuilder - Angular service which can be used to create the 'FormGroup' or FormControl instance quickly. Form Array - That can hold infinite form control, this helps to create dynamic forms. Create An Angular(14) Application: Let'

.NET 7 Web API CRUD Using Entity Framework Core

In this article, we are going to implement a sample .NET 7 Web API CRUD using the Entity Framework Core. Web API: Web API is a framework for building HTTP services that can be accessed from any client like browser, mobile devices, and desktop apps. In simple terminology API(Application Programming Interface) means an interface module that contains programming functions that can be requested via HTTP calls either to fetch or update data for their respective clients. Some of the Key Characteristics of API: Supports HTTP verbs like 'GET', 'POST', 'PUT', 'DELETE', etc. Supports default responses like 'XML' and 'JSON'. Also can define custom responses. Supports self-hosting or individual hosting, so that all different kinds of apps can consume it. Authentication and Authorization are easy to implement. The ideal platform to build the REST full services. Install The SQL Server And SQL Management Studio: Let's install the SQL server on our l

ReactJS(v18) JWT Authentication Using HTTP Only Cookie

In this article, we will implement the ReactJS application authentication using the HTTP-only cookie. HTTP Only Cookie: In a SPA(Single Page Application) Authentication JWT token either can be stored in browser 'LocalStorage' or in 'Cookie'. Storing the JWT token inside of the cookie then the cookie should be HTTP Only. The HTTP-ONly cookie nature is that it will be only accessible by the server application. Client apps like javascript-based apps can't access the HTTP-Only cookie. So if we use the authentication with HTTP-only JWT cookie then we no need to implement the custom logic like adding authorization header or storing token data, etc at our client application. Because once the user authenticated cookie will be automatically sent to the server by the browser on every API call. Authentication API: To authenticate our client application with JWT HTTP-only cookie, I developed a NetJS(which is a node) Mock API. Check the GitHub link and read the document on G

.NET6 Web API CRUD Operation With Entity Framework Core

In this article, we are going to do a small demo on AspNetCore 6 Web API CRUD operations. What Is Web API: Web API is a framework for building HTTP services that can be accessed from any client like browser, mobile devices, desktop apps. In simple terminology API(Application Programming Interface) means an interface module that contains a programming function that can be requested via HTTP calls to save or fetch the data for their respective clients. Some of the key characteristics of API: Supports HTTP verbs like 'GET', 'POST', 'PUT', 'DELETE', etc. Supports default responses like 'XML' and 'JSON'. Also can define custom responses. Supports self-hosting or individual hosting, so that all different kinds of apps can consume it. Authentication and Authorization are easy to implement. The ideal platform to build REST full services. Create A .NET6 Web API Application: Let's create a .Net6 Web API sample application to accomplish our

Angular 14 State Management CRUD Example With NgRx(14)

In this article, we are going to implement the Angular(14) state management CRUD example with NgRx(14) NgRx Store For State Management: In an angular application to share consistent data between multiple components, we use NgRx state management. Using NgRx state helps to avoid unwanted API calls, easy to maintain consistent data, etc. The main building blocks for the NgRx store are: Actions - NgRx actions represents event to trigger the reducers to save the data into the stores. Reducer - Reducer's pure function, which is used to create a new state on data change. Store - The store is the model or entity that holds the data. Selector - Selector to fetch the slices of data from the store to angular components. Effects - Effects deals with external network calls like API. The effect gets executed based the action performed Ngrx State Management flow: The angular component needs data for binding.  So angular component calls an action that is responsible for invoking the API call.  Aft

Angular 14 Crud Example

In this article, we will implement CRUD operation in the Angular 14 application. Angular: Angular is a framework that can be used to build a single-page application. Angular applications are built with components that make our code simple and clean. Angular components compose of 3 files like TypeScript File(*.ts), Html File(*.html), CSS File(*.cs) Components typescript file and HTML file support 2-way binding which means data flow is bi-directional Component typescript file listens for all HTML events from the HTML file. Create Angular(14) Application: Let's create an Angular(14) application to begin our sample. Make sure to install the Angular CLI tool into our local machine because it provides easy CLI commands to play with the angular application. Command To Install Angular CLI npm install -g @angular/cli Run the below command to create the angular application. Command To Create Angular Application ng new name_of_your_app Note: While creating the app, you will see a noti

Unit Testing Asp.NetCore Web API Using xUnit[.NET6]

In this article, we are going to write test cases to an Asp.NetCore Web API(.NET6) application using the xUnit. xUnit For .NET: The xUnit for .Net is a free, open-source, community-focused unit testing tool for .NET applications. By default .Net also provides a xUnit project template to implement test cases. Unit test cases build upon the 'AAA' formula that means 'Arrange', 'Act' and 'Assert' Arrange - Declaring variables, objects, instantiating mocks, etc. Act - Calling or invoking the method that needs to be tested. Assert - The assert ensures that code behaves as expected means yielding expected output. Create An API And Unit Test Projects: Let's create a .Net6 Web API and xUnit sample applications to accomplish our demo. We can use either Visual Studio 2022 or Visual Studio Code(using .NET CLI commands) to create any.Net6 application. For this demo, I'm using the 'Visual Studio Code'(using the .NET CLI command) editor. Create a fo

Part-1 Angular JWT Authentication Using HTTP Only Cookie[Angular V13]

In this article, we are going to implement a sample angular application authentication using HTTP only cookie that contains a JWT token. HTTP Only JWT Cookie: In a SPA(Single Page Application) Authentication JWT token either can be stored in browser 'LocalStorage' or in 'Cookie'. Storing JWT token inside of the cookie then the cookie should be HTTP Only. The HTTP-Only cookie nature is that it will be only accessible by the server application. Client apps like javascript-based apps can't access the HTTP-Only cookie. So if we use authentication with HTTP only JWT cookie then we no need to implement custom logic like adding authorization header or storing token data, etc at our client application. Because once the user authenticated cookie will be automatically sent to the server by the browser on every API call. Authentication API: To implement JWT cookie authentication we need to set up an API. For that, I had created a mock authentication API(Using the NestJS Se

ReactJS(v18) Authentication With JWT AccessToken And Refresh Token

In this article, we are going to do ReactJS(v18) application authentication using the JWT Access Token and Refresh Token. JSON Web Token(JWT): JSON Web Token is a digitally signed and secured token for user validation. The JWT is constructed with 3 important parts: Header Payload Signature Create ReactJS Application: Let's create a ReactJS application to accomplish our demo. npx create-react-app name-of-your-app Configure React Bootstrap Library: Let's install the React Bootstrap library npm install react-bootstrap bootstrap Now add the bootstrap CSS reference in 'index.js'. src/index.js: import 'bootstrap/dist/css/bootstrap.min.css' Create A React Component 'Layout': Let's add a React component like 'Layout' in 'components/shared' folders(new folders). src/components/shared/Layout.js: import Navbar from "react-bootstrap/Navbar"; import { Container } from "react-bootstrap"; import Nav from "react-boot

A Small Guide On NestJS Queues

NestJS Application Queues helps to deal with application scaling and performance challenges. When To Use Queues?: API request that mostly involves in time taking operations like CPU bound operation, doing them synchronously which will result in thread blocking. So to avoid these issues, it is an appropriate way to make the CPU-bound operation separate background job.  In nestjs one of the best solutions for these kinds of tasks is to implement the Queues. For queueing mechanism in the nestjs application most recommended library is '@nestjs/bull'(Bull is nodejs queue library). The 'Bull' depends on Redis cache for data storage like a job. So in this queueing technique, we will create services like 'Producer' and 'Consumer'. The 'Producer' is used to push our jobs into the Redis stores. The consumer will read those jobs(eg: CPU Bound Operations) and process them. So by using this queues technique user requests processed very fastly because actually